Showing posts with label dessert. Show all posts

Friday, June 24, 2016

Black Bean Brownies.

This version included walnuts!

If you've never had black bean brownies, now is the time to try them.  Like many people, I was skeptical at first, but since trying them, I can't make any other kind of brownie.  I've been making these non-stop for six months now.  These are deliciously fudgy, chocolatey, and satisfying.  I've brought them to many events and they always ellicit rave reviews!  These are great if you're new to gluten-free baking and just need a brownie recipe that works, without having to buy a bunch of gluten-free flours.

Black Bean Brownies.
    makes one 8x8 pan

    2 cans (15 oz x 2)  black beans  (make sure you get the unseasoned versions)
    1/4-1/2 cup  sugar  (or 1/3 cup is a good middle)
    1/4 cup  coconut oil, melted
    2  eggs,  large or medium sized
    1 cup  unsweetened cocoa - mine favorite is mixture of dutched and non-dutched
    1 cup  unsweetened almond milk OR milk of choice
    1/2 tsp  baking soda
    ~9 oz  dark chocolate chips, this is 3/4 of one choc chip bag
    2 tsp-1 Tbsp  vanilla extract
    1/2 tsp  real salt

Directions:
  1)  Un-can the black beans into a fine mesh strainer. Strain and run under cold water x1 minute or until water over the beans runs clear.
  2)  Place all ingredients, except chocolate chips, into Vitamix blender (or equivalent) and blend for about 30 seconds to 1 minute OR until all ingredients are incorporated, and the mixture is smooth and homogenous. Stir in chocolate chips with a soft spatula.
  3)  Pour into one greased or parchment paper lined 8x8 pan. Bake at 350 degrees non-convection for 40-45 minutes. Brownies are done when slightly pulling away from the sides of the pan, and the middle is slightly set. Bake longer to be slighly less fudgy. Let cool on counter. Store in fridge for best results.

I personally love how easy they are to make! You can have awesome brownies ready in under an hour. These are best the next day, however, after they've had some time to set. I love them straight from the fridge. GREAT with any kind of vanilla ice cream or whipped cream.

Note on substitutions: I've made these with melted butter and water before, with coconut milk, with almond milk, and ALL versions have come out extremely yummy.


Nothing like a new brownie recipe to rock all summer long!


P.S. I'm all graduated from medical school now (Dr. Meg has finally arrived!). Maybe you'll be seeing more recipes on this space again! And my apologies for the poor photo - this was quickly snapped in clinic when I brought brownies for the whole shift.


Friday, June 20, 2014

Paleo Chocolate Sauce or Ganache.

(Hello everyone :) I am alive! I've been busy (with medical school), but here I am again!)


Sauce or ganache? Why the fuss?

Well, technically, this is a "ganache" recipe... since ganache is composed of melted chocolate + cream (coconut milk here), which makes it spreadable and allows it to just barely harden into a lovely smooth chocolate experience.

Chocolate sauce, on the other hand, tends to be more of a more syrupy/sugary composition that is perfect for drizzling. Chocolate sauces commonly include corn syrup, or a simple syrup, which gives it a characteristic sweet smoothness that holds its shape when swirled and twisted on a spoon (and on top of your ice cream!)

This recipe rides in the middle. Best of both worlds, I'd say :)

And it's paleo, primal, gluten-free, soy-free, and barely sweetened (my favorite). Which by default makes it amazing. Obviously.


Paleo Chocolate Sauce.
    makes enough for a crowd, or some for one and enough for later!
    Time to prepare = < 10 minutes

    3 oz  unsweetened Baker's chocolate* - or 3 oz of your favorite
    8 oz  unsweetened coconut milk - this one is my favorite**
    1 tsp to 1 Tbsp  runny honey*** (or more to taste)
    splash  vanilla
    dash  unrefined sea salt
    stevia drops - (optional and to taste)

To make your chocolate sauce:
  1)  In a double boiler, or a heavy bottomed pan, add chocolate chunks, coconut milk, honey. Heat on medium / medium-low until chocolate is melted. Whisk whisk whisk until smooth and entirely incorporated.
***To measure out the honey in this recipe, I usually stick a regular eating teaspoon into the honey, to get it moderately coated, and then place it into the chocolate sauce pan; I am estimating this is about 2 tsp to a whole tablespoon of honey. Feel free to use more if you want more sweetness.
  2)  Add vanilla extract, stevia (if desired) and salt. Whisk again. Taste. Add more stevia or honey if desired.
  3)  Enjoy! Dip in some strawberries, apple slices, spread on unsweetened pumpkin bread use to make into chocolate bark, use it as cake frosting (pictured); or put in a jar to use on ice cream! This sauce can do anything! Stored in the fridge this should last 1-2 weeks.

*I used the old size Baker's chocolate squares which I stocked up on right after they changed / halved the sizing of their packages.
** This brand is 100% coconut milk, and I can get it locally (if you're in Seattle, look at Central Market or PCC) for a great price (and no yucky canned coconut milk flavor!)


PS. I am now officially a third year medical student! I finished second year today. This will be a busy summer, as I am taking classes, starting clinic, and taking BOARDS in August, but you should hopefully hear more from me! I've got some recipes I've been meaning to share you guys. I hope to have some more time to get you some more yummies :) I know I've been completely MIA, and I appreciate my readers who still subscribe and share and benefit from my recipes!

PPS. The first picture is this chocolate sauce over my favorite grain-free gluten-free chocolate cake! (The sauce has harded at this point, and is exactly like a ganache!) I halved the ingredients to the cake and topped it with chocolate sauce, for a yummy dessert that is only minimally sweetened. The second picture is this chocolate sauce after being made, so it is still warm and in "sauce" vs ganache form. I love how versatile this recipe is!

XOXOOXO
Happy Day!


Monday, November 18, 2013

Thanksgiving Ideas 2013.


Hello, everyone! I just want to say that, yes, I am alive. Medical school does not leave me much time for anything, including the necessities like vacuuming, much less writing a blog post!

With the holidays around the corner (Thanksgiving! Christmas!), I wanted to share some links with you of some yummy things I've been eyeing. This Thanksgiving I'll be spending with my friend S and her hubby and family and friends. She's relatively new to GF and paleo-ish, so it's going to be a fun time in the kitchen making delicious food.


Thanksgiving Ideas 2013 --> just click the links below!

Start your day of food prepping and cooking with this bright and light smoothie, just be sure to add some protein so you don't crash later!

Every Thanksgiving table needs...  Cranberry sauce, roasted veggies of all kinds, cauliflower garlic mashed potatoes, squash fries, some form of sweet potatoes, corn bread, corn bread, (yes two kinds is perfectly acceptable!), brussel sprouts, and green bean casserole, if that's your thing. And what about a broccoli-bacon salad? Or a light and easy spinach salad?

The main event... Want to switch it up this year? How about smoked turkey?

Who loves muffins? My mom's favorite snack and side for nearly any fall/winter holiday is these grain-free pumpkin muffins. If pumpkin muffins aren't your thing, or you want something to more easily please many different taste buds (young and old)... try these crowd-pleasing grain-free cranberry orange muffins, chocolate chips are optional!

This is my favorite pumpkin bread... Pst, it's unsweetened! ;)

Is there anyone who wants egg-nog before Christmas?

Dessert options are many...

My inner New-Englander loves any kind of grain-free apple crisp; this version has a crunchy delicious topping!

And of course there's vanilla ice cream, because apple crisp and paleo pumpkin pie always must be served with ice cream.

Cake, because it just may be someones birthday on or around Thanksgiving.

And for those of you who always need some chocolate, how about some brownies ;)

Lastly... After the main event... make some delicious grain-free waffle sandwiches using all your leftover turkey and cranberry sauce!


I hope you all have a warm and safe Thanksgiving holiday! Enjoy the time with loved ones, and don't forget to crunch some leaves if you have them :)


Saturday, September 14, 2013

"Reverse" Nourishing Protein Bars 1.0.


Cocoa butter is one of those ingredients that I've been wanting to flirt with for a while, yet the "high" price tag has always bothered me. Recently, however, some of my blogger friends have been using cocoa butter in their recipes, effectively making me jealous (well, more so curious!), so I jumped in and got some myself.

Cocoa butter is the fat that is extracted from the cocoa bean; and that's why it is white/yellowish in color, and not brown. Good quality cocoa butter should be at least $15/lb, and if it's less than that, you're either getting scammed or you just happened on a good deal. Look for a brand that has good reviews, is raw and organic, and can be used to make both food items and lotions. If you're using your cocoa butter for food applications, like here, you do not want to buy a non-food grade cocoa butter, so be sure to read the description on the product before you buy. I am a fan of Tisano brand organic cocoa butter, which you can find the link to on my ingredients page.

Cocoa butter comes in chunks or wafers (look for the kind made of chunks) and is easily meltable. For best results, store in the fridge before you're ready to work with it. And don't be afraid to try a chunk on it's own. I think it texture is like a bit like really smooth fatty coconut, but instead of coconut flavor, a hint of chocolate flavor instead! That being said, it's super versatile, and you can use it in chocolate sauces, puddings, and in things like these delicious protein bars :) I actually had a little bit left after making my protein bars, so I mashed some ripe bananas into it, added some cocoa powder, a little coconut sugar, ground chia, salt, and vanilla, and Viola! Chocolate pudding!


"Reverse" Nourishing Protein Bars 1.2.
    a spin off my original protein bars
 
    1 cup  whole raw walnuts
    1 cup  whole raw pumpkin seeds
    1/4 cup  ground chia seed
    1/2 cup  organic whole cranberries - mine were from Trader Joes
    1/2 cup  organic unsweetened coconut chips
    1/2 cup  organic sunbutter - mine was homemade :)
    1/2 tsp  unrefined sea salt
    1/2 cup  organic coconut oil, melted
    1-2 Tbsp  organic local wildflower honey
    2-3 tsp  vanilla
    ~  1 cup  organic raw cocoa butter, melted - source
    ~  1 cup  coconut cream concentrate - source
    ~  1/4-1/3 cup  organic coconut oil
    1 dropper  vanilla creme liquid stevia (optional)
    1 Tbsp  vanilla
 
* Please note the ingredients with an "about" sign in front of them are just estimates of amounts. I really just added some cocoa butter, ccc, and coconut oil to a double boiler and melted it together, adding the stevia (for sweetness) and vanilla (for flavor) at the end. I wanted a lot chocolate coating on my protein bars, but feel free to use less if desired.

To make your protein bars:
  1.  Place walnuts, pumpkin seeds, ground chia, cranberries, coconut, sunbutter and salt in a food processor. Pulse to combine.
  2.  In a small sauce pan, melt coconut oil using LOW heat. Remove from heat and add vanilla and maple syrup.
  3.  Add melted oil mixture to the food processor and pulse/grind ingredients until it forms a coarse paste.
  4.  Scoop out the mixture and press down hard into an square bar pan.
  5.  Melt coconut and cocoa butter in a double boiler, add stevia and vanilla last when finally melted. Pour the white mixture on top of the already pressed down bars, it should be liquid. Place into the fridge until chocolate has hardened. To serve, take bars out of fridge for at least 2 minutes. Work a knife around the edges gently, or insert a large knife on side and gently pop out the bar  and place pieces of plastic wrap or small baggies. Freeze for later or munch right away :)


You can even cut them into smaller or easier to bite shapes, like in the second photo. Enjoy this easy + nutritious option on the go!

Thursday, July 25, 2013

Triple Vanilla Ice Cream.


Vanilla ice cream is definitely one of  my favorite flavor of ice cream. I like to try sample at every ice cream shop I visit, to see if I have found the vanilla ice cream. So far my search has found some pretty good vanillas, and some pretty mediocre vanilla ice creams. By far, the standard of my comparison has been the storebought super premium ice cream, Double Rainbow. Since trying this ice cream, no other vanilla I've tried has stacked up to it's incredibly creamy, smooth, bright and comforting vanilla flavor.


So when I whipped up this ice cream last weekend, I thought that it would come out very well, but I didn't know how well. Even before pouring this ice cream into the ice cream maker to freeze, I knew this batch was special. It tastes like a dream, scoops like a dream, and melts like a dream (unlike some homemade ice creams which just seem to melt right away, or to never melt at all). I have to admit, it certainly rivals the amazing taste of Double rainbow, which is a feat in and of itself. I will definitely be making more vanilla ice cream exactly like this. Below is a photo from my brother's birthday celebration.


Since the vanilla sugar and cream are simmered together (in order to dissolve the sugar), the final product as a slight caramel taste! No doubt if you simmered the cream and sugar longer, you could easy make a dulche de leche version.


Triple Vanilla Ice Cream.
    makes two quarts

    6 oz  vanilla sugar - source or make your own
    4 cups (1 quart)  raw cow's milk cream
    1  vanilla bean
    1 Tbsp  vanilla extract
    1 Tbsp  coconut flour - source
    5  egg yolks
    1/2 tsp  unrefined sea salt

To make your ice cream:
  1. In a small sauce pan, combine sugar and 1 cup cream. Turn on high heat, bring almost to a boil, when first bubbles appear at sides reduce heat to simmer, and simmer, stirring frequently, for about 5-10 minutes. Mixture will thicken, coat the back of a spoon, and be caramel-like when ready. Remove from heat and allow to cool (this may take a while).
  2. In a separate bowl, combine coconut flour, salt, vanilla bean flecks, and egg yolks. Mix until yellow and thick. Add vanilla extract. Whisk in remaining 3 cups cream. Slowly add the cooled vanilla sugar mixture, whisking constantly.
  3. Add to your ice cream maker, and freeze according to manufacturers instructions. Mine churned for about 25 minutes. This ice cream comes out perfectly straight from the ice cream maker. Freeze overnight before scooping for hard ice cream. No need to remove ice cream from freezer for 10 minutes before serving. It's scoopable as is!
  4. This ice cream is so delicious, serve with your favorite brownies, chocolate sauce, nuts or whipped cream. Or you can serve along mint cake, like I did here! Enjoy :)


Want some cake with your ice cream? Try my grain-free chocolate cake! It's super easy, just make sure to follow instructions and to both grease and flour the pan.

Other ice creams I've made:
- Original vanilla ice cream - my first attempt, these basic proportions are what I use as a "template" for making all my other ice cream recipes
- French vanilla ice cream
- Chocolate ice cream
- Chocolate peanut butter ice cream

Have a lovely summer day!


Tuesday, December 25, 2012

Merry Christmas.

Hello everyone,

Merry Christmas to all of you celebrating the holiday.  I am having a wonderful time relaxing at home with my mom and dad.  Christmas is one of my favorite days of the year simply because it is a time when we slow down, take a moment to rest, enjoy some Christmas music, cookies, and twinkly Christmas tree lights.  A Christmas run or walk is always in order too, and I find myself braving the cold each year to do so.  Christmas Eve is always a very special day for me because it is a time where I get to see my extended family.  I decided to be a little different this year and made a slightly different version of my lemon cookies; I made them instead like little sandwich cookies with lemon yogurt frosting inside.  My mother always likes to make my pumpkin muffins for Thanksgiving and for Christmas, and they always taste so good!  And we have leftover muffins at home! They certainly make for an excellent breakfast!

This year we were blessed with a white Christmas.  We woke up in the morning to light snow and a dusting all over the ground.  The snow kept up all day until it warmed up slightly later in the afternoon, and we ventured outside for some exercise and fresh air.  Tonight I think I am going to make some gluten-free pizza for the family and have "movie" night.  One morning this week I plan to make some waffles and eggnog too.  Eggnog is always synonymous with Christmas in my house ;)  While I am home I also plan on making some spiced nuts, grain-free granola, gluten-free crackers for my mom, protein bars for my sister-in-law, and of course Yule Log for my family when we get together to celebrate a little later in the week.  I also hope to make a gingerbread cake or gingerbread cookies, since I have definitely had a hankering for some spice-y molasses-y goodness lately.  While I have a whole pile (in a three-ring binder, actually) of new recipes I want to try, I think I will mostly be staying with some of my tried and true favorites this year.

I hope you are all healthy, happy, warm and enjoying time with family during this Christmas season.

Jesus is the Reason for this SEASON.

Monday, October 1, 2012

Real Chocolate Ice Cream.


I got an ice cream maker for my birthday a few years ago, and I've put it to good use!  It's been so fun to experiment with different ice cream recipes.  Some have been really good, and some have been, not so good.  Several batches have come out too sweet, not sweet enough, or too icy or crumbly and hard as rock.  But this summer I think I've got the whole process down!  I am so happy with this recipe.  It's incredibly scoopable and you don't need to remove it from the freezer for any amount of time before serving.  It's texture is fantastic and the sweetness is just right.  


Real Chocolate Ice Cream.
   makes 2 quarts

    1 pt  raw cream
    2 cups  raw whole milk
    4  egg yolks
    1 T  arrowroot starch
    1/2 cup  cocoa powder
    1/2 cup  raw honey
    1 T  vanilla
    5 dashes  unrefined sea salt

To make your ice cream:
  1.  Combine all ingredients in a blender.
  2.  Pour into ice cream maker and freeze per manufacturers instructions.
  3.  Freeze overnight until hard.
  4.  Serve  and  enjoy! Try it with fresh whipped cream and chocolate sauce.  Or top it with peanut butter!!

Mhmm. The goodness is beginning to melt! YUM.

I like to freeze my ice cream in leftover yogurt containers! They are the perfect size, and I can put equal amounts in two 32 ounce containers.  Eat one, save one (shove it in the back).  In a few months you'll have several types of ice cream to choose from waiting for you in the freezer!

Chocolate not your style? Check out my other flavors:

Homemade French Vanilla Ice Cream
Homemade Vanilla Ice Cream
Peanut Butter Frozen Yogurt


Saturday, September 1, 2012

Grain-free Unsweetened Banana Cake.


Today is my birthday, so I thought sharing a cake today would be only appropriate.  I didn't make this cake today, however, but made it sometime early summer.

Banana bread has always been one of my favorites.  Since going gluten-free, I've made lots of different versions.  Up until now, my best recipe has been my original banana cake recipe.  Then there was a banana cake made with oatmeal.  There was also my gluten-free whole-grain banana bread, which I adapted from my favorite wheat-based recipe when I first went gluten-free.  And now there is this banana cake.  Made with grain-free flours, left-over soured milk, and bananas, this banana bread is easy to digest, primal and absolutely delicious!  I also love it because it give me a use for raw milk that has gone a little bit too sour to be palatable.  Raw dairy is so valuable nutritionally, it's such a waste to not use it!


I've made this recipe twice now, and it's been fantastic.  The first time I made a frosting over the whole cake made with peanut butter, butter, yogurt and coconut oils.  It was fantastic and I ended up eating it for breakfast because it had enough protein and fat to make my metabolism happy :)  The pictures you see here have one layer of a peanut butter-butter frosting in the middle, but not over the entire cake.  I hope to tweak my peanut butter recipe, get it just right, and then share it with you.  For now, feel free to mix equal parts, butter, fresh ground peanut butter, a few drops of Stevia clear, and vanilla extract together to make a wonderfully nourishing peanut butter filling for the middle of these cakes.  And be sure to share with family!  It's so good (and makes a lot) so sharing should be mandatory!  This cake is also completely unsweetened (bananas only) and it's Primal!


Grain-free Unsweetened Banana Cake.
    makes two 9" rounds

    1 cup  blanched almond flour - source
    1 cup  organic coconut flour - source
    3 cups  ripe bananas, mashed
    6 small  real eggs
    2 cups  soured raw milk
    1 Tbsp  warm spice blend (mine was a mix of cinnamon, cloves, ginger, cardamom, nutmeg, allspice)
    1 Tbsp  vanilla
    1 tsp  baking soda
    1/2 tsp  unrefined sea salt
    2 Tbsp  grassfed butter (to grease the pan) - source


To make your banana cake:
  1.  Preheat the oven to 375 degrees (convection or non-convection, same results for this cake). Use your fingers to butter the cake pans liberally.
  2.  In a large bowl, mash bananas, whisk in eggs, sour milk, and vanilla.
  3.  In another medium sized bowl, combine flours, baking soda, and sea salt.
  4.  Mix wet ingredients into dry, using a spatula to incorporate.
  5.  Distribute batter evenly between both pans. Bake for about 35-40 minutes or until sides have pulled away from the pan and top is golden brown. When the cakes have cooled, remove from pans by gently inverting them onto your hand or a plate.  Wait until cakes are completely cooled to frost, if desired.

Texture up close.

This cake has quickly become one of my favorites, I hope you enjoy it too!

Wednesday, August 8, 2012

Peanut Butter Frozen Yogurt.


Happy August everyone!  As I type this post, it's July, and I anticipate some hot weather ahead for New Englanders in August.  But as you read this post, it's August, and I am busy busy studying Organic Chemistry.  I am completing my last pre-requisite before starting the ND program (naturopathic medicine program) in the fall at Bastyr University in Seattle, Washington.   This East Coast girl, turned California girl, is now a Seattlite(?)  I never imagined this!  Now can say I've lived in all four corners of the USA.  I was born and raised in Florida, lived in New Hampshire until college, lived in Southern California for my undergrad, and now I am pursuing my doctoral degree in Washington state!  How cool.  Even though I haven't moved around "a lot" in comparison to some people, I still feel as if I have.  Am I an East Coaster now?  Or a West Coaster?  For the past four plus years the West Coast has been my home, and now for the next four plus years (at least) the West Coast will continue to be my home, only instead of the Southwest I'll be in the Pacific Northwest.  Once I was just starting to feel like a true CA girl,  I'm off to Seattle.  Sunshine to rain.  Dirty LA traffic, to clear Seattle roads.  It's a new adventure.


But enough about traveling.  Let's take a look at this yogurt.  YUMMY.  This recipe was inspired by a guest post over at Kimi Harris' blog The Nourishing Gourmet.  I didn't have exactly the right ingredients the original recipe called for, so I made some changes, and now instead of honey and tahini ice cream, it's more like peanut butter frozen yogurt.  The 1/2 cup of raw honey was a little sweet for my taste, so next time I will probably reduce to either 1/3 or 1/4 cup.  If you aren't partial to peanut butter, feel free to use tahini, cashini, cashew butter, almond butter, coconut butter, sunflower seed butter, etc.  But if you're a peanut butter fan (in moderation of course) like me, you'll love this recipe!  Chocolate chips would go great with this too!


Peanut Butter Frozen Yogurt.
    Makes almost 2 quarts

    3 cups  raw milk yogurt
    1 cup  raw whole milk or full-fat coconut milk (mine was mixture of both)
    ½ cup  organic peanut butter
    ½ cup  organic raw honey
    2  real eggs
    1T  vanilla extract
    1T  arrowroot powder
    ¼ tsp  unrefined sea salt

To make your delicious peanut butter fro-yo:
  1.  Mix all ingredients in a blender.
  2.  Pour into ice cream maker and churn per manufacturers instructions.
  3.  When ready, scoop into reused plastic yogurt containers (or another vessel) and freeze for at least 12 hours.  Serve when frozen yogurt has hardened.  You may also want to remove from freezer a few minutes before serving.  Enjoy!


Make this frozen yogurt as a healthy "cool-off" treat to beat the August heat.  East Coast humidity is something that I definitely don't miss on the West Coast!  You can also put this fro-yo into popsicle molds for yourself or the little kiddos in your life.  I can't wait to do this when my little nephews get older!

Question for you: how much does your location relate to your identity?

Monday, July 16, 2012

Grain-free Kefir Brownies.


Sometimes my best recipes come from nowhere.  These brownies are definitely a testament to that.  One day I was in my apartment and I had some soured kefir that I had made.  It was past the palatable drinking stage, and not wanting to waste it, I threw together these brownies.  I didn't expect the results to come out very well, but I was completely surprised.  These are so incredible, I may like them better than my favorite grain-free brownie recipe.  I gave the pan away to one of my advisors as a thank-you, and he ended up (due to the pestering of his students) sharing them the with his entire class!  I got an email the next day with rave reviews.  I think you'll rave about them too ;)

Mhmm. Fudgey cakey chocolatey goodness!

Grain-free Kefir Brownies.
    makes one 8x8 pan

    2 cups  soured homemade kefir
    1 cup  organic coconut flour - source
    4  happy eggs
    1 cup  raw cacoa powder - source
    16 oz  chocolate chunks, I used Enjoy Life
    1 Tbsp  vanilla extract
    1 tsp  baking soda
    1/4 tsp  sea salt
    2 full droppers plain stevia - source


To make your brownies:
  1.  Preheat your oven to 350 degrees (mine is convection).
  2.  In a large bowl, combine all ingredients except chocolate chips.  Mix well.
  3.  Add chocolate chunks and mix again.
  4.  Bake for about 30-40 minutes or until the top is cracked, the sides are slightly firm and there is a tiny bit of jiggle in the middle of the pan.
  5.  Remove from oven and let cool.  Try a slice warm.  Let it cool and try another slice.  Share.  Serve with a nice cold glass of raw milk. Yum!

I love these brownies, not only because they are delicious, but that they are low in sugar and carbohydrates!  The only added sugar comes from the sugar in the chocolate chunks.  If you use unsweetened chocolate the brownies will not taste very sweet.  For those of you who are not partial to stevia, feel free to omit it.  I haven't made the recipe without stevia so I don't know if it will grossly affect the flavor, but my guess is that it will make a small difference in sweetness.

Mhmm. Chocolate chunks.

These will freeze very well.  They will also make a great accompaniment to homemade french vanilla ice cream and homemade raw whipped cream.  I love anything chocolate and vanilla combined!

Here are some of my other delicious brownie recipes:

Grain-free Coconut Flour Brownies
Banownies
Gluten-free Brownies (for you whole-grain folk)


Friday, July 13, 2012

Primal Pea(nut) Butter Cookies.


As soon as I typed the title to this post I realized what I had done.  I just called peanuts Primal!  Peanuts are actually a legume (which is like a bean), not a nut, and legumes are not Primal.  Oops!  But if you're like me, you are Primal, but you still eat peanut butter.  I don't eat gobs of it like I used to, but on occasion, it's great!  For those of you who are pure Primalists, try making these cookies with almond butter, cashew butter, pecan butter, tahini, the list goes on!

I love this recipe because it has barely 6 ingredients.  And it's so easy!  You can even let your kids help you make these!  I made the ones with MMs specifically for my brother, but his favorite was actually the chocolate/sea salt combination.

Primal Pea(nut) Butter Cookies.
    makes 14 cookies

    8 oz  (1 cup)  organic creamy unsalted peanut butter (best is fresh ground or homemade)
    4 oz  (1/2 cup)  organic coconut sugar
    4 oz  (1/2 cup)  blanched almond flour
    1  happy pastured egg
    1/2 tsp  baking soda
    pinch unrefined sea salt

    Optional toppings:  various candies, sea salt, dark chocolate, raisins

To make your cookies:
  1.  Preheat the oven to 350 degrees (mine is convection).
  2.  Combine all ingredients in a bowl with a electric mixer.
  3.  Use your hands or a cookie scoop to make balls of the dough.  Place peanut butter balls on a silicone lined baking sheet.
  4.  Bake for 7 minutes, then remove from the oven and make criss-cross design with a fork.  This will flatten the cookies.  Add toppings if desired.
  5.  Bake for 5 more minutes or until golden brown and chocolate has melted.
  6.  Remove from oven and let cool on the sheet.  Carefully transfer to a wire rack when cool and place cookies in the fridge to set the chocolate.  Enjoy!

Don't forget to share! (It won't be easy :)

Sunday, July 8, 2012

Lactation (Oatmeal) Cookies.

My lovely sister in law just gave birth to TWINS!  I could not be more thrilled.  It is my first time being an Auntie!  Now I have two adorable little boys to love and spoil.  Now that the twins are here, my brother and sister in law have a lot to keep them busy! 


One thing that a lot of new moms struggle with (so I am told) is keeping up their milk supply, sleeping, and keeping their calories up sufficiently to breastfeed.  My friend Heather created the idea of a "lactation cookie" when she had her first child (and she has also had twins recently!).  This is exactly what nutrition is all about, using food to meet your bodies needs.

These lactation cookies are pretty much just like your standard oatmeal raisin cookie. (Men don't worry, you won't lactate if you eat these).  These are called lactation cookies because the main ingredient is oats, and they also have some flaxseed.  Oats are very well known to increase milk supply for mothers, and flax help increase milk supply too.  They also do not have a lot of sugar (you can eat many and not get blood sugar spikes), and the oats and almond flour provide some protein, which is crucial for breastfeeding!  Cookies are also great for new moms because suddenly life revolves around the baby(ies) and finding time to eat can be hard.  Having twins doesn't leave a lot of time on your hands!  Cookies can easily be grabbed and eaten with one hand.  Just make sure they're as nutritious as these!  Beware - I am told husbands like lactation cookies too!  Moms may want to guard them ;)


Lactation Oatmeal Cookies.
    makes over 2 dozen cookies

    2 1/2 cups  toasted rolled gluten-free oats (mine were sprouted and soaked oat groats)
    1 cup  blanched almond flour
    1 Tbsp  organic coconut flour - source
    2 sticks  grass-fed butter, softened - source
    1/2 cup  coconut sugar - source
    2  real eggs
    1 cup  organic unsweetened shredded coconut
    1 cup  organic raisins (can use chocolate chips)
    2 tsp  vanilla
    2 tsp  cinnamon
    1/4 tsp  unrefined sea salt
    2 Tbsp  organic raw honey -- for topping - source
    2 Tbsp  organic raw ground flax seed -- for topping
    2 Tbsp  warm water


To make your cookies:
  1.  To toast your oats, preheat oven to 350 degrees. Pour oats onto a silicone lined a baking sheet and spread evenly. Place in the oven for 5 minutes, stir and return to oven for another 5 minutes or until oats are toasty (be careful not to burn!).
  2.  In a large bowl combine almond flour, coconut flour, sugar, coconut, cinnamon and sea salt. Whisk until combined. Add toasted oats.
  3.  In another large bowl, beat together butter, eggs, and vanilla with an electric mixer.
  4.  Combine the dry into the wet ingredients, incorporating together with a spatula. Add raisins, and mix again.
  5.  On silicone lined baking sheets, use your hands to make balls of the dough and place cookies in rows 4x3.  Place sheets into the fridge to set for about 30 minutes.  Then pull from fridge and bake in oven for about 12 minutes until golden brown.
  6.  Make your topping in a small dish combine honey, warm water and ground flax.  Mix together with a pastry brush. Let cookies cool for about 10 minutes.  When cookies are warm, but not hot, brush the flax-honey mixture on top of the cookies.  Remove cookies from pan with a spatula, transfer to a wire rack, and place in the fridge to set the topping.
  7.  After about 10 minutes in the fridge, cookies are ready to eat!


Do the new moms in your life a favor - bring them these cookies :)


Friday, June 22, 2012

Grain-free Chocolate Cake.


My attempts at grain-free cakes have really come a long way.  Those of you who have ever made a grain-free cake know that it's not the easiest thing ;)  I started my journey with some of Elana's recipes at Elana's Pantry.  The results were better than I hoped, but I knew I could make it better.  Over the past three summers, I've made a couple versions of her chocolate cake.  I've scoured a countless number of other food blogs, drawing ideas from what other real food bloggers have done in grain-free cake land.  I've experimented with the amounts of liquids and ratios of flours and other ingredients, changing it as I went along, longing for a certain taste and mouth feel of cake.  Now I finally have a recipe entirely my own.  Each time I've learned something new, and now this is a cake I am really happy with.  I cannot say more about this cake's texture, flavor and ease of cooking.  I know that you'll love it too.


Grain-free Chocolate Cake.
    makes two nine inch round cakes

Cake:
  3/4 cup  organic coconut flour
  1/2 cup  blanched almond flour
  1/2 cup  cocoa powder - I used Ghirardelli
  12  real eggs
  1 cup  maple syrup - grade B
  1 cup  organic coconut oil, melted
  1 Tbsp  vanilla
  1/2 tsp  baking powder
  1 tsp  baking soda
  1 tsp  unrefined sea salt

Frosting:
  4 cups  organic powdered sugar
  1 stick  unsalted butter - I used KerryGold
  ~1/2 cup  raw whole milk
  1/2 tsp  unrefined sea salt
  optional: extract of choice for flavor, here I used mint extract


Chocolate Ganache, or use my Paleo Ganche recipe:
  1 - 12 oz  package chocolate chips - I used Trader Joes brand - feel free to use unsweetened also
  1/2  stick unsalted butter - I used KerryGold

Here's the final product! Cake assembled and frosting+ganache set.

To make your chocolate cake:
  1.  Preheat oven to 350 degrees convection.
  2.  In a small bowl, combine cocoa powder, coconut flour, almond flour, sea salt, baking powder, baking soda. Whisk until there are no lumps.
  3.  In another bowl, whisk together eggs (room temp), maple syrup, melted coconut oil (make sure it's not hot), and vanilla.
  4.  Combine wet into dry ingredients until just combined.
  5. ****Grease and flour the sides of the pan - use butter (best) or coconut oil (ok). 
  6.  Pour equal amounts of cake batter into 2 9" round cake pans.
  7.  Bake at 350 degrees for about 35 minutes or until top springs back lightly when touched and sides are pulling away from the pan.
  8.  Let cool only until you can handle the pans, then run a knife around the edges before gently inverting the cakes and removing them from the pan. If you floured and greased the sides well, getting the cakes out of the pan shouldn't be an issue, but if you didn't, you might get only the top of the cake out!

To make your frosting and ganache:
  1.  For the frosting, with room temperature butter, cream butter and powdered sugar until fluffy. Add milk slowly as needed into the sugar and butter.
  2.  Add vanilla, extract (optional).
  3.  For the ganache, in a double boiler melt chocolate chips and butter. Remove from heat when 80% of the chocolate is melted. Stir. The heat will melt the remaining chips.
  4.  Let ganache cool, but still be spreadable.

Cake assembly:
  1.  Remove cake from the pans. Place one on a large plate.
  2.  Frost with one layer of frosting on the top of the cake.
  3.  Place the remaining cake on top of the frosted layer.
  4.  Frost with remaining frosting on top and sides of both layers.
  5.  Place cake in the fridge for the frosting to set.
  6.  Spread ganache on top of the cake. Return to the fridge and allow ganache to set.

Notes:
1) You can easily cut this recipe in half, and you'll have one 9" cake.
2) Do not make this with runny honey instead of maple syrup. There is less flavor and a bit less sweetness. When I made this with honey it just seemed to be lacking something.
3) Make sure your eggs are on the medium/large side. I've made this cake with small sized eggs, and the end product was a bit more on the dry side than I would like.

Here are some pictures of the first grain-free chocolate cakes I made:


At my house, cake is always served with real ice cream!


There was A LOT of filling inside, and it still wasn't enough ;)


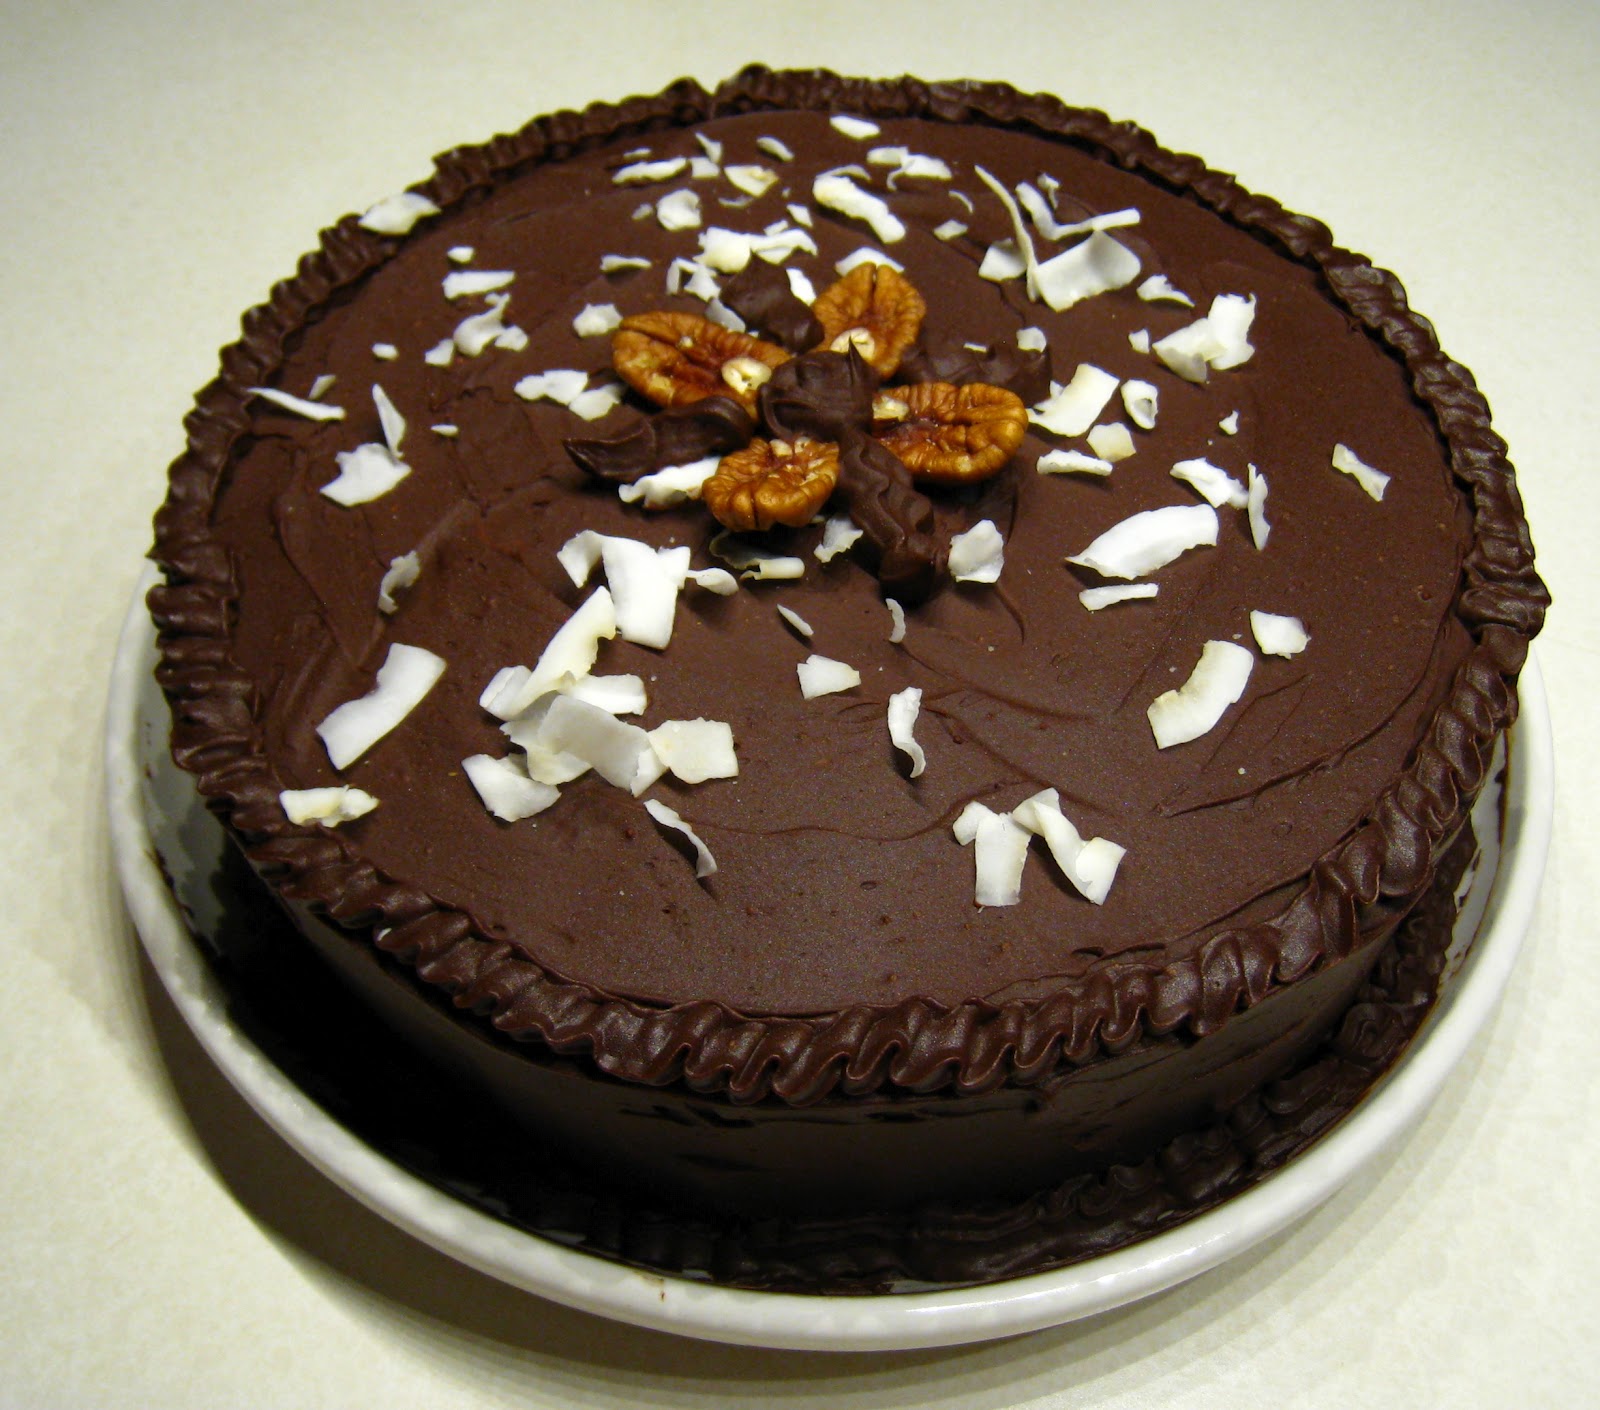
German chocolate cake, completely finished!


This was my first attempt at grain-free chocolate cake. I wish I had remembered to snap a picture before cutting it up!


My brother's birthday is always during the summer, so I always have an excuse to make a cake.  It's my once a year cake indulgence!  However that is beginning to change since I've learned how to make these cakes so nourishing and healthy!  This summer will probably be a little different since my brother and his wife are having twins.  It's very exciting, but I doubt a birthday celebration with cake and ice cream will be the last thing on their mind ;)  This past week I made this cake in a banana version with peanut butter frosting!  It's so nourishing, low in sugar and high in protein, and I've been eating it with my yogurt and berries for breakfast.

Happy summer! Cake away :)