Showing posts with label coconut. Show all posts

Tuesday, May 19, 2015

Benefits of Coconut Flour.

Many of you readers (hello! long time no see!) know how much I loooove coconut flour.  Coconut flour has been such a great option for me, for many reasons, and I know many of you have learned the ins and outs of baking with coconut flour too and love it just as much as I do.

For those of you who are still on the fence, or just haven't hopped on the coconut train (it's a serious train that's been chugging very strong for several years now) then I'm here to convince you to give coconut flour a try.

My journey with coconut products began several years ago when I first learned about the paleo way of eating. Focusing on the paleo / primal template for my food choices was a great option for me, and during this time I discovered the awesomeness of coconut flour.

What makes coconut flour so awesome is mostly its nutrition stats, its affordability and its versatility. Today I'm here to tell you about why coconut flour is a healthy choice, so that will be my main focus, but I'll also touch on the other two points near the end.

Disclaimer - While I do have extensive training in nutrition, I am not a doctor, nutritionist or registered dietitian, so implement this information with your own discretion.


  Why I Love Coconut Flour 101

1) Contain healthy fats
- Healthy fats are so important for our bodies.  We need fat in order to make healthy skin, hair, and nails.  Fat is an essential part of our brains, as well as ALL our cell membranes which are basically a double stack of fat molecules, called a phospholipid bilayer.  Many sources of fat also contain cholesterol, which is an essential building block of almost all hormones.  Pregnant women need a higher intake of essential fatty acids (EFAs) in order to make the babies brain (most importantly).
- Coconut flour contains medium chain triglycerides (MCTs) aka medium chain fatty acids (MCFAs). You've probably heard about these before. What's great about MCTs is that they are metabolized very quickly by the body and so are used as an energy source right away, in contrast to LCFAs (long chain fatty acids) which need a more involved process in order to be broken down and utilized. MCTs are also very antimicrobial.
- Coconut flour is also rich in a type of fat called lauric acid, which along with MCTs, are very antimicrobial. Both together can help contribute to a healthy balance of body flora, on our skin and in our gut.
- In less than one ounce of coconut flour, it contains about 3 grams of saturated fat.
- It is also worth mentioning that coconut flour is low carb, which makes it a great alternative for those who medically need to choose a low carb diet, and for others who eat low carb diets by choice.
- Fats also contribute to feeling satisfied with the food you're eating, so you are more likely to stop eating and be satisfied with how much you've eaten, when you are feeling full.

2) Fiber content
- Many baking flours on the market are devoid of certain nutrients, and other properties like fiber, but coconut flour is NOT one of them! Coconut flour is rich in fiber, and if you've ever worked with coconut flour before you know that if not used properly, it will suck up all the liquid in your recipes and the end product will be very dry! That's because of all the fiber.
- In less than 1 ounce of coconut flour, there is 11 grams of fiber.
- Fiber is necessary in our diets because it is needed to detoxify hormones, to help move our bowels, and to feed the bacteria in our colons.

3) Protein
- Most flour products contain little or NO protein, but coconut flour actually does!
- In less than 1 ounce of coconut flour, there is 4.5 grams of protein.
- Both the fat, fiber, and protein contents of coconut flour make it very nourishing and satisfying at the same time. Making brownies or cookies or waffles with coconut flour will keep you full for hours, instead of lifting your blood sugar and crashing you down 2 hours later. Say good-bye to the blood sugar roller coaster. ;)
 

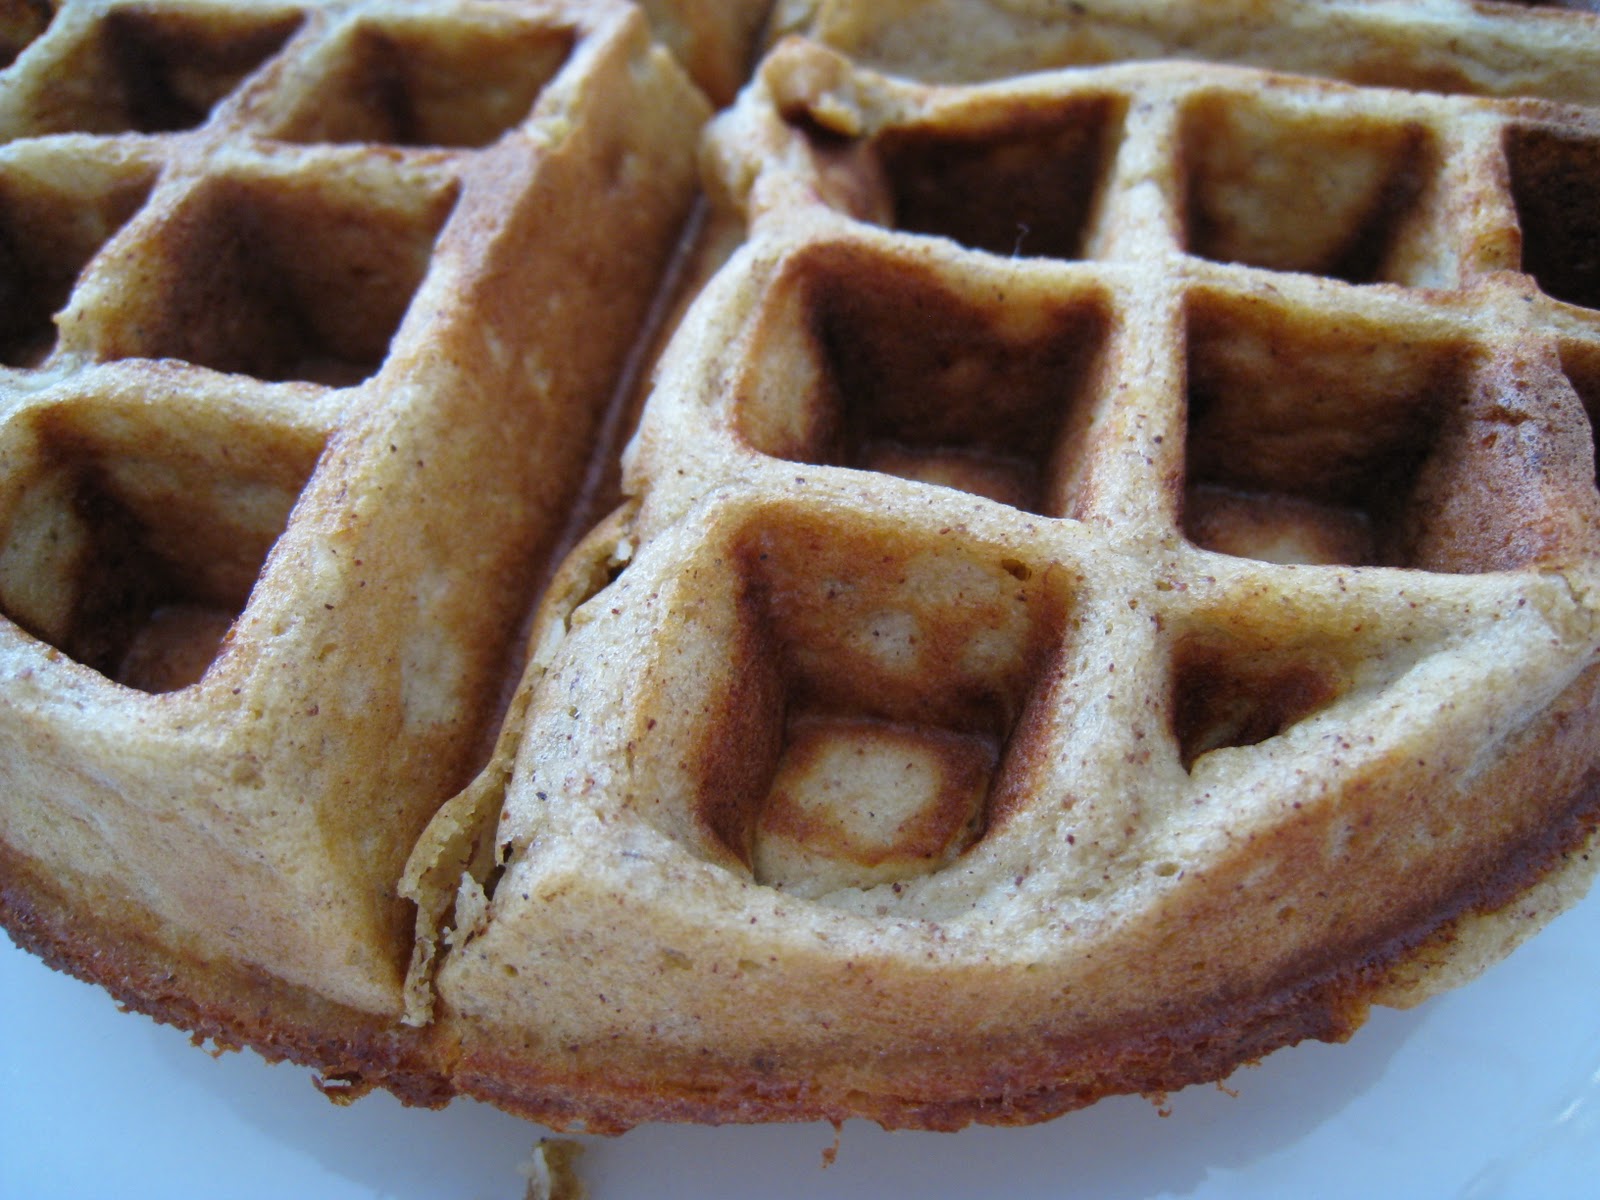
Many of my recipes use coconut flour - but these are some of my absolute favorites. They're also all grain-free! All the photos in this post feature recipes I've created using coconut flour.


I hope you all found this post to be useful, informative, and inspiring! Get baking ;)

Love to you all,
xoxo



I am wrote this post for Nuts.com because they are passionate about sharing information about healthy food!  It was good opportunity to join forces in order to spread information about making healthy choices.

Saturday, December 21, 2013

Grain-free Granola 2.0.


About a year ago I made some delicious grain-free cinnamon raisin granola for the first time. It was seriously delicious. So recently I went to go make some, and the search bar in my blog wasn't working... anyone else having this problem?!  So I ended up wingining it, trying to remember just what I did, and it came out great!  Even better than the first version if I do say so myself.


This grain-free granola is crunchy, toasty, and packed full of flavor!  Everyone in your family will love it, and they will all have a hard time believing that yeah, there are no oats in here!  You could even make a batch of this granola, put it in cute little jars, and give it away as Christmas gifts!  But everyone just might hound you for the recipe ;)  No worries, feel free to share!

PS - If cinnamon and raisins aren't your thing, try another spice combo, like cranberries and cardamom, or nutmeg and dried blueberries, or apricots and cloves! Feel free to switch it up to your liking.

These were filled to the tippy tippy top, BUT I ate some ;)

Grain-free Granola 2.0.
    makes 2 gallon sized mason jars full (even with extensive recipe sampling ;)
    * these ratios are generalized, really just throw all your favorite nuts combination in a large bowl; for instance, I didn't use cashews or peanuts, but feel free to use these if you wish

1/2 cup each:
    sesame seeds, sunflower seeds, whole macadamia nuts*, whole pecans, whole walnuts
1 cup each:
    pumpkin seeds, whole pecans, sliced almonds, raisins
1 cup each:
    ground macadamia nuts*, ground pistachios, ground walnuts
1-2 cups  organic coconut "chips" (largely flaked coconut)
1 cup  organic shredded coconut (small little shreds of coconut, not traditional sized flakes)
2  large eggs
1 - 2 Tbsp  cinnamon
1/3-1/2 cup  brown rice syrup
~1/4 cup  runny honey

To make your yummy granola:
  1.  Preheat oven to 375 degrees; mine was non-convection.
  2.  Combine nuts, coconuts, cinnamon, brown rice syrup, and honey.  Mix together. Add in both eggs and stir well with a wooden spoon.
  4.  On two parchment paper lined baking sheets, spread the mixture evenly between two pans.
  5.  Bake at 375 for 10-15 minutes. Watch it, uneven ovens may burn.  Stir well.  Bake another 10 minutes or so.  Stir.  Depending on your oven, you may need another a longer or shorter time. For me, it varies a little on every batch.
  6.  When done, remove from oven and let cool on pans. The granola will crisp up considerably as it cools and even more after you put it in jars and taste it the next day.

*My macadamia nuts were roasted and salted, so I did not add salt to the recipe. If you don't have any pre-salted nuts in your mixture and they are all raw, I suggest adding a teaspoon or two of salt, to your taste.


I cannot be held responsible for any granola-lovers who ingest too much granola during the making of this recipe. WARNING - This granola is dangerously good. Serve it straight out of the jar as a snack, with some cold raw milk or coconut milk in the morning like "cereal" or even on top of your favorite greek yogurt or ice cream. Or even a fruit parfait!  Use as you would any "regular" granola, but be aware that this granola is substantially more calorie dense, so you can eat way less and still feel just as satisfied ;)

Yum! Enjoy :)


Saturday, September 14, 2013

"Reverse" Nourishing Protein Bars 1.0.


Cocoa butter is one of those ingredients that I've been wanting to flirt with for a while, yet the "high" price tag has always bothered me. Recently, however, some of my blogger friends have been using cocoa butter in their recipes, effectively making me jealous (well, more so curious!), so I jumped in and got some myself.

Cocoa butter is the fat that is extracted from the cocoa bean; and that's why it is white/yellowish in color, and not brown. Good quality cocoa butter should be at least $15/lb, and if it's less than that, you're either getting scammed or you just happened on a good deal. Look for a brand that has good reviews, is raw and organic, and can be used to make both food items and lotions. If you're using your cocoa butter for food applications, like here, you do not want to buy a non-food grade cocoa butter, so be sure to read the description on the product before you buy. I am a fan of Tisano brand organic cocoa butter, which you can find the link to on my ingredients page.

Cocoa butter comes in chunks or wafers (look for the kind made of chunks) and is easily meltable. For best results, store in the fridge before you're ready to work with it. And don't be afraid to try a chunk on it's own. I think it texture is like a bit like really smooth fatty coconut, but instead of coconut flavor, a hint of chocolate flavor instead! That being said, it's super versatile, and you can use it in chocolate sauces, puddings, and in things like these delicious protein bars :) I actually had a little bit left after making my protein bars, so I mashed some ripe bananas into it, added some cocoa powder, a little coconut sugar, ground chia, salt, and vanilla, and Viola! Chocolate pudding!


"Reverse" Nourishing Protein Bars 1.2.
    a spin off my original protein bars
 
    1 cup  whole raw walnuts
    1 cup  whole raw pumpkin seeds
    1/4 cup  ground chia seed
    1/2 cup  organic whole cranberries - mine were from Trader Joes
    1/2 cup  organic unsweetened coconut chips
    1/2 cup  organic sunbutter - mine was homemade :)
    1/2 tsp  unrefined sea salt
    1/2 cup  organic coconut oil, melted
    1-2 Tbsp  organic local wildflower honey
    2-3 tsp  vanilla
    ~  1 cup  organic raw cocoa butter, melted - source
    ~  1 cup  coconut cream concentrate - source
    ~  1/4-1/3 cup  organic coconut oil
    1 dropper  vanilla creme liquid stevia (optional)
    1 Tbsp  vanilla
 
* Please note the ingredients with an "about" sign in front of them are just estimates of amounts. I really just added some cocoa butter, ccc, and coconut oil to a double boiler and melted it together, adding the stevia (for sweetness) and vanilla (for flavor) at the end. I wanted a lot chocolate coating on my protein bars, but feel free to use less if desired.

To make your protein bars:
  1.  Place walnuts, pumpkin seeds, ground chia, cranberries, coconut, sunbutter and salt in a food processor. Pulse to combine.
  2.  In a small sauce pan, melt coconut oil using LOW heat. Remove from heat and add vanilla and maple syrup.
  3.  Add melted oil mixture to the food processor and pulse/grind ingredients until it forms a coarse paste.
  4.  Scoop out the mixture and press down hard into an square bar pan.
  5.  Melt coconut and cocoa butter in a double boiler, add stevia and vanilla last when finally melted. Pour the white mixture on top of the already pressed down bars, it should be liquid. Place into the fridge until chocolate has hardened. To serve, take bars out of fridge for at least 2 minutes. Work a knife around the edges gently, or insert a large knife on side and gently pop out the bar  and place pieces of plastic wrap or small baggies. Freeze for later or munch right away :)


You can even cut them into smaller or easier to bite shapes, like in the second photo. Enjoy this easy + nutritious option on the go!

Wednesday, September 4, 2013

Banana Macadamia Muffins.

 
For the past two weeks I've been on a muffin craze, which has me seriously thinking why I don't make muffins more often. Perhaps the one thing between me and muffin-land is the belief that muffins take longer from start to finish. Well, after making 4 different batches of muffins in the past 2 weeks, I can definitely say, I am so totally wrong! Muffins are easy. Easy easy easy. Which means... More muffins! More muffins! Yay!

You will certainly feel my enthusiasm once you taste these muffins. I orginally found the recipe on Tropical Traditions coconut recipe website (which is great for inspiration), but have never made a recipe from there before. I never make a recipe from someone I don't know, or a blogger I don't respect. I've done it before, and they don't work out. Anyways! So these muffins looked so great, and after looking at the ingredient list I figured they couldn't go wrong, so I whipped up these muffins. I am so glad I did! They are moist, with just the right texture and not overloaded on any one ingredient. My favorite thing is that you can make these in one bowl quite easily, then pop them into the oven and you've got some delicious muffins to share!

I made some minor changes to the recipe, like subbing coconut water vinegar for lemon juice, since it's what I had on hand, and I didn't toast the coconut before adding it to the batter, since that would just be another step. I've also found that the recipe makes 14 muffins, so you'll need more than one muffin tin. Head over to thepaleomom.com for the original recipe!


Banana Macadamia Muffins.
    makes 14 muffins

    2/3 cup  macadamia nuts of choice, chopped
    2/3 cup  unsweetened coconut flakes
    1 cup  blanched almond flour
    ¼ cup  organic coconut flour - source
    3  ripe bananas, peeled and mashed
    2  eggs, room temperature
    1/3 cup  raw creamy honey
    1/3 cup  organic coconut oil, melted and cooled
    ¾ tsp  baking soda
    ½ tsp  unrefined sea salt
    1 tsp  coconut water vinegar or apple cider vinegar or lemon juice
    1 tsp  vanilla extract

To make your muffins:
  1. Preheat your oven to 350 degrees convection. Take out 2 muffin tins and place muffin liners inside.
  2. In a large bowl, add nuts, coconut, flours, baking soda, salt; mix to combine.
  3. To the same bowl, add eggs, bananas, honey, coconut oil, vinegar, vanilla; mix again to combine.
  4. Drop by tablespoons into the muffin tins. Fill 14 muffins full. *This will make 14 full sized muffins as long as there is no batter eaten in the process.
  5. Bake for about 30-35 minutes, rotating the pans at 20 minutes for best results. Let cool in pan for 5-10 minutes. Then move muffins to a cooling rack, which helps to firm up their bottoms. Enjoy!


These muffins can be frozen or refridgerated! I recommend storing them in the fridge, versus the countertop before eating. Be sure to share these with your family and friends, they're quite tasty!


Monday, October 15, 2012

Grain-free Cinnamon Raisin Granola 1.0.


Granola is one of the things that I have missed a lot since giving up grains.  I've tried a few recipes here and there that don't use oats, but the ease of making them and the combination of ingredients just didn't agree with me.  Recipes were either too complicated, or just plain odd.  I wanted a recipe that had the same satisfying crunch that I remember from normal oat-based granola.  Finally I came up with this!  It's so delicious my mom and I ate it up in no time.  Primal, WAPFers, Paleo and ALL people will love this recipe.  It makes either a delicious breakfast, or a great snack on the go.  I also shared this with my sister-in-law who just had twin boys :)  She's a grain-free granola lover and this totally made her day!  I know that you'll love it too!

Grain-free Cinnamon Raisin Granola.
    makes a bunch! :)

    6  egg whites
    1/4 cup  coconut sugar
    3 tsp  cinnamon
    1 tsp  unrefined sea salt
    1/2 cup  sesame seeds
    1/2 cup  chia seeds
    1 cup (each): whole cashews, pistachios, sunflower seeds, pumpkin seeds, coconut chips, walnuts, chopped pecans, sliced almonds, raisins

To make your delicious granola:
  1.  Preheat oven to 400 degrees convection.
  2.  Combine egg whites, sugar, cinnamon and salt.  Whisk until frothy.
  3.  Add all nuts and seeds, mix well with a wooden spoon.
  4.  On two silicone lined baking sheets, spread out the mixture evenly between two pans.
  5.  Bake at 400 for 10 minutes. Stir.  Another 10 minutes. Stir.  Depending on your oven, you may need another 5 minutes.  The first time I made this I didn't, the second time, I did.


This granola keeps very well.  I store mine in an airtight container in the cupboard.  Eat within 2 weeks or store in the fridge.

My favorite way to eat this is in a bowl with freshly sliced banana and some cold raw whole milk.  What a nourishing breakfast!! Enjoy!

Sunday, July 8, 2012

Lactation (Oatmeal) Cookies.

My lovely sister in law just gave birth to TWINS!  I could not be more thrilled.  It is my first time being an Auntie!  Now I have two adorable little boys to love and spoil.  Now that the twins are here, my brother and sister in law have a lot to keep them busy! 


One thing that a lot of new moms struggle with (so I am told) is keeping up their milk supply, sleeping, and keeping their calories up sufficiently to breastfeed.  My friend Heather created the idea of a "lactation cookie" when she had her first child (and she has also had twins recently!).  This is exactly what nutrition is all about, using food to meet your bodies needs.

These lactation cookies are pretty much just like your standard oatmeal raisin cookie. (Men don't worry, you won't lactate if you eat these).  These are called lactation cookies because the main ingredient is oats, and they also have some flaxseed.  Oats are very well known to increase milk supply for mothers, and flax help increase milk supply too.  They also do not have a lot of sugar (you can eat many and not get blood sugar spikes), and the oats and almond flour provide some protein, which is crucial for breastfeeding!  Cookies are also great for new moms because suddenly life revolves around the baby(ies) and finding time to eat can be hard.  Having twins doesn't leave a lot of time on your hands!  Cookies can easily be grabbed and eaten with one hand.  Just make sure they're as nutritious as these!  Beware - I am told husbands like lactation cookies too!  Moms may want to guard them ;)


Lactation Oatmeal Cookies.
    makes over 2 dozen cookies

    2 1/2 cups  toasted rolled gluten-free oats (mine were sprouted and soaked oat groats)
    1 cup  blanched almond flour
    1 Tbsp  organic coconut flour - source
    2 sticks  grass-fed butter, softened - source
    1/2 cup  coconut sugar - source
    2  real eggs
    1 cup  organic unsweetened shredded coconut
    1 cup  organic raisins (can use chocolate chips)
    2 tsp  vanilla
    2 tsp  cinnamon
    1/4 tsp  unrefined sea salt
    2 Tbsp  organic raw honey -- for topping - source
    2 Tbsp  organic raw ground flax seed -- for topping
    2 Tbsp  warm water


To make your cookies:
  1.  To toast your oats, preheat oven to 350 degrees. Pour oats onto a silicone lined a baking sheet and spread evenly. Place in the oven for 5 minutes, stir and return to oven for another 5 minutes or until oats are toasty (be careful not to burn!).
  2.  In a large bowl combine almond flour, coconut flour, sugar, coconut, cinnamon and sea salt. Whisk until combined. Add toasted oats.
  3.  In another large bowl, beat together butter, eggs, and vanilla with an electric mixer.
  4.  Combine the dry into the wet ingredients, incorporating together with a spatula. Add raisins, and mix again.
  5.  On silicone lined baking sheets, use your hands to make balls of the dough and place cookies in rows 4x3.  Place sheets into the fridge to set for about 30 minutes.  Then pull from fridge and bake in oven for about 12 minutes until golden brown.
  6.  Make your topping in a small dish combine honey, warm water and ground flax.  Mix together with a pastry brush. Let cookies cool for about 10 minutes.  When cookies are warm, but not hot, brush the flax-honey mixture on top of the cookies.  Remove cookies from pan with a spatula, transfer to a wire rack, and place in the fridge to set the topping.
  7.  After about 10 minutes in the fridge, cookies are ready to eat!


Do the new moms in your life a favor - bring them these cookies :)


Thursday, March 1, 2012

Grain-free Almond Banana Waffles.


I have a new version of grain-free waffles to share!!  Those of you who have read my site for a while will remember my first grain-free waffles.  They taste really great, but these new waffles taste even better in my opinion.  (How is that possible?!)  One of the reasons I like this recipe so much is because they taste great plain, which is atypical of many grain-free versions!!  I also like how this grain-free waffle does not rely on coconut flour or eggs.  I love my other grain-free waffles, but they more dense compared to regular waffles and coconut flour is very filling.  They are, however, GAPS friendly.  Overall, this recipe has a bit more natural sweetness (from the banana) and isn't so dense.  The texture is FAB!  This recipe is also good for those who either don't care for coconut flour or just want a real food waffle recipe that doesn't use so many eggs!

I created this recipe on a whim one morning as I was whipping up some of my original grain-free waffles.  I wanted a recipe that did not use coconut flour.  And I wanted it to be easy!  So these waffles were born :) And I can tell you that they're here to stay. 

Grain-free Almond Banana Waffles.
    makes about 2 large Belgian waffles

    3 real eggs
    1 cup  blanched almond flour - source
    1/2 cup  organic shredded coconut - source
    2 Tbsp  almond butter - source
    4 Tbsp  butter, softened or melted - source
    1 ripe banana, mashed
    1 tsp  cinnamon - source
    1 tsp  vanilla - source

To make your waffles:
  1.  Turn on your waffle maker to medium heat. Spray it with olive oil - you don't want it to stick!
  2.  In a small bowl, crack eggs and beat with a whisk by hand until glossy yellow.
  3.  In a medium bowl, mix dry ingredients together. Make sure your coconut is finely shredded, and not in the form of flakes or chips.
  4.  Mix eggs and melted butter (but make sure butter is not boiling hot!) together, and whisk this into the bowl with the dry mixture.  **Add water to thin to right consistency, not too runny and not too thick (this step is optional, do if needed).
  4.  Pour batter into your waffle maker. Mine took over a whole cup of batter to fill and make one waffle. Depending on your waffle maker, your waffle yeild may vary, requiring less or more batter, or requiring more or less heat.
  5.  When done (mine beeps!), gently remove to a hot sheet pan in a 200 degree oven to keep warm as the other waffles are made.  Try using two forks or a fork and spatula for this step!
  6.  Enjoy your waffles!  Top them with BUTTER, yogurt, real maple syrup, peanut butter or fresh fruit.  And they're so good you can even eat them plain!!


I must admit, one of the best parts about these waffles is how great they are later, whether they're cold and left out for a few hours after making, or after they are frozen (for weeks) and then are thawed out.  And PS, they make great waffle sandwiches.  More on that in the next post!!

Happy waffling ;)
And Happy March!

Monday, August 1, 2011

Grain-free Zucchini Bread


Every once and a while I find a recipe that just tastes SO good! A recipe that you just can not stop eating. It happened especially with my original banana cake, nourishing protein bars, chocolate chunk bark, the best cornbread, gluten-free gingerbread men, and now it's happening again. I'll admit, while this phenomenon of finding an excellent recipe is preferable, it is a problem. Recipes that are just too good are a problem simply because it's extremely tempting to eat the final product in one sitting. Eating a whole batch of baked goods in one sitting (while it may be delicious) is not recommended for good digestion or my girl-ish figure. May this be your warning that this grain-free zucchini bread is quite good :)

Great texture!

Summer means zucchini, zucchini means zucchini bread, and zucchini bread means happy stomach. But only if you're baking with real fresh eggs, health fats and simple ingredients. This bread has all of that! For lack of a better word (augh here it comes) this bread is moist, sweet, and nutritious. Anyone else not like using the word "moist"? Bananas, eggs, and zucchini make the bread moist/soft/creamy; the banana, coconut sugar and maple syrup make the bread sweet (I am going to cut back next time); and the zucchini, eggs, and cinnamon make this bread super nutritious.


Grain-free Zucchini Bread
     Makes one standard loaf 

     4  real eggs
     38 g  coconut sugar (palm sugar)
     4.1 oz  maple syrup (I use grade B)  
     70 g  organic coconut oil - softened
      2 g  cinnamon
      4 g  vanilla
      2 g  sea salt
     88 g  organic coconut flour
     81 g  natural almond flour (unblanched - I use Honeyville)
     35 g  arrowroot flour
     4 g  baking powder
     50 g  organic coconut flakes
     176 g  ripe banana (2 medium)
     12.2 oz  organic farmer's market zucchini - shredded (weighed after draining)
     80 g  organic raisins
     chopped walnuts for topping

To make your zucchini bread:
  1.  Preheat oven to 350 degrees convection.
  2.  In your food processor, grate zucchini. Turn zucchini into a tea towel and squeeze out the natural water of the zucchini. Let sit while preparing other ingredients, and squeeze hard once more before adding to bowl.
  3.  Place first three ingredients in a small bowl and whisk vigorously together by hand one minute.
  4.  To that bowl, add next four ingredients and whisk until combined. Small lumps are ok.
  5.  To the same bowl, add next six ingredients and mash together.
  6.   Finally, fold in zucchini and raisins. Pour batter into a greased (with old butter wrappers or coconut oil) standard loaf pan. Top with ground walnuts if desired.
  7.   Bake in oven until bread rises, cracks slightly on top, walnuts are browned, sides have pulled away from pan and a stick inserted in the middle comes out clean; about an hour.


These measurements are given in grams or ounces, and I do not know the cup or metric conversions. I have found that baking with a food scale, not only is easier, but takes much less time. After my experience baking and in food service, it's hard for me to use measuring utensils, as I am used to "scaling out" every ingredient.

Yummy walnut topping!

Also, as I mentioned earlier, this bread is very sweet. I included my original measurements in this recipe, but next time I know I will use less coconut sugar and maple syrup. I enjoy the sweetness, but it makes this bread just too good and a bit too sweet for my taste. Enjoy this grain-free version of zucchini bread :) I sure did!

Tuesday, June 28, 2011

Chocolate Peanut Butter "No Bake" Bars.


Making food for other people gives me joy. That's one reason why I love getting creative in the kitchen. Throwing ingredients together on a whim is just plain fun! Making food for other people as a surprise is EVEN better. The look on their faces says it all.


It was a rainy Friday afternoon, so what could I do? I had to make something. Recently I have recognized my extreme urge to be in the kitchen and baking something whenever it rains. I mentioned this breifly to my mother and she said that when my brother and I were children she always used to save her baking day for when it would rain, that way we wouldn't miss out on the good weather and there would also be something fun to do when it rained and we had to be inside. After I heard this, my feelings were finally explained! It all made perfect sense :) So now whenever it rains I know I will want to bake, and it happens every time. I better not ever live in a very very rainy place!

Look at the texture - you can see the coconut!!

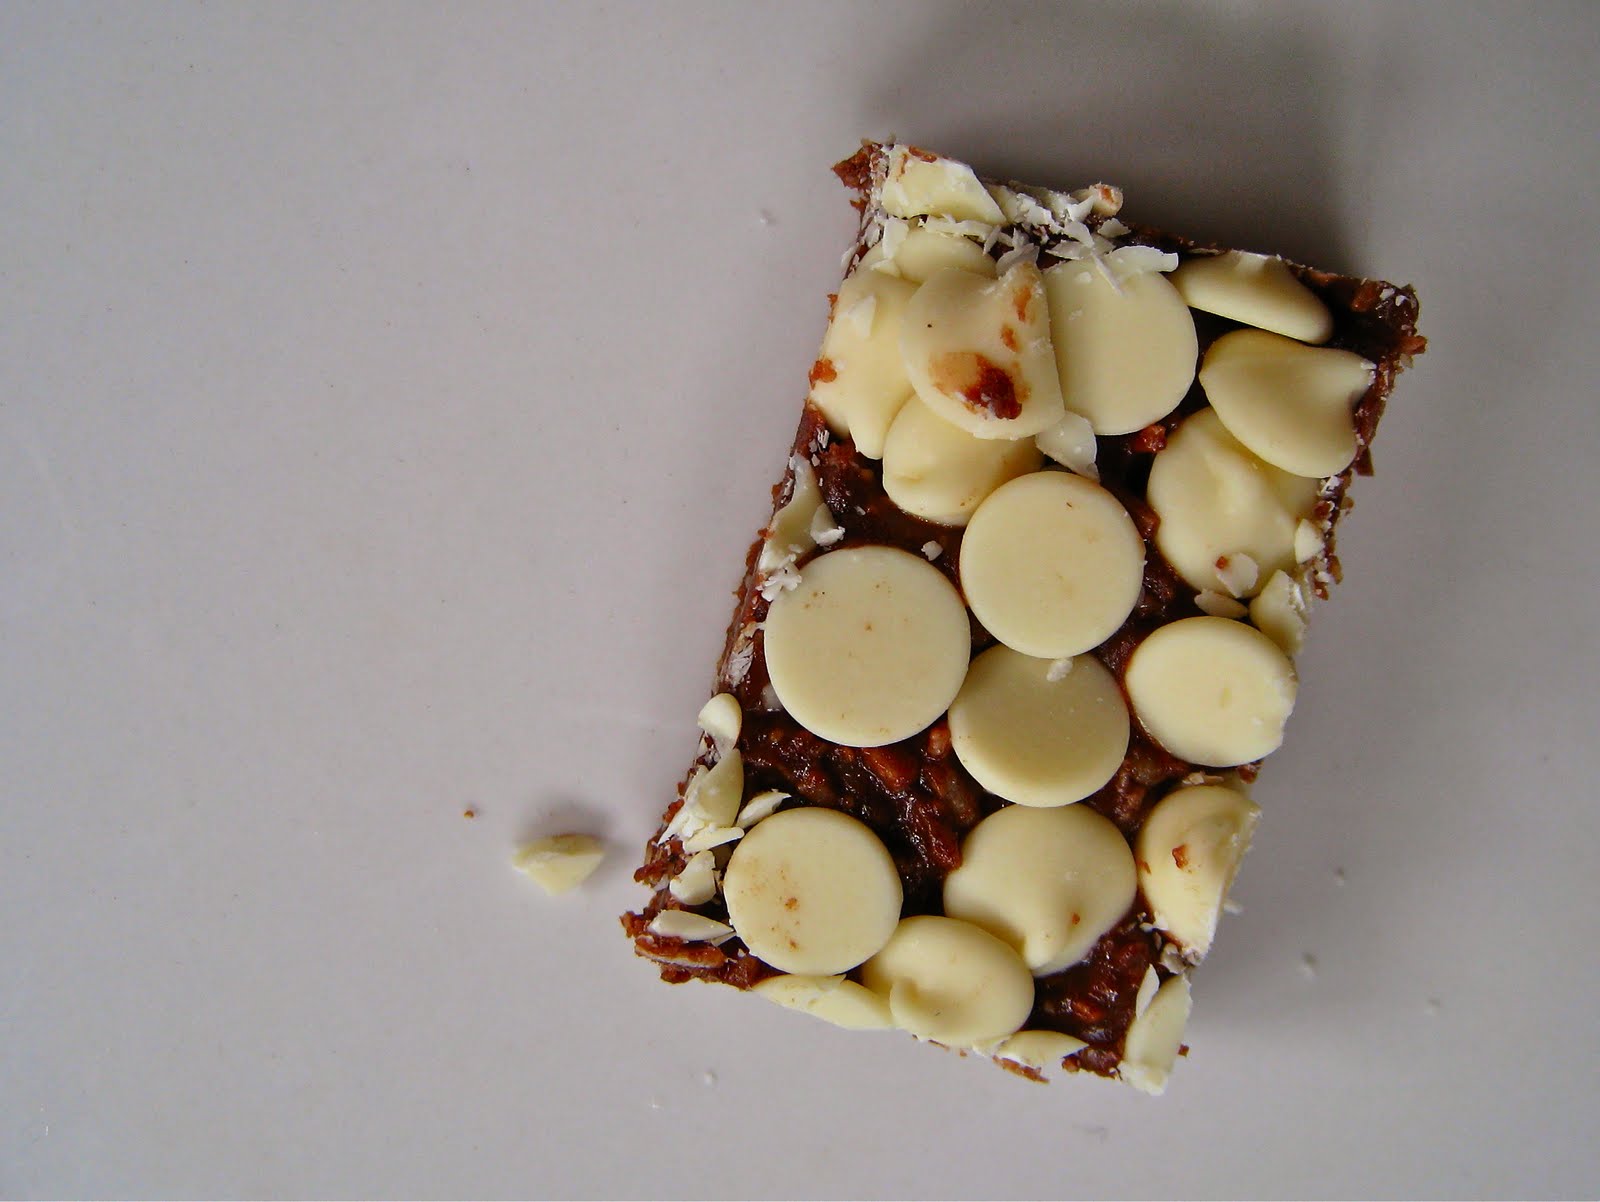
When I placed these bars on the counter, everyone inhaled them and soon they were gone :) One lady said to me "Meagan, these are a winner!" That just warmed my heart! These bars are mostly made up of peanut butter, chocolate and coconut. Great combination? YES! They remind me of no bake cookies, but they are actually grain-free and don't have any oats in them.

Chocolate Peanut Butter "No Bake" Bars
    makes one 8x8 pan   

    1 cup organic coconut flakes
    1 cup chopped walnuts
    1/4 cup organic raw honey
    1/2 cup chocolate chips or any type of chocolate
    3/4 cup peanut butter
    4 oz butter (half stick)
    topping of choice (mine were Ghirardelli white chocolate chips)

To make your bars:
1.  In a small bowl, mix coconut flakes, honey and chopped walnuts together.
2.  In a double boiler melt chocolate chips, remove from heat, add butter and mix well. Lastly add peanut butter and mix well again.
3.  Pour the coconut flake mixture into the bowl with the melted chocolate and stir until combined.
4.  In an 8x8 pan, plop mixture into the middle and spread evenly with a spatula.
5.  Press white chocolate chips or topping of choice into the "dough."
6.  Freeze for about 10-20 minutes or until set, then store in the fridge. Cut into small squares and serve. Freeze any extras (doubt there will be any ;) or keep in fridge until gone. But it won't take long!!


YUM YUM YUM
Enjoy :D

Sunday, June 26, 2011

Chocolate Date Bars


As promised in my last post, here is the triangle mystery bar. These are Chocolate Date Bars! I used a triangle scone pan to get their interesting shape, but I think they are actually better suited to be scooped with a cookie scoop and rolled into tiny bite-sized balls!


Chocolate Date Bars

    1 small (6-7") baked plantain
    2 T cocoa powder
    1 T maple butter
    3/4 cup walnuts
    4 medjool dates - pitted
    1/4 cup organic coconut flakes
    1/2 tsp sea salt
    cacoa nibs - as topping

To make your bars:
1.  Place dates, walnuts, coconut flakes in food processor and process until it is a course mixture.
2.  Add cocoa powder, maple butter, sea salt and the baked plantain and process until the mixture comes together and is cohesive.
3.  Pat down into desired type of pan (I used a scone pan!) or scoop out little balls of the "dough" of the processor onto a cookie sheet.
4. Press cacao nibs onto the top or roll balls in cocoa nibs.
5. Freeze until set. Eat and enjoy!

I would highly suggest keeping these in the freezer or the refrigerator before consuming, their texture is rather soft and tends to get even more soft if left out at room temperature.

Yumm, cacoa nibs :D

Since I know that I will probably get asked this, can you substitute a banana for the plantain? The answer is yes and no. Both types of "fruit" are related, but bananas are considerably LESS starchy and are more wet in consistency than a plantain. If you plan to use bananas either dehydrate the final product for a few hours, or you can add some coconut flour to the mix to help hold everything together.


P.S. - These taste like brownies! :D

Friday, June 24, 2011

Green Fig Bars


As you probably have already noticed, I love to make raw nut based "protein" bars. Whenever I go to an event, or want to bake something healthy for someone that is easy and does not take much time, I turn to my protein bar recipes. Remember my Sunbutter Chocolate Raisin Protein bars? And my Original Nourishing Protein bar recipe, look here and here? They are always a hit! I am always asked for the recipe. I am definitely a kitchen experimentor, I am definitely creative in the kitchen and so as I discover new ingredients (spirulina, coconut cream, zante currants) each different type of bar takes on a slightly different texture and flavor. The one thing I never change? Chocolate :)

This bar is all about figs! Have you ever tried a dried organic turkish fig? They are fantastic! After biting through the slightly tough outer layer, there are myriads of little tiny gooey fig seeds inside. I really enjoy biting off the tops and then stuffing them with other ingredients like homemade peanut butter and creamy coconut cream. They make the perfect snack! Figs are the star in this recipe, since I used some figs for the base and also some yummy fig jam. The bars look green because I used some spirulina. After seeing it on so many food blogs and then researching it myself, I decided to buy some at my local health food store and give it a try. I am surprised how it smells like algae - that was something I did not expect... but since it IS algae I do not really know what I was expecting it to smell like! The spirulina gives the bar a nutritional boost and a lovely green color. But don't worry, you can't taste any funny algae-like flavor in this bar.


Green Fig Bars

Base:
    4 large medjool dates - pitted
    1/3 cup organic raisins
    4 organic turkish figs
    1/2 cup roasted and salted macadamia nuts
    1 T fig jam - I used St. Dalfour, since it has no cane sugar
    1 T organic coconut oil
    1 T organic chia seeds
    1/2 tsp spirulina
    1 tsp vietnamese cinnamon (it's stronger than grocery store cinnamon and more flavorful)
    1/2 tsp sea salt

Chocolate topping (choose either):
    Handful or two of 100% baking chips or unsweetened chocolate - melted
    1/4-1/2 cup raw cacao powder + 1/4-1/2 cup coconut cream - melted and whisked together

To make your bars:
1.  In your food processor, blend dates, raisins, figs and nuts, until it reaches a coarsely ground texture. Pulse the mixture for a few times at the beginning to get it started.
2.  Add jam, oil, chia seeds, spirulina, cinnamon and salt to the food processor and process until combined. Mixture will be on the "wet" side.
3.  Using a square muffin pan (mine looks like this), place little bit of the bar mixture into each spot and push down with your fingers (helps to keep placing your fingers in a bowl of cold water).
4.  Pour type of melted chocolate of choice on top of each fig bar. Place in the freezer until set. Carefully remove from pan and store in the refrigerator. I wrap mine individually with plastic wrap.

These make a great snack! If you do not particularly like figs, try using raspberry or blueberry jam and use more dates instead of figs. Or you could just make some Sunbutter Chocolate Raisin Protein bars or Original Nourishing Proteins bars. They are all crowd pleasers, and no one will know that they are eating a healthy treat that is grain-free, full of both protein and fat which will give them lasting energy.

Enjoy your homemade protein / energy / chocolate green fig bars :)

Ps. Wondering what that triangle shaped treat is in the picture? You'll have to wait until next post :)