Showing posts with label egg. Show all posts

Monday, December 22, 2014

Single Serving Protein Pancake.

FLUFFY

Hey everyone :) I know it's been a while, but this blog is no longer a tip top priority! Med school has me busy busy, along with all the typical life stuff that has to happen. Talk about a balancing act!

Today I bring you a recipe for a single serving pancake. I've been eyeing pancake recipes lately, especially the "single lady" ones, but I was never quite happy with the ingredients that were used, so I chose my own.

Banana slices hiding on the bottom, with greek yogurt and cooked strawberries and raspberries.

This pancake is everything I could ever want in a pancake :) It's fluffy, has a nice nutty flavor from the flaxseed, it's full of protein, and isn't too sweet, so it's easy to top it with things like a touch of maple syrup, butter or some yummy berries and yogurt.

The secret to success in this recipe is measuring the ingredients, and also using a non-stick pan. I know that non-stick pans are not at all the best choice health-wise, but there's really no alternative when you want to make some awesome pancakes.


Single Serving Protein Pancake.
    serves one or two

    15 grams / one serving of brown rice protein powder - I use Nutribiotic plain, you could use brown rice flour here also
    50 grams / ~1/2 one normal sized banana, mashed
    8 grams / 1 heaping Tbsp  ground brown flaxseed
    3 grams / 1 scant Tbsp  ground chia seed
    12 grams / ~1 tsp  runny honey
    2 eggs / about 100 grams  give or take depending on your egg size
    1 gram  baking soda (this is a very small amount)
    15 drops  vanilla extract (I used a dropper)
    pinch each: salt, ground cardamom

To make your pancake:
  1)  Combine all ingredients into a bowl and whisk well, scraping off the sides with a spatula and getting everything incorporated. The only lumps present should be a little bit of mashed banana. The batter will appear thin, and shiny from the eggs, resist adding more dry ingredients.
  2)  Preheat your nonstick pan on medium-low heat (#4 on my stove, point at small hand on the 7 in 7 o'clock).
  3)  Pour batter onto the pan. Do two batches, or pour it all in for one pancake (this is what I do).  Cook on one side for about 5 minutes. Pancake is ready when there are some bubbles on top and you can see the edges are beginning to set. Work your rubber spatual around the edges of the pancake and also the bottom. One pancake requires one massive or two normal sized spatulas to flip it.
  4)  Flip pancake and wait another 1-2 minutes.
  5)  Remove pancake to a plate with banana slices already on it. Place pancake on top of sliced bananas. Drizzle with maple syrup or whatever is desired. I like to put some butter on top, berries and homemade yogurt. ENJOY!

My first attempt; not quite right but topped with yum!


Because someone will want the stats ;) Thanks to myfitnesspal.com

I hope you are staying both warm and well this holiday season :) Love to all my readers :)
Merry Christmas!


PS - And no, this recipe will not work if you substitute the egg for something else.

Saturday, December 21, 2013

Grain-free Granola 2.0.


About a year ago I made some delicious grain-free cinnamon raisin granola for the first time. It was seriously delicious. So recently I went to go make some, and the search bar in my blog wasn't working... anyone else having this problem?!  So I ended up wingining it, trying to remember just what I did, and it came out great!  Even better than the first version if I do say so myself.


This grain-free granola is crunchy, toasty, and packed full of flavor!  Everyone in your family will love it, and they will all have a hard time believing that yeah, there are no oats in here!  You could even make a batch of this granola, put it in cute little jars, and give it away as Christmas gifts!  But everyone just might hound you for the recipe ;)  No worries, feel free to share!

PS - If cinnamon and raisins aren't your thing, try another spice combo, like cranberries and cardamom, or nutmeg and dried blueberries, or apricots and cloves! Feel free to switch it up to your liking.

These were filled to the tippy tippy top, BUT I ate some ;)

Grain-free Granola 2.0.
    makes 2 gallon sized mason jars full (even with extensive recipe sampling ;)
    * these ratios are generalized, really just throw all your favorite nuts combination in a large bowl; for instance, I didn't use cashews or peanuts, but feel free to use these if you wish

1/2 cup each:
    sesame seeds, sunflower seeds, whole macadamia nuts*, whole pecans, whole walnuts
1 cup each:
    pumpkin seeds, whole pecans, sliced almonds, raisins
1 cup each:
    ground macadamia nuts*, ground pistachios, ground walnuts
1-2 cups  organic coconut "chips" (largely flaked coconut)
1 cup  organic shredded coconut (small little shreds of coconut, not traditional sized flakes)
2  large eggs
1 - 2 Tbsp  cinnamon
1/3-1/2 cup  brown rice syrup
~1/4 cup  runny honey

To make your yummy granola:
  1.  Preheat oven to 375 degrees; mine was non-convection.
  2.  Combine nuts, coconuts, cinnamon, brown rice syrup, and honey.  Mix together. Add in both eggs and stir well with a wooden spoon.
  4.  On two parchment paper lined baking sheets, spread the mixture evenly between two pans.
  5.  Bake at 375 for 10-15 minutes. Watch it, uneven ovens may burn.  Stir well.  Bake another 10 minutes or so.  Stir.  Depending on your oven, you may need another a longer or shorter time. For me, it varies a little on every batch.
  6.  When done, remove from oven and let cool on pans. The granola will crisp up considerably as it cools and even more after you put it in jars and taste it the next day.

*My macadamia nuts were roasted and salted, so I did not add salt to the recipe. If you don't have any pre-salted nuts in your mixture and they are all raw, I suggest adding a teaspoon or two of salt, to your taste.


I cannot be held responsible for any granola-lovers who ingest too much granola during the making of this recipe. WARNING - This granola is dangerously good. Serve it straight out of the jar as a snack, with some cold raw milk or coconut milk in the morning like "cereal" or even on top of your favorite greek yogurt or ice cream. Or even a fruit parfait!  Use as you would any "regular" granola, but be aware that this granola is substantially more calorie dense, so you can eat way less and still feel just as satisfied ;)

Yum! Enjoy :)


Thursday, December 19, 2013

Grain-free "Recovery" Banana Bread.


One of my lovely family members just recently had surgery and an overnight hospital stay [everything is going well, thanks :)], and so I thought I would share this recipe, as it has been great for her recovery.

Let me explain...

My loved one recently had to have surgery. Post-operation she was having trouble swallowing because she felt so sore. She only wanted cold, soft things, and was also barely able to eat due to the nausea caused by pain meds. Turns out that I had just made some grain-free banana bread that week, in an endeavor to start recipe development for my own grain-free banana bread recipe that I would love just as much my grain-free pumpkin bread recipe. Well, the recipe was not perfect, and was very soft and moist (ie, the texture isn't quite there yet, and therefore not bloggable), but it was still had great flavor and tasted delicious, so I had kept it and was planning on nibbling on it throughout the week.


This "recipe" failure ended up being a blessing, as it's smooth and soft texture was very easy to swollow for my patient, but also gave her the feeling that she was "eating something solid." Win win!

For this recipe I used a smaller loaf pan, not the standard size. It was a medium sized Pyrex glass loaf pan which probably measures 4" x 8" and is tall, not wide, like standard loaf pans. It's very easy to whip up, and is a great idea to bring to the hospital to help your loved one recover! It sets up best in the fridge. So after the bread cools, turn it out, and place it in the fridge.

Grain-free "Recovery" Banana Bread.
    makes one loaf pan, size above

    2  very ripe bananas (or 3 small)
    1 cup  almond flour 
    1/3 cup  coconut flour
    2  medium/large eggs
    1/4 cup runny honey
    1/3 cup  coconut oil - mine was not melted
    3/4 cup  coconut milk - mine is always unsweetened
    1 Tbsp raw apple cider vinegar
    1 tsp  baking soda
    1-2 tsp  cinnamon or more if desired
    1.5 tsp vanilla

To make your recovery bread:
  1)  Preheat oven to 375 degrees; mine is non-convection.
  2)  Put ingredients in order listed into Vitamix or blender. Blend. Pour into coconut oil greased loaf pan (mine is a glass loaf pan).
  3)  Bake for over 1 hour. LET COOL. Store in fridge. Bread will be moist but will firm up in the fridge.
  4)  Eat with a spoon, or slice it thick. Spread with your favorite nut or coconut butter, for even more nutrition!


Enjoy this bread! I hope it will help your recovering family members, as it did mine, whether they are sick at home or are recovering from major surgery! In fact, we ate up this banana bread so fast because it was so tasty, and I am baking another one right now!

xoxo :)


P.S. I am home for Christmas break. This in the medical school world are going very well. I am tired, but loving my classes and assignments. Stay tuned for some delicious recipes that I can hopefully share with you during the time I am home. As always, thanks for continue to read my blog even though things are slow now-a-days!


Thursday, July 25, 2013

Triple Vanilla Ice Cream.


Vanilla ice cream is definitely one of  my favorite flavor of ice cream. I like to try sample at every ice cream shop I visit, to see if I have found the vanilla ice cream. So far my search has found some pretty good vanillas, and some pretty mediocre vanilla ice creams. By far, the standard of my comparison has been the storebought super premium ice cream, Double Rainbow. Since trying this ice cream, no other vanilla I've tried has stacked up to it's incredibly creamy, smooth, bright and comforting vanilla flavor.


So when I whipped up this ice cream last weekend, I thought that it would come out very well, but I didn't know how well. Even before pouring this ice cream into the ice cream maker to freeze, I knew this batch was special. It tastes like a dream, scoops like a dream, and melts like a dream (unlike some homemade ice creams which just seem to melt right away, or to never melt at all). I have to admit, it certainly rivals the amazing taste of Double rainbow, which is a feat in and of itself. I will definitely be making more vanilla ice cream exactly like this. Below is a photo from my brother's birthday celebration.


Since the vanilla sugar and cream are simmered together (in order to dissolve the sugar), the final product as a slight caramel taste! No doubt if you simmered the cream and sugar longer, you could easy make a dulche de leche version.


Triple Vanilla Ice Cream.
    makes two quarts

    6 oz  vanilla sugar - source or make your own
    4 cups (1 quart)  raw cow's milk cream
    1  vanilla bean
    1 Tbsp  vanilla extract
    1 Tbsp  coconut flour - source
    5  egg yolks
    1/2 tsp  unrefined sea salt

To make your ice cream:
  1. In a small sauce pan, combine sugar and 1 cup cream. Turn on high heat, bring almost to a boil, when first bubbles appear at sides reduce heat to simmer, and simmer, stirring frequently, for about 5-10 minutes. Mixture will thicken, coat the back of a spoon, and be caramel-like when ready. Remove from heat and allow to cool (this may take a while).
  2. In a separate bowl, combine coconut flour, salt, vanilla bean flecks, and egg yolks. Mix until yellow and thick. Add vanilla extract. Whisk in remaining 3 cups cream. Slowly add the cooled vanilla sugar mixture, whisking constantly.
  3. Add to your ice cream maker, and freeze according to manufacturers instructions. Mine churned for about 25 minutes. This ice cream comes out perfectly straight from the ice cream maker. Freeze overnight before scooping for hard ice cream. No need to remove ice cream from freezer for 10 minutes before serving. It's scoopable as is!
  4. This ice cream is so delicious, serve with your favorite brownies, chocolate sauce, nuts or whipped cream. Or you can serve along mint cake, like I did here! Enjoy :)


Want some cake with your ice cream? Try my grain-free chocolate cake! It's super easy, just make sure to follow instructions and to both grease and flour the pan.

Other ice creams I've made:
- Original vanilla ice cream - my first attempt, these basic proportions are what I use as a "template" for making all my other ice cream recipes
- French vanilla ice cream
- Chocolate ice cream
- Chocolate peanut butter ice cream

Have a lovely summer day!


Friday, July 12, 2013

Grain-free Sweet Potato French Toast.


Growing up I have a lot of fond memories of my mom's cooking.  On the weekends, she would make a special breakfast for us, and my brother and I would get to choose between either pancakes, french toast, or waffles.  French toast was my brother's particular favorite.  It always came out the same, (tasty), and it was the faster of the three options for my mother to prepare, which always meant breakfast would be sooner!


To be honest I haven't had regular french toast in a long time. Last summer I spontaneously took some left over sweet potato, combined it with some eggs and warm spices, and this recipe was born! I didn't write it down, however, and this last year of medical school has stopped virtually all my recipe development time. Since I am free this summer, I have more time, and so one morning last week I spent time in the kitchen whipping this up! It feels good to be cooking again :)

If you're paleo, primal, grain-free or just wish to avoid unecessary carbs, this recipe is for you. It doesn't actually contain any bread, just some delicious orange sweet potatoes. The eggs and warm spices combine to make the french-toast taste. The texture isn't like bread, but it's moist and melts in your mouth!! Yum!


Grain-free Sweet Potato French Toast.
    makes one 9x13 pan

    1 Tbsp  cinnamon
    1/2 tsp  fresh ground nutmeg
    3 dashes  ground cloves
    1/4 tsp  black pepper
    1/2 tsp  unrefined sea salt
    2 tsp  vanilla extract
    2 Tbsp  raw honey - source
    2 Tbsp  organic coconut oil, melted - source
    1/2 cup  organic raw milk
    6  happy pastured eggs

    3 large sweet potatoes, washed and peeled

    Toppings: (optional, choose your favorites!)
      pecans
      sunflower seeds
      coconut chips
      maple-cinnamon sugar - source

To make your french toast:
  1.  Wash and peel your sweet potatoes. Cut lengthwise in half, then cut each half into half moon shapes about a half inch thick. Arrange on a cookie sheet and roast at 425 degrees until just fork tender.
  2. In a large bowl, combine all spices, honey, oil, milk and eggs. Be sure coconut oil is not hot. Whisk until well combined and there are no lumps of spices or egg.
  3. Grease a 9x13 glass casserole dish with about 1 tablespoon of butter.
  4. Arrange pre-baked sweet potatoes on the bottom of the dish. Pour egg and spice mixture on top. Sprinkle with toppings of choice! I used pecans, sunflower seeds, coconut chips and a maple sugar-cinnamon mixture. Other good choices would be whole walnuts, shredded coconut, ground pecans, and raisins.
  5. Bake at 400 degrees convection, covered in foil, for a total of 45 minutes. At 30 minutes check to see how it's doing. For the last 5 minutes, remove foil. Let cool to set before serving warm with plain yogurt, thick greek yogurt or maple syrup. This will freeze very well and is also great for the next few days straight from the fridge. Enjoy!


This recipe would be a great brunch option, since you can easily make the sweet potatoes and egg mixture the day before and store it in the fridge. Then in the morning before guests arrive, grease the baking dish, add the sweet potatoes, pour in the egg mixture, add the toppings, and in an hour you'll have some delicious paleo french toast baked, cooled, and ready to be devoured! I'd serve it topped with your favorite greek yogurt and fresh blueberries or strawberries, with sizzling bacon on the side, and warm green tea in your mug!

I'd eat this up within a week after you make it, but then again I don't think that will be a problem :)

Sunday, March 3, 2013

Meat + Egg Protein Bites.

I am finding that I have very little time for cooking now that I am in medical school, and I've been searching for easier and easier ways of eating home cooked real food that doesn't take a lot of time, or create a lot of dishes, which I will inevitably have to do myself.


One evening as an experiment (and since I was short on time), I took some grass-fed ground beef which I had defrosted, stuffed it into a mini muffin tin, and baked it. Turns out my experiment worked very well, and I decided to do it on a larger scale.  This time I used a normal sized muffin tin and cracked an egg on top - a definite success!

This is the what the underside looks like :)

This recipe is so easy because all you have to do is take your meat of choice, section it into a muffin tin, press down and bake! In less than a half hour you have easy bites of protein which can be conveniently topped on a salad, warmed with a side of veggies, or eaten quick and on the go. I seasoned mine with only a little bit of salt, but feel free to sprinkle on top whatever spice you fancy. Cheese and ketchup were my other experiments, which turned out great too! Please note - do not grease the muffin tins, there is enough fat in the meat and there will be no sticking. The meat actually shrinks away from the sides and will look like it's "swimming" in fat when you take them out of the oven. I really like this because you can so easily lift out each little bite / piece and place on a paper towel, and then discard (or save) the meat fat / tallow that has rendered out of the meat!


Meat + Egg Protein Bites.
    makes 1 dozen

    1 lb  grass-fed ground meat - I used pet burger 
    12  pastured happy eggs
    sprinkle unrefined sea salt
    spices - optional
    ketchup - optional
    cheese - optional

To make your protein bites:
  1.  Evenly section out beef between the holes of a normal sized muffin pan.
  2.  Press down with your fingers. Add optional spices or cheese.
  3.  Crack an egg on top. Sprinkle each with unrefined sea salt
  4.  Bake in a preheated oven at 350 degrees (don't believe mine is convection), for 25-30 minutes. Bites will be ready when eggs are cooked through. Remove from oven and promptly grab bites out of the tin with tongs, placing then on a paper towel drain. When cool, store in a glass container in the fridge for grabbing whenever you need some protein :) ENJOY!


Even though this idea is quite simple, they taste so good. It would be possible to make this with ground chicken, turkey or bison, but I would suggest greasing the sides of each muffin cup with olive oil first; these meats have very low fat content and therefore may stick.

 I hope you find these a useful addition to your food plans for busy weeks :)

Monday, January 28, 2013

Grain-free Lemon Poppy Seed Coconut Flour Cake.


It's a rather odd sounding title, isn't it?  This recipe was a spin off my primal gingerbread cake, as well as my grain-free waffle recipe.  I wanted a simple coconut flour-based grain-free baked good that I could whip up fast and was super easy.  So I experimented, and made this!  It was delicious on the first go! This cake has just the right amount of cakey-ness to satisfy my (occasional) bread cravings, but without being loaded with sugar or refined gluten-free grains.  It is also nut-free and Paleo!  My first version was a spiced flavor with lots of ginger and a touch of molasses, and my second (this version) was lemon poppy seed, but feel free to change spices and flavor extracts for a different taste.  I know I will be sharing several different versions as time allows me :)  This bread bakes thin in the pan, so I used two squares and spread some grass-fed butter in between both sides, to make little "sandwich" looking treats.  The whole batch lasted me nearly two weeks, and I was very happy to have something interesting (besides veggies) to nibble on at lunch time :)  It's also a great way to add some more coconut oil and grass-fed butter to your diet, which are rich in good for you saturated fats and fat-soluble activators, which our bodies, brains, and hearts desperately need!


Grain-free Lemon Poppy Seed Coconut Flour Cake.
    makes one 9x13 pan

    1/3 cup  organic coconut oil - source
    2/3 cup  warm water
    6  happy eggs
    1/3 cup + 2 Tbsp (or 1/3 cup heaping)  organic coconut flour - source
    1/4 cup  honey  - mine was wildflower runny honey
    1 tsp  baking soda
    1/2 tsp  organic lemon extract
    2 tsp  poppy seeds
    zest of one organic lemon

To make your lemon poppy cake:
   1.  Place coconut oil and warm water in a medium sized bowl, whisk vigorously for about 2 minutes or until white, glossy and homogenous (and no longer clumpy).
   2.  To the same bowl, add flour, and remaining ingredients. Whisk until incorporated.
   3.  Pour batter into a greased 9x13 pan (I used coconut oil), and bake at 350 degrees non-convection for exactly 20 minutes.
   4.  Pull pan from the oven and place on a baking rack to cool. Transfer to the fridge to cool some more. Cut into squares when cool, and spread with your favorite filling. I used grass-fed butter! Yum! Sun-butter or cashew butter would go nicely with these too.


Spread something fun inside and enjoy :) PS-- Don't you love my plates! I found them last year at Sur La Table, and I absolutely love them! I'm so happy they survived the trek from Southern California to Seattle!


Monday, December 31, 2012

Grain-free Gingerbread.

 
Holiday baking is always a lot of fun for me.  Since I just completed my undergraduate degree, and have now begun medical school, I don't exactly have a lot of time to bake!  I've been home for Christmas for the past few weeks, and it's been really nice to be "on vacation," and have time to read books, bake, workout, and sleep at my leisure!

When discussing what we wanted to make during the time I am home, as well as for our family Christmas celebrations, my mom suggested we make a gingerbread cake, since my gingerbread men cookies are just too delicious!  (And hooow long has it been since there's been gingerbread in the house??  Apparently years!!)  You see, gingerbread used to be a favorite of mine, but today I realized I haven't had gingerbread cake in probably about 10 years!  What a shock!

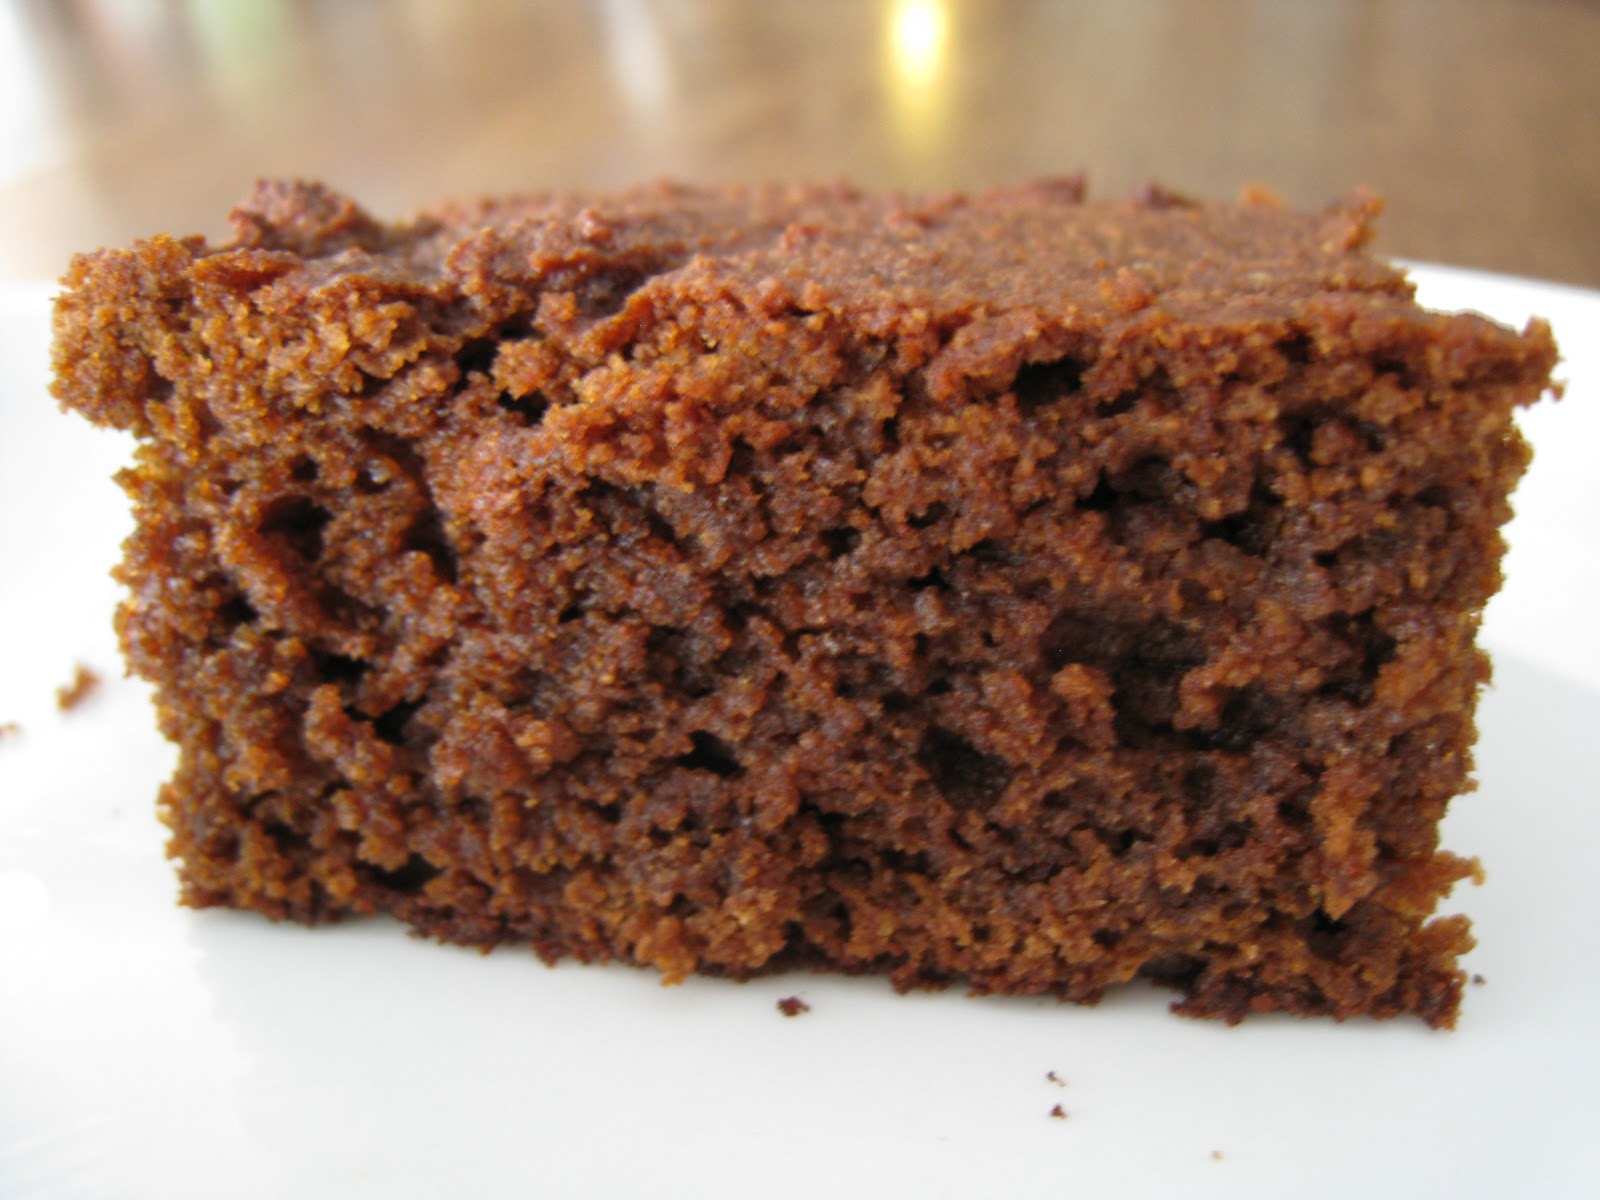
So today, I got out my bowl, my favorite spatula, a bunch of yummy molasses and baked this goodness.  My family and I love the cakey texture of this gingerbread, the rich flavor of the molasses, and the punch of the ginger.  And it's not overly sweet, which is what I prefer!


Grain-free Gingerbread Cake.
    makes one 9x13 pan

    1/2 cup  organic palm oil shortening - source
    1/4 cup  homemade vanilla sugar - or any sugar of choice
    4  REAL eggs
    1 cup  molasses
    1 cup  organic coconut flour - source
    1/2 cup  blanched almond flour - source
    1/2 cup  arrowroot flour/starch - source
    1/2 cup  organic applesauce
    1 tsp  baking soda
    1/2 tsp  unrefined sea salt
    lots of ginger + cinnamon (probably 2 T ginger, and 1 T cinnamon)

To make your gingerbread cake:
  1.  Preheat oven to 375 degrees (convection). Grease a 9x13 pan liberally with butter.
  2.  In a large bowl, cream together shortening and sugar until fluffy. Add one egg at a time until just incorporated.
  3.  To the same bowl add spices, coconut flour, almond flour, arrowroot, sea salt, baking soda, molasses. Mix. Add applesauce. Mix until combined.
  4.  Pour batter into the prepared pan and smooth top with spatula. Bake for about 20-25 minutes, depending on the heat of your oven.
  5.  Remove for oven when sides are slightly browned, and center of cake is springy. Let pan cool on a baking rack for about 20 minutes, then slice and transfer to desired container.  Feel free to freeze for later! Top with whipped cream, ice cream or eat it warm and slather it with cinnamon butter.


Try it cold (you can REALLY taste the ginger punch this way) and topped with some fresh whipped cream! Yum! And don't forget to share it with all your primal, paleo, or grain-free friends! :)


Monday, October 15, 2012

Grain-free Cinnamon Raisin Granola 1.0.


Granola is one of the things that I have missed a lot since giving up grains.  I've tried a few recipes here and there that don't use oats, but the ease of making them and the combination of ingredients just didn't agree with me.  Recipes were either too complicated, or just plain odd.  I wanted a recipe that had the same satisfying crunch that I remember from normal oat-based granola.  Finally I came up with this!  It's so delicious my mom and I ate it up in no time.  Primal, WAPFers, Paleo and ALL people will love this recipe.  It makes either a delicious breakfast, or a great snack on the go.  I also shared this with my sister-in-law who just had twin boys :)  She's a grain-free granola lover and this totally made her day!  I know that you'll love it too!

Grain-free Cinnamon Raisin Granola.
    makes a bunch! :)

    6  egg whites
    1/4 cup  coconut sugar
    3 tsp  cinnamon
    1 tsp  unrefined sea salt
    1/2 cup  sesame seeds
    1/2 cup  chia seeds
    1 cup (each): whole cashews, pistachios, sunflower seeds, pumpkin seeds, coconut chips, walnuts, chopped pecans, sliced almonds, raisins

To make your delicious granola:
  1.  Preheat oven to 400 degrees convection.
  2.  Combine egg whites, sugar, cinnamon and salt.  Whisk until frothy.
  3.  Add all nuts and seeds, mix well with a wooden spoon.
  4.  On two silicone lined baking sheets, spread out the mixture evenly between two pans.
  5.  Bake at 400 for 10 minutes. Stir.  Another 10 minutes. Stir.  Depending on your oven, you may need another 5 minutes.  The first time I made this I didn't, the second time, I did.


This granola keeps very well.  I store mine in an airtight container in the cupboard.  Eat within 2 weeks or store in the fridge.

My favorite way to eat this is in a bowl with freshly sliced banana and some cold raw whole milk.  What a nourishing breakfast!! Enjoy!

Monday, October 1, 2012

Real Chocolate Ice Cream.


I got an ice cream maker for my birthday a few years ago, and I've put it to good use!  It's been so fun to experiment with different ice cream recipes.  Some have been really good, and some have been, not so good.  Several batches have come out too sweet, not sweet enough, or too icy or crumbly and hard as rock.  But this summer I think I've got the whole process down!  I am so happy with this recipe.  It's incredibly scoopable and you don't need to remove it from the freezer for any amount of time before serving.  It's texture is fantastic and the sweetness is just right.  


Real Chocolate Ice Cream.
   makes 2 quarts

    1 pt  raw cream
    2 cups  raw whole milk
    4  egg yolks
    1 T  arrowroot starch
    1/2 cup  cocoa powder
    1/2 cup  raw honey
    1 T  vanilla
    5 dashes  unrefined sea salt

To make your ice cream:
  1.  Combine all ingredients in a blender.
  2.  Pour into ice cream maker and freeze per manufacturers instructions.
  3.  Freeze overnight until hard.
  4.  Serve  and  enjoy! Try it with fresh whipped cream and chocolate sauce.  Or top it with peanut butter!!

Mhmm. The goodness is beginning to melt! YUM.

I like to freeze my ice cream in leftover yogurt containers! They are the perfect size, and I can put equal amounts in two 32 ounce containers.  Eat one, save one (shove it in the back).  In a few months you'll have several types of ice cream to choose from waiting for you in the freezer!

Chocolate not your style? Check out my other flavors:

Homemade French Vanilla Ice Cream
Homemade Vanilla Ice Cream
Peanut Butter Frozen Yogurt


Monday, July 16, 2012

Grain-free Kefir Brownies.


Sometimes my best recipes come from nowhere.  These brownies are definitely a testament to that.  One day I was in my apartment and I had some soured kefir that I had made.  It was past the palatable drinking stage, and not wanting to waste it, I threw together these brownies.  I didn't expect the results to come out very well, but I was completely surprised.  These are so incredible, I may like them better than my favorite grain-free brownie recipe.  I gave the pan away to one of my advisors as a thank-you, and he ended up (due to the pestering of his students) sharing them the with his entire class!  I got an email the next day with rave reviews.  I think you'll rave about them too ;)

Mhmm. Fudgey cakey chocolatey goodness!

Grain-free Kefir Brownies.
    makes one 8x8 pan

    2 cups  soured homemade kefir
    1 cup  organic coconut flour - source
    4  happy eggs
    1 cup  raw cacoa powder - source
    16 oz  chocolate chunks, I used Enjoy Life
    1 Tbsp  vanilla extract
    1 tsp  baking soda
    1/4 tsp  sea salt
    2 full droppers plain stevia - source


To make your brownies:
  1.  Preheat your oven to 350 degrees (mine is convection).
  2.  In a large bowl, combine all ingredients except chocolate chips.  Mix well.
  3.  Add chocolate chunks and mix again.
  4.  Bake for about 30-40 minutes or until the top is cracked, the sides are slightly firm and there is a tiny bit of jiggle in the middle of the pan.
  5.  Remove from oven and let cool.  Try a slice warm.  Let it cool and try another slice.  Share.  Serve with a nice cold glass of raw milk. Yum!

I love these brownies, not only because they are delicious, but that they are low in sugar and carbohydrates!  The only added sugar comes from the sugar in the chocolate chunks.  If you use unsweetened chocolate the brownies will not taste very sweet.  For those of you who are not partial to stevia, feel free to omit it.  I haven't made the recipe without stevia so I don't know if it will grossly affect the flavor, but my guess is that it will make a small difference in sweetness.

Mhmm. Chocolate chunks.

These will freeze very well.  They will also make a great accompaniment to homemade french vanilla ice cream and homemade raw whipped cream.  I love anything chocolate and vanilla combined!

Here are some of my other delicious brownie recipes:

Grain-free Coconut Flour Brownies
Banownies
Gluten-free Brownies (for you whole-grain folk)