Showing posts with label almond flour. Show all posts

Sunday, June 29, 2014

Grain-free Unsweetened Paleo Banana Bread.


I've been wanting to share this recipe with y'all for too long. Banana bread is one of my all-time favorite things (which is no secret, see below for more banana-centric recipes), and for a long-time I've been elusively searching for and experimenting with the perfect-for-me banana bread recipe. Two years ago I created my delicious grain-free unsweetened primal pumpkin bread, and I love that recipe so much that I believed it had to be possible to morph it into a banana bread instead. After a few different tries, what I'm sharing with you now is a paleo banana bread recipe I am most proud of :)


Grain-free Unsweetened Paleo Banana Bread.
    makes one standard loaf

    1 cup  blanched almond flour
    1/2 cup  organic coconut flour
    3 happy eggs - mine were large
    1/2 cup  coconut oil - mine was soft
    1 1/2 cups  mashed ripe bananas (about 2 large)
    1 tsp  baking soda
    1/2 tsp  unrefined sea salt
    1 Tbsp  raw apple cider vinegar
    1 tsp  ground nutmeg
    1 Tbsp  cinnamon
    2 tsp  vanilla
    20 drops  clear stevia

To make your banana bread:
1) Preheat oven to 375 degrees.
2) Pour all ingredients into a high speed blender (Vitamix!)
3) Blend briefly until incorporated.
4) Pour into a glass, standard loaf pan, that has been greased with coconut oil, and floured with coconut or almond flour.
5) Bake for about 20 minutes, check on the bread and maybe rotate the pan, and bake for another 20-30 minutes depending on your oven. Let bread cool in the pan, then carefully turn out and slice. Store it in the fridge, or the freezer! But most likely your family will gobble it up in no time!


And now, I invite you to explore my other banana lovin' recipes!

Banana Bread Muffins

Grain-free Zucchini Bread

Banownies

Banana Macadamia Nut Muffins

Almond Butter Banana Blueberry Muffins

Grain-free Post-surgery Banana Bread

Grain-free Almond Banana Waffles

Grain-free Unsweetened Banana Cake

My Original Banana Cake

Fruity Vegan Oatmeal Bake


Enjoy your banana bread. It's great spread with some almond or peanut butter or slathered with some juice-sweetened black raspberry jam :) YUM. Or even butter, if you're so inclined.

And I know the pictures aren't super great. It's been really hard to adjust to all the poor Seattle lighting!


Thursday, December 19, 2013

Grain-free "Recovery" Banana Bread.


One of my lovely family members just recently had surgery and an overnight hospital stay [everything is going well, thanks :)], and so I thought I would share this recipe, as it has been great for her recovery.

Let me explain...

My loved one recently had to have surgery. Post-operation she was having trouble swallowing because she felt so sore. She only wanted cold, soft things, and was also barely able to eat due to the nausea caused by pain meds. Turns out that I had just made some grain-free banana bread that week, in an endeavor to start recipe development for my own grain-free banana bread recipe that I would love just as much my grain-free pumpkin bread recipe. Well, the recipe was not perfect, and was very soft and moist (ie, the texture isn't quite there yet, and therefore not bloggable), but it was still had great flavor and tasted delicious, so I had kept it and was planning on nibbling on it throughout the week.


This "recipe" failure ended up being a blessing, as it's smooth and soft texture was very easy to swollow for my patient, but also gave her the feeling that she was "eating something solid." Win win!

For this recipe I used a smaller loaf pan, not the standard size. It was a medium sized Pyrex glass loaf pan which probably measures 4" x 8" and is tall, not wide, like standard loaf pans. It's very easy to whip up, and is a great idea to bring to the hospital to help your loved one recover! It sets up best in the fridge. So after the bread cools, turn it out, and place it in the fridge.

Grain-free "Recovery" Banana Bread.
    makes one loaf pan, size above

    2  very ripe bananas (or 3 small)
    1 cup  almond flour 
    1/3 cup  coconut flour
    2  medium/large eggs
    1/4 cup runny honey
    1/3 cup  coconut oil - mine was not melted
    3/4 cup  coconut milk - mine is always unsweetened
    1 Tbsp raw apple cider vinegar
    1 tsp  baking soda
    1-2 tsp  cinnamon or more if desired
    1.5 tsp vanilla

To make your recovery bread:
  1)  Preheat oven to 375 degrees; mine is non-convection.
  2)  Put ingredients in order listed into Vitamix or blender. Blend. Pour into coconut oil greased loaf pan (mine is a glass loaf pan).
  3)  Bake for over 1 hour. LET COOL. Store in fridge. Bread will be moist but will firm up in the fridge.
  4)  Eat with a spoon, or slice it thick. Spread with your favorite nut or coconut butter, for even more nutrition!


Enjoy this bread! I hope it will help your recovering family members, as it did mine, whether they are sick at home or are recovering from major surgery! In fact, we ate up this banana bread so fast because it was so tasty, and I am baking another one right now!

xoxo :)


P.S. I am home for Christmas break. This in the medical school world are going very well. I am tired, but loving my classes and assignments. Stay tuned for some delicious recipes that I can hopefully share with you during the time I am home. As always, thanks for continue to read my blog even though things are slow now-a-days!


Wednesday, September 4, 2013

Banana Macadamia Muffins.

 
For the past two weeks I've been on a muffin craze, which has me seriously thinking why I don't make muffins more often. Perhaps the one thing between me and muffin-land is the belief that muffins take longer from start to finish. Well, after making 4 different batches of muffins in the past 2 weeks, I can definitely say, I am so totally wrong! Muffins are easy. Easy easy easy. Which means... More muffins! More muffins! Yay!

You will certainly feel my enthusiasm once you taste these muffins. I orginally found the recipe on Tropical Traditions coconut recipe website (which is great for inspiration), but have never made a recipe from there before. I never make a recipe from someone I don't know, or a blogger I don't respect. I've done it before, and they don't work out. Anyways! So these muffins looked so great, and after looking at the ingredient list I figured they couldn't go wrong, so I whipped up these muffins. I am so glad I did! They are moist, with just the right texture and not overloaded on any one ingredient. My favorite thing is that you can make these in one bowl quite easily, then pop them into the oven and you've got some delicious muffins to share!

I made some minor changes to the recipe, like subbing coconut water vinegar for lemon juice, since it's what I had on hand, and I didn't toast the coconut before adding it to the batter, since that would just be another step. I've also found that the recipe makes 14 muffins, so you'll need more than one muffin tin. Head over to thepaleomom.com for the original recipe!


Banana Macadamia Muffins.
    makes 14 muffins

    2/3 cup  macadamia nuts of choice, chopped
    2/3 cup  unsweetened coconut flakes
    1 cup  blanched almond flour
    ¼ cup  organic coconut flour - source
    3  ripe bananas, peeled and mashed
    2  eggs, room temperature
    1/3 cup  raw creamy honey
    1/3 cup  organic coconut oil, melted and cooled
    ¾ tsp  baking soda
    ½ tsp  unrefined sea salt
    1 tsp  coconut water vinegar or apple cider vinegar or lemon juice
    1 tsp  vanilla extract

To make your muffins:
  1. Preheat your oven to 350 degrees convection. Take out 2 muffin tins and place muffin liners inside.
  2. In a large bowl, add nuts, coconut, flours, baking soda, salt; mix to combine.
  3. To the same bowl, add eggs, bananas, honey, coconut oil, vinegar, vanilla; mix again to combine.
  4. Drop by tablespoons into the muffin tins. Fill 14 muffins full. *This will make 14 full sized muffins as long as there is no batter eaten in the process.
  5. Bake for about 30-35 minutes, rotating the pans at 20 minutes for best results. Let cool in pan for 5-10 minutes. Then move muffins to a cooling rack, which helps to firm up their bottoms. Enjoy!


These muffins can be frozen or refridgerated! I recommend storing them in the fridge, versus the countertop before eating. Be sure to share these with your family and friends, they're quite tasty!


Sunday, August 25, 2013

Banana Bread Muffins.


Banana bread is one of my favorite things in this whole wide world. After being inspired by some banana macadamia nut muffins I made, I knew that I could make some banana bread muffins that were absolutely delicious! So that's what I did. They're also grain-free and gluten-free (and wicked tasty)!

These little muffins taste just like banana bread, but are more portable! They're also super easy to whip up too, which will be great for when I start classes again.


Banana Bread Muffins.
    makes 14 muffins

    2/3 cup  walnuts, chopped
    2/3 cup  unsweetened coconut flakes
    1 cup + 2 Tbsp  blanched almond flour
    ¼ cup  organic coconut flour - source
    3  ripe bananas, peeled and mashed
    2  eggs, room temperature
    1/4 cup  raw creamy honey
    1/3 cup  organic coconut oil, melted and cooled
    ¾ tsp  baking soda
    ½ tsp  unrefined sea salt
    1 tsp  coconut water vinegar or apple cider vinegar or lemon juice
    1½ tsp  vanilla extract
    1½ tsp  cinnamon
    ½ tsp  freshly ground nutmeg
    toppings - optional

To make your banana bread muffins:
  1. Preheat your oven to 350 degrees convection. Take out 2 muffin tins and place muffin liners inside.
  2. In a large bowl, add nuts, coconut, flours, baking soda, salt; mix to combine.
  3. To the same bowl, add eggs, bananas, honey, coconut oil, vinegar, vanilla; mix again to combine.
  4. Drop by tablespoons into the muffin tins. Fill 14 muffins full. *This will make 14 full sized muffins as long as there is no batter eaten in the process.
  5. Bake for about 30-35 minutes, rotating the pans at 20 minutes for best results. Let cool in pan for 5-10 minutes. Then move muffins to a cooling rack, which helps to firm up their bottoms. Enjoy!


I am such a fan of banana bread, I know I will be making these often! And they are sure to please a crowd, so try bringing them to parties and sharing with friends and family!!

Sunday, August 18, 2013

Grain-free Blueberry Muffins 1.0.


I have loved all things blueberry for as long as I can remember. In fact, maybe I should ask my mom, as I am sure there was some point when I didn't like blueberries... but if there was a day, I don't want to remember!


August in New England means blueberries. Usually I get a bunch from some bushes we have on the land, but this year, either someone was picking them, or they just didn't have a good year, since I couldn't find nearly any! Lucky for us there are groceries stores that sell frozen blueberries and other farms to buy them from at the local farmers market!

These muffins were muffin #2 on my recent muffin kick. I am really excited about the flavor and 85% of the texture, but they seem to be a little on the crumbly side. I am going to work on this, and then edit the recipe, but I couldn't wait to share! They are just too delicious. The flavor is perfectly balanced.


Grain-free Blueberry Muffins 1.0.
    makes 18 muffins

    3/4 cup  organic coconut flour – sifted
    1/2 cup  blanched almond flour – sifted
    1/2 cup  raw honey
    1/2 cup  organic coconut oil, softened
    1/2 tsp  unrefined sea salt
    1/2 tsp  baking soda
    2  real eggs
    1 - 1½  cup  raw whole milk
    juice of half a lemon
    zest of one lemon
    1 cup  ground walnuts
    2 cup  frozen or fresh (large) blueberries
    sugar crystals for sprinkling - optional

To make your blueberry muffins:
  1.  Preheat oven to 350 degrees convection. Line muffin tins with paper liners.
  2.  In a large bowl, whisk coconut oil until glossy, white and homogenous. Add raw honey and whisk until combined. Add room temperature eggs, lemon juice, lemon zest.
  3.  Add coconut flour, almond flour, soda, salt and walnuts to wet ingredients, sifting the flours into the bowl. Combine with a spatula.
  4.  Add milk, and combine again. Gently fold in blueberries.
  5.  With a tablespoon, add batter to muffin tins until 3/4 full. Bake for 30-35 minutes, until golden brown on top. Let cool for a few minutes, then move muffins to a wire rack to cool.


If you don't anticipate eating these within a week (stored in the refridgerator) then freeze them! They'll keep for about 6 months, that is, if you don't eat them sooner ;)


Monday, December 31, 2012

Grain-free Gingerbread.

 
Holiday baking is always a lot of fun for me.  Since I just completed my undergraduate degree, and have now begun medical school, I don't exactly have a lot of time to bake!  I've been home for Christmas for the past few weeks, and it's been really nice to be "on vacation," and have time to read books, bake, workout, and sleep at my leisure!

When discussing what we wanted to make during the time I am home, as well as for our family Christmas celebrations, my mom suggested we make a gingerbread cake, since my gingerbread men cookies are just too delicious!  (And hooow long has it been since there's been gingerbread in the house??  Apparently years!!)  You see, gingerbread used to be a favorite of mine, but today I realized I haven't had gingerbread cake in probably about 10 years!  What a shock!

So today, I got out my bowl, my favorite spatula, a bunch of yummy molasses and baked this goodness.  My family and I love the cakey texture of this gingerbread, the rich flavor of the molasses, and the punch of the ginger.  And it's not overly sweet, which is what I prefer!


Grain-free Gingerbread Cake.
    makes one 9x13 pan

    1/2 cup  organic palm oil shortening - source
    1/4 cup  homemade vanilla sugar - or any sugar of choice
    4  REAL eggs
    1 cup  molasses
    1 cup  organic coconut flour - source
    1/2 cup  blanched almond flour - source
    1/2 cup  arrowroot flour/starch - source
    1/2 cup  organic applesauce
    1 tsp  baking soda
    1/2 tsp  unrefined sea salt
    lots of ginger + cinnamon (probably 2 T ginger, and 1 T cinnamon)

To make your gingerbread cake:
  1.  Preheat oven to 375 degrees (convection). Grease a 9x13 pan liberally with butter.
  2.  In a large bowl, cream together shortening and sugar until fluffy. Add one egg at a time until just incorporated.
  3.  To the same bowl add spices, coconut flour, almond flour, arrowroot, sea salt, baking soda, molasses. Mix. Add applesauce. Mix until combined.
  4.  Pour batter into the prepared pan and smooth top with spatula. Bake for about 20-25 minutes, depending on the heat of your oven.
  5.  Remove for oven when sides are slightly browned, and center of cake is springy. Let pan cool on a baking rack for about 20 minutes, then slice and transfer to desired container.  Feel free to freeze for later! Top with whipped cream, ice cream or eat it warm and slather it with cinnamon butter.


Try it cold (you can REALLY taste the ginger punch this way) and topped with some fresh whipped cream! Yum! And don't forget to share it with all your primal, paleo, or grain-free friends! :)


Saturday, September 1, 2012

Grain-free Unsweetened Banana Cake.


Today is my birthday, so I thought sharing a cake today would be only appropriate.  I didn't make this cake today, however, but made it sometime early summer.

Banana bread has always been one of my favorites.  Since going gluten-free, I've made lots of different versions.  Up until now, my best recipe has been my original banana cake recipe.  Then there was a banana cake made with oatmeal.  There was also my gluten-free whole-grain banana bread, which I adapted from my favorite wheat-based recipe when I first went gluten-free.  And now there is this banana cake.  Made with grain-free flours, left-over soured milk, and bananas, this banana bread is easy to digest, primal and absolutely delicious!  I also love it because it give me a use for raw milk that has gone a little bit too sour to be palatable.  Raw dairy is so valuable nutritionally, it's such a waste to not use it!


I've made this recipe twice now, and it's been fantastic.  The first time I made a frosting over the whole cake made with peanut butter, butter, yogurt and coconut oils.  It was fantastic and I ended up eating it for breakfast because it had enough protein and fat to make my metabolism happy :)  The pictures you see here have one layer of a peanut butter-butter frosting in the middle, but not over the entire cake.  I hope to tweak my peanut butter recipe, get it just right, and then share it with you.  For now, feel free to mix equal parts, butter, fresh ground peanut butter, a few drops of Stevia clear, and vanilla extract together to make a wonderfully nourishing peanut butter filling for the middle of these cakes.  And be sure to share with family!  It's so good (and makes a lot) so sharing should be mandatory!  This cake is also completely unsweetened (bananas only) and it's Primal!


Grain-free Unsweetened Banana Cake.
    makes two 9" rounds

    1 cup  blanched almond flour - source
    1 cup  organic coconut flour - source
    3 cups  ripe bananas, mashed
    6 small  real eggs
    2 cups  soured raw milk
    1 Tbsp  warm spice blend (mine was a mix of cinnamon, cloves, ginger, cardamom, nutmeg, allspice)
    1 Tbsp  vanilla
    1 tsp  baking soda
    1/2 tsp  unrefined sea salt
    2 Tbsp  grassfed butter (to grease the pan) - source


To make your banana cake:
  1.  Preheat the oven to 375 degrees (convection or non-convection, same results for this cake). Use your fingers to butter the cake pans liberally.
  2.  In a large bowl, mash bananas, whisk in eggs, sour milk, and vanilla.
  3.  In another medium sized bowl, combine flours, baking soda, and sea salt.
  4.  Mix wet ingredients into dry, using a spatula to incorporate.
  5.  Distribute batter evenly between both pans. Bake for about 35-40 minutes or until sides have pulled away from the pan and top is golden brown. When the cakes have cooled, remove from pans by gently inverting them onto your hand or a plate.  Wait until cakes are completely cooled to frost, if desired.

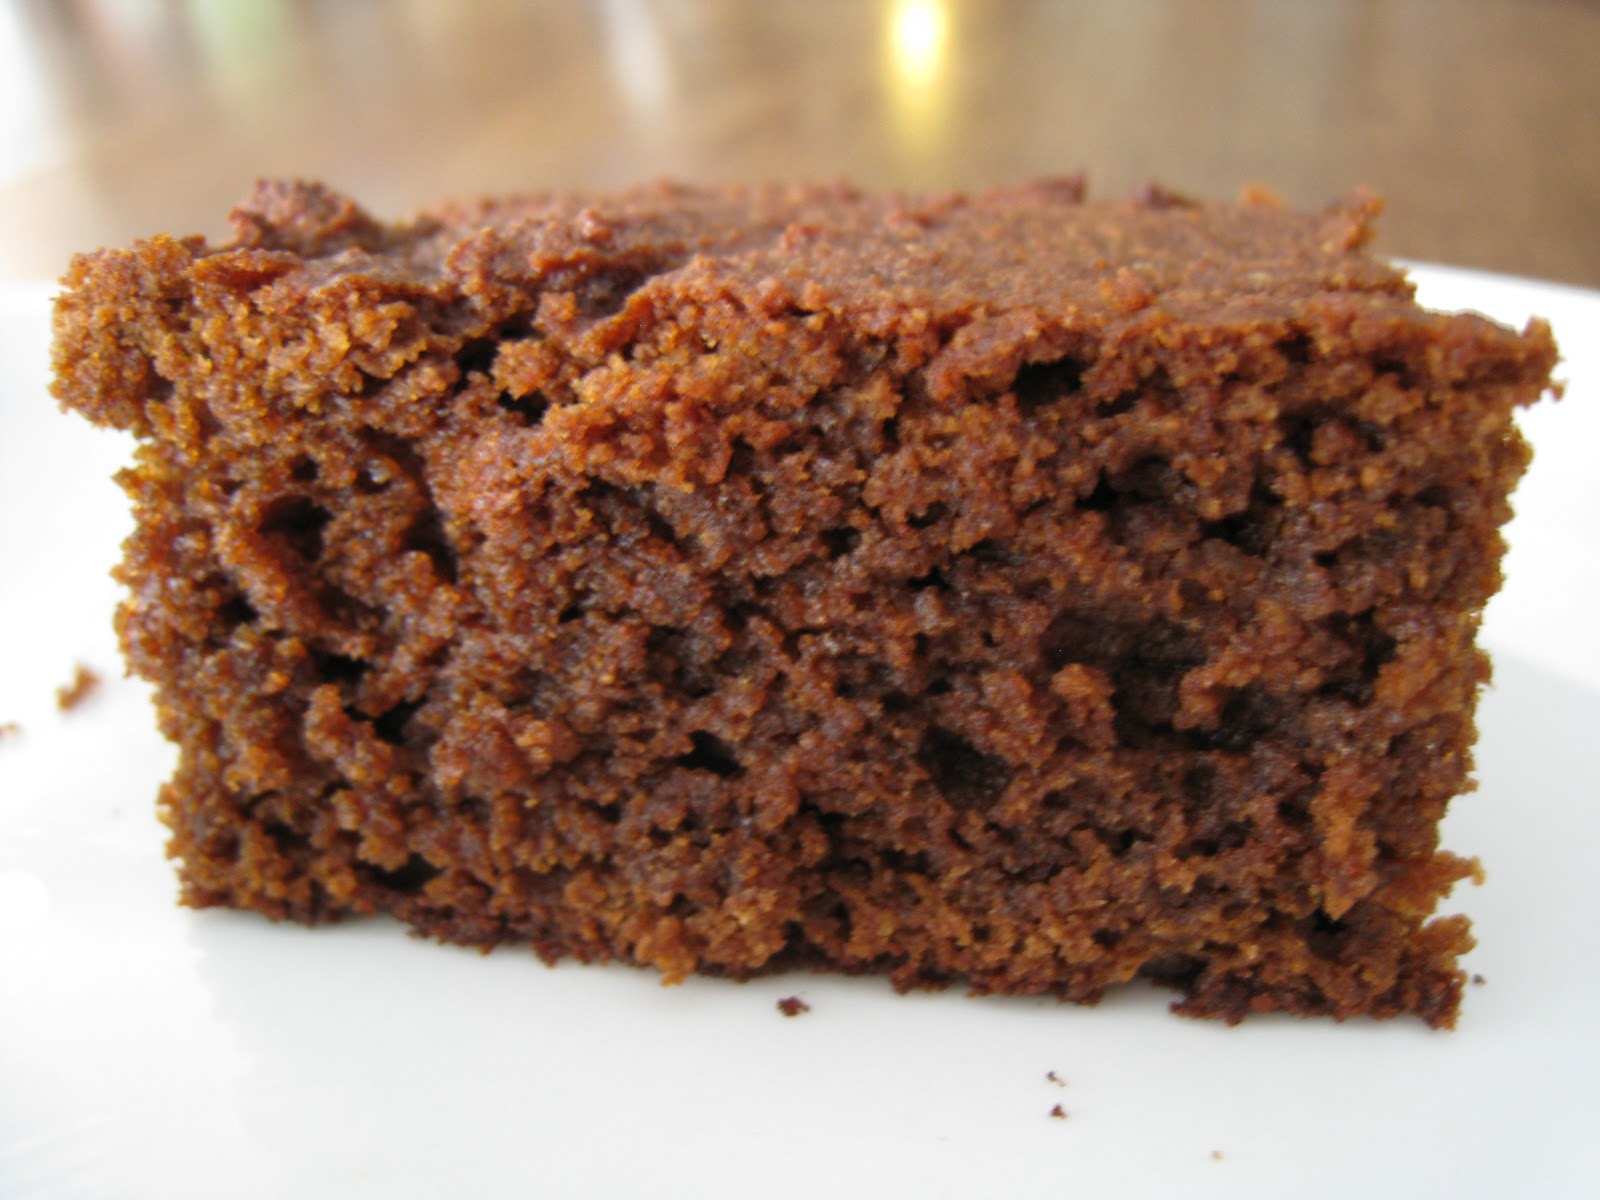
Texture up close.

This cake has quickly become one of my favorites, I hope you enjoy it too!

Friday, July 13, 2012

Primal Pea(nut) Butter Cookies.


As soon as I typed the title to this post I realized what I had done.  I just called peanuts Primal!  Peanuts are actually a legume (which is like a bean), not a nut, and legumes are not Primal.  Oops!  But if you're like me, you are Primal, but you still eat peanut butter.  I don't eat gobs of it like I used to, but on occasion, it's great!  For those of you who are pure Primalists, try making these cookies with almond butter, cashew butter, pecan butter, tahini, the list goes on!

I love this recipe because it has barely 6 ingredients.  And it's so easy!  You can even let your kids help you make these!  I made the ones with MMs specifically for my brother, but his favorite was actually the chocolate/sea salt combination.

Primal Pea(nut) Butter Cookies.
    makes 14 cookies

    8 oz  (1 cup)  organic creamy unsalted peanut butter (best is fresh ground or homemade)
    4 oz  (1/2 cup)  organic coconut sugar
    4 oz  (1/2 cup)  blanched almond flour
    1  happy pastured egg
    1/2 tsp  baking soda
    pinch unrefined sea salt

    Optional toppings:  various candies, sea salt, dark chocolate, raisins

To make your cookies:
  1.  Preheat the oven to 350 degrees (mine is convection).
  2.  Combine all ingredients in a bowl with a electric mixer.
  3.  Use your hands or a cookie scoop to make balls of the dough.  Place peanut butter balls on a silicone lined baking sheet.
  4.  Bake for 7 minutes, then remove from the oven and make criss-cross design with a fork.  This will flatten the cookies.  Add toppings if desired.
  5.  Bake for 5 more minutes or until golden brown and chocolate has melted.
  6.  Remove from oven and let cool on the sheet.  Carefully transfer to a wire rack when cool and place cookies in the fridge to set the chocolate.  Enjoy!

Don't forget to share! (It won't be easy :)

Sunday, July 8, 2012

Lactation (Oatmeal) Cookies.

My lovely sister in law just gave birth to TWINS!  I could not be more thrilled.  It is my first time being an Auntie!  Now I have two adorable little boys to love and spoil.  Now that the twins are here, my brother and sister in law have a lot to keep them busy! 


One thing that a lot of new moms struggle with (so I am told) is keeping up their milk supply, sleeping, and keeping their calories up sufficiently to breastfeed.  My friend Heather created the idea of a "lactation cookie" when she had her first child (and she has also had twins recently!).  This is exactly what nutrition is all about, using food to meet your bodies needs.

These lactation cookies are pretty much just like your standard oatmeal raisin cookie. (Men don't worry, you won't lactate if you eat these).  These are called lactation cookies because the main ingredient is oats, and they also have some flaxseed.  Oats are very well known to increase milk supply for mothers, and flax help increase milk supply too.  They also do not have a lot of sugar (you can eat many and not get blood sugar spikes), and the oats and almond flour provide some protein, which is crucial for breastfeeding!  Cookies are also great for new moms because suddenly life revolves around the baby(ies) and finding time to eat can be hard.  Having twins doesn't leave a lot of time on your hands!  Cookies can easily be grabbed and eaten with one hand.  Just make sure they're as nutritious as these!  Beware - I am told husbands like lactation cookies too!  Moms may want to guard them ;)


Lactation Oatmeal Cookies.
    makes over 2 dozen cookies

    2 1/2 cups  toasted rolled gluten-free oats (mine were sprouted and soaked oat groats)
    1 cup  blanched almond flour
    1 Tbsp  organic coconut flour - source
    2 sticks  grass-fed butter, softened - source
    1/2 cup  coconut sugar - source
    2  real eggs
    1 cup  organic unsweetened shredded coconut
    1 cup  organic raisins (can use chocolate chips)
    2 tsp  vanilla
    2 tsp  cinnamon
    1/4 tsp  unrefined sea salt
    2 Tbsp  organic raw honey -- for topping - source
    2 Tbsp  organic raw ground flax seed -- for topping
    2 Tbsp  warm water


To make your cookies:
  1.  To toast your oats, preheat oven to 350 degrees. Pour oats onto a silicone lined a baking sheet and spread evenly. Place in the oven for 5 minutes, stir and return to oven for another 5 minutes or until oats are toasty (be careful not to burn!).
  2.  In a large bowl combine almond flour, coconut flour, sugar, coconut, cinnamon and sea salt. Whisk until combined. Add toasted oats.
  3.  In another large bowl, beat together butter, eggs, and vanilla with an electric mixer.
  4.  Combine the dry into the wet ingredients, incorporating together with a spatula. Add raisins, and mix again.
  5.  On silicone lined baking sheets, use your hands to make balls of the dough and place cookies in rows 4x3.  Place sheets into the fridge to set for about 30 minutes.  Then pull from fridge and bake in oven for about 12 minutes until golden brown.
  6.  Make your topping in a small dish combine honey, warm water and ground flax.  Mix together with a pastry brush. Let cookies cool for about 10 minutes.  When cookies are warm, but not hot, brush the flax-honey mixture on top of the cookies.  Remove cookies from pan with a spatula, transfer to a wire rack, and place in the fridge to set the topping.
  7.  After about 10 minutes in the fridge, cookies are ready to eat!


Do the new moms in your life a favor - bring them these cookies :)


Friday, June 22, 2012

Grain-free Chocolate Cake.


My attempts at grain-free cakes have really come a long way.  Those of you who have ever made a grain-free cake know that it's not the easiest thing ;)  I started my journey with some of Elana's recipes at Elana's Pantry.  The results were better than I hoped, but I knew I could make it better.  Over the past three summers, I've made a couple versions of her chocolate cake.  I've scoured a countless number of other food blogs, drawing ideas from what other real food bloggers have done in grain-free cake land.  I've experimented with the amounts of liquids and ratios of flours and other ingredients, changing it as I went along, longing for a certain taste and mouth feel of cake.  Now I finally have a recipe entirely my own.  Each time I've learned something new, and now this is a cake I am really happy with.  I cannot say more about this cake's texture, flavor and ease of cooking.  I know that you'll love it too.


Grain-free Chocolate Cake.
    makes two nine inch round cakes

Cake:
  3/4 cup  organic coconut flour
  1/2 cup  blanched almond flour
  1/2 cup  cocoa powder - I used Ghirardelli
  12  real eggs
  1 cup  maple syrup - grade B
  1 cup  organic coconut oil, melted
  1 Tbsp  vanilla
  1/2 tsp  baking powder
  1 tsp  baking soda
  1 tsp  unrefined sea salt

Frosting:
  4 cups  organic powdered sugar
  1 stick  unsalted butter - I used KerryGold
  ~1/2 cup  raw whole milk
  1/2 tsp  unrefined sea salt
  optional: extract of choice for flavor, here I used mint extract


Chocolate Ganache, or use my Paleo Ganche recipe:
  1 - 12 oz  package chocolate chips - I used Trader Joes brand - feel free to use unsweetened also
  1/2  stick unsalted butter - I used KerryGold

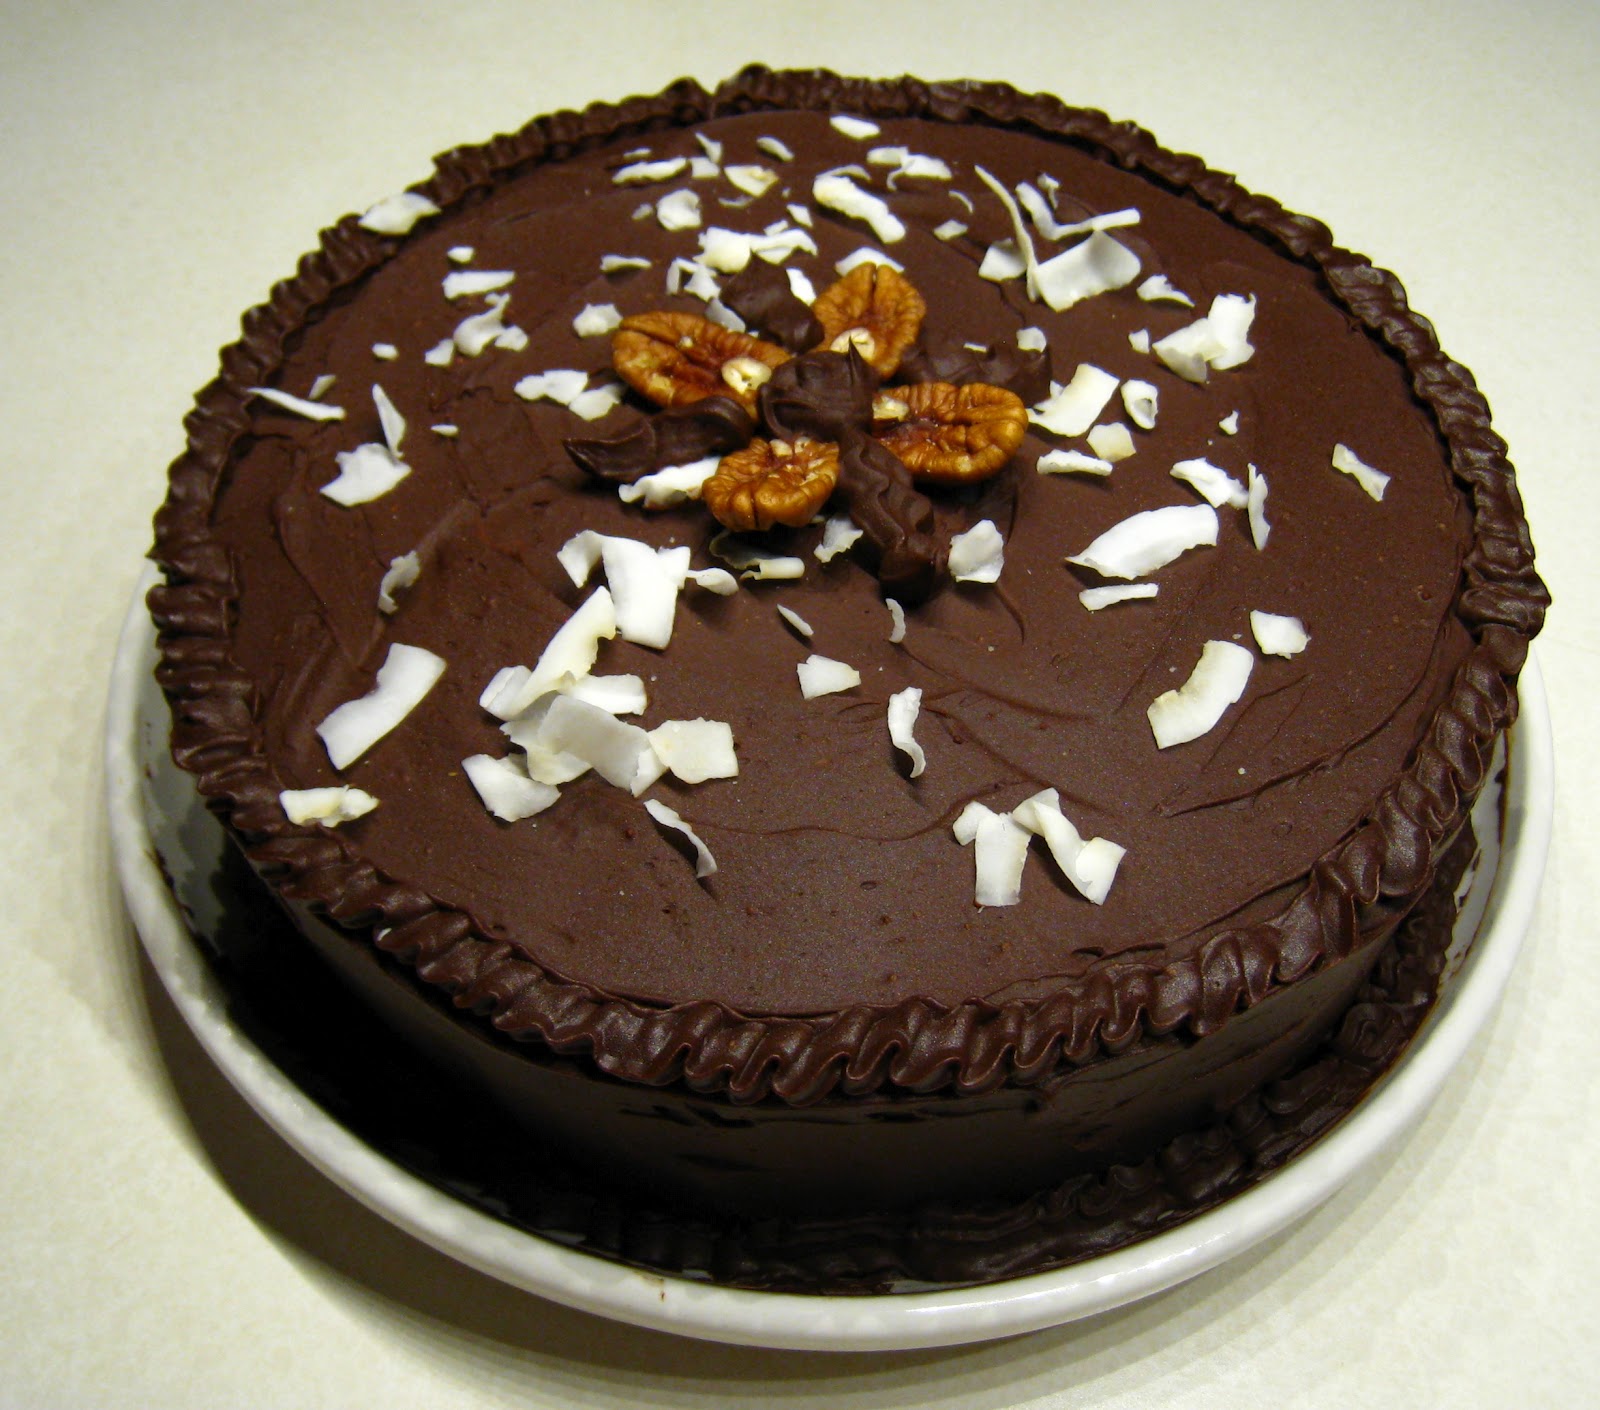
Here's the final product! Cake assembled and frosting+ganache set.

To make your chocolate cake:
  1.  Preheat oven to 350 degrees convection.
  2.  In a small bowl, combine cocoa powder, coconut flour, almond flour, sea salt, baking powder, baking soda. Whisk until there are no lumps.
  3.  In another bowl, whisk together eggs (room temp), maple syrup, melted coconut oil (make sure it's not hot), and vanilla.
  4.  Combine wet into dry ingredients until just combined.
  5. ****Grease and flour the sides of the pan - use butter (best) or coconut oil (ok). 
  6.  Pour equal amounts of cake batter into 2 9" round cake pans.
  7.  Bake at 350 degrees for about 35 minutes or until top springs back lightly when touched and sides are pulling away from the pan.
  8.  Let cool only until you can handle the pans, then run a knife around the edges before gently inverting the cakes and removing them from the pan. If you floured and greased the sides well, getting the cakes out of the pan shouldn't be an issue, but if you didn't, you might get only the top of the cake out!

To make your frosting and ganache:
  1.  For the frosting, with room temperature butter, cream butter and powdered sugar until fluffy. Add milk slowly as needed into the sugar and butter.
  2.  Add vanilla, extract (optional).
  3.  For the ganache, in a double boiler melt chocolate chips and butter. Remove from heat when 80% of the chocolate is melted. Stir. The heat will melt the remaining chips.
  4.  Let ganache cool, but still be spreadable.

Cake assembly:
  1.  Remove cake from the pans. Place one on a large plate.
  2.  Frost with one layer of frosting on the top of the cake.
  3.  Place the remaining cake on top of the frosted layer.
  4.  Frost with remaining frosting on top and sides of both layers.
  5.  Place cake in the fridge for the frosting to set.
  6.  Spread ganache on top of the cake. Return to the fridge and allow ganache to set.

Notes:
1) You can easily cut this recipe in half, and you'll have one 9" cake.
2) Do not make this with runny honey instead of maple syrup. There is less flavor and a bit less sweetness. When I made this with honey it just seemed to be lacking something.
3) Make sure your eggs are on the medium/large side. I've made this cake with small sized eggs, and the end product was a bit more on the dry side than I would like.

Here are some pictures of the first grain-free chocolate cakes I made:


At my house, cake is always served with real ice cream!


There was A LOT of filling inside, and it still wasn't enough ;)


German chocolate cake, completely finished!


This was my first attempt at grain-free chocolate cake. I wish I had remembered to snap a picture before cutting it up!


My brother's birthday is always during the summer, so I always have an excuse to make a cake.  It's my once a year cake indulgence!  However that is beginning to change since I've learned how to make these cakes so nourishing and healthy!  This summer will probably be a little different since my brother and his wife are having twins.  It's very exciting, but I doubt a birthday celebration with cake and ice cream will be the last thing on their mind ;)  This past week I made this cake in a banana version with peanut butter frosting!  It's so nourishing, low in sugar and high in protein, and I've been eating it with my yogurt and berries for breakfast.

Happy summer! Cake away :)


Friday, March 9, 2012

Grain-free Waffle Sandwiches

Turkey bologna, sharp cheddar, green leaf lettuce, mustard and homemade mayo @ mid-munch ;)

Last week I posted about my new favorite grain-free almond banana waffles.  They are really different than my original grain-free waffles, since they are not as dense and taste super great plain.

Sandwich close up

One of my most favorite things to do with leftover waffles is make grain-free waffle sandwiches!  I don't eat any gluten-free bread and so this has been a great option for me when I really want a sandwich, which happens occasionally but not very often.

Top view

The combinations are endless.  My pictures here show organic turkey bologna with real sharp cheddar cheese, dijon mustard, homemade mayo and fresh green lettuce.


Best of all, you can make GAPS safe sandwiches with these waffles!  What a great departure from squash and soups, yes?  To learn more about the GAPS diet and it's healing abilities for myriads of symptoms including poor digestion, click here.  For even more resources, here.

pb + j

Or you can make the classic peanut butter and jelly, or almond butter and jelly!  This picture shows peanut butter and fruit juice sweetened locally made strawberry rhubarb jam.  (Which is a FANTASTIC combo by the way, if you've never tried it :)

No pb + j is complete without a little bit of oozing ;)


Waffles shouldn't be limited to savory sandwiches and can easily be incorporated into a dessert dish for something sweet.  This is a waffle sliced in half topped with organic pink lady apple slices and organic chocolate sauce.  What a treat!


Don't let the pretty pictures fool you, they really are easy to make! 

Grain-free Waffle Sandwiches

    Directions: 
      Simply take a waffle quarter (I have a Belgian waffle iron that creates a round waffle divided into   four pieces), gently cut it in half, and fill with the ingredients of your choosing.  

More ideas:
         Freshly sliced cheeses, meats like bacon, roast beef slices, roasted chicken and turkey, as well as homemade meatballs add protein. 
         Veggies like cucumbers, tomatoes, and lettuce add some filling crunch.  
         Spread the insides with goat cheese, grass-fed butter, homemade mayonnaise, real guacamole, or nut butter and jam of choice. 
         Avocado slices and fried eggs would be a yummy option as well. 

Feel free to create the sandwich of your dreams!