Showing posts with label butter. Show all posts

Monday, December 22, 2014

Single Serving Protein Pancake.

FLUFFY

Hey everyone :) I know it's been a while, but this blog is no longer a tip top priority! Med school has me busy busy, along with all the typical life stuff that has to happen. Talk about a balancing act!

Today I bring you a recipe for a single serving pancake. I've been eyeing pancake recipes lately, especially the "single lady" ones, but I was never quite happy with the ingredients that were used, so I chose my own.

Banana slices hiding on the bottom, with greek yogurt and cooked strawberries and raspberries.

This pancake is everything I could ever want in a pancake :) It's fluffy, has a nice nutty flavor from the flaxseed, it's full of protein, and isn't too sweet, so it's easy to top it with things like a touch of maple syrup, butter or some yummy berries and yogurt.

The secret to success in this recipe is measuring the ingredients, and also using a non-stick pan. I know that non-stick pans are not at all the best choice health-wise, but there's really no alternative when you want to make some awesome pancakes.


Single Serving Protein Pancake.
    serves one or two

    15 grams / one serving of brown rice protein powder - I use Nutribiotic plain, you could use brown rice flour here also
    50 grams / ~1/2 one normal sized banana, mashed
    8 grams / 1 heaping Tbsp  ground brown flaxseed
    3 grams / 1 scant Tbsp  ground chia seed
    12 grams / ~1 tsp  runny honey
    2 eggs / about 100 grams  give or take depending on your egg size
    1 gram  baking soda (this is a very small amount)
    15 drops  vanilla extract (I used a dropper)
    pinch each: salt, ground cardamom

To make your pancake:
  1)  Combine all ingredients into a bowl and whisk well, scraping off the sides with a spatula and getting everything incorporated. The only lumps present should be a little bit of mashed banana. The batter will appear thin, and shiny from the eggs, resist adding more dry ingredients.
  2)  Preheat your nonstick pan on medium-low heat (#4 on my stove, point at small hand on the 7 in 7 o'clock).
  3)  Pour batter onto the pan. Do two batches, or pour it all in for one pancake (this is what I do).  Cook on one side for about 5 minutes. Pancake is ready when there are some bubbles on top and you can see the edges are beginning to set. Work your rubber spatual around the edges of the pancake and also the bottom. One pancake requires one massive or two normal sized spatulas to flip it.
  4)  Flip pancake and wait another 1-2 minutes.
  5)  Remove pancake to a plate with banana slices already on it. Place pancake on top of sliced bananas. Drizzle with maple syrup or whatever is desired. I like to put some butter on top, berries and homemade yogurt. ENJOY!

My first attempt; not quite right but topped with yum!


Because someone will want the stats ;) Thanks to myfitnesspal.com

I hope you are staying both warm and well this holiday season :) Love to all my readers :)
Merry Christmas!


PS - And no, this recipe will not work if you substitute the egg for something else.

Sunday, March 24, 2013

Grain-free Coconut flour Spice Cake.


Calling this recipe cake isn't really fair.  Calling this recipe bread isn't really fair either.  It is actually similar to both, but with the best parts of each.  Light and airy (bread), but sweet and satisfying (cake).  Remember when I promised you I'd post other versions of my lemon poppyseed cake?  Well, this is actually my original recipe, as I made first made a spicy version, but instead shared the lemon poppyseed recipe with you all before this version, since I hadn't taken proper pictures.

This recipe reminds me of gingerbread, but without all the heavieness or sugar content of a thick cake, as this is more light and airy; something that you can eat everyday.  It's great by itself for a snack, or on the side of a salad for paleo/primal friendly treat.  I like to make this on the weekend and slowly eat the pan down over the next two weeks. This would free great too!


Grain-free Coconut flour Spice Cake.
    makes one 9x13 pan

    1/3 cup  organic coconut oil - source
    2/3 cup  warm water
    6  happy eggs
    1/3 cup + 2 Tbsp (or 1/3 cup heaping)  organic coconut flour - source
    2 Tbsp  honey - mine was wildflower runny honey
    2 Tbsp  molasses
    1 tsp  baking soda
    1/4 tsp  unrefined sea salt
    1 Tbsp  organic cinnamon
    3 Tbsp  ground ginger
    3 dashes  ground nutmeg
    2 dashes  ground gloves

To make your lovely simple spice cake:
   1.  Place coconut oil and warm water in a medium sized bowl, whisk vigorously for about 2 minutes or until white, glossy and homogenous (and no longer clumpy).
   2.  To the same bowl, add flour, and remaining ingredients. Whisk until incorporated.
   3.  Pour batter into a greased 9x13 pan (I used coconut oil), and bake at 350 degrees non-convection for exactly 20 minutes.
   4.  Pull pan from the oven and place on a baking rack to cool. Transfer to the fridge to cool some more. Cut into squares when cool, and spread with your favorite filling. I used grass-fed butter! Yum! Tahini, peanut or cashew butter would go nicely with these too.


Other spices like cardamom and allspice would be great in this cake too!  Use your favorite warm spice combination :)

Monday, January 28, 2013

Grain-free Lemon Poppy Seed Coconut Flour Cake.


It's a rather odd sounding title, isn't it?  This recipe was a spin off my primal gingerbread cake, as well as my grain-free waffle recipe.  I wanted a simple coconut flour-based grain-free baked good that I could whip up fast and was super easy.  So I experimented, and made this!  It was delicious on the first go! This cake has just the right amount of cakey-ness to satisfy my (occasional) bread cravings, but without being loaded with sugar or refined gluten-free grains.  It is also nut-free and Paleo!  My first version was a spiced flavor with lots of ginger and a touch of molasses, and my second (this version) was lemon poppy seed, but feel free to change spices and flavor extracts for a different taste.  I know I will be sharing several different versions as time allows me :)  This bread bakes thin in the pan, so I used two squares and spread some grass-fed butter in between both sides, to make little "sandwich" looking treats.  The whole batch lasted me nearly two weeks, and I was very happy to have something interesting (besides veggies) to nibble on at lunch time :)  It's also a great way to add some more coconut oil and grass-fed butter to your diet, which are rich in good for you saturated fats and fat-soluble activators, which our bodies, brains, and hearts desperately need!


Grain-free Lemon Poppy Seed Coconut Flour Cake.
    makes one 9x13 pan

    1/3 cup  organic coconut oil - source
    2/3 cup  warm water
    6  happy eggs
    1/3 cup + 2 Tbsp (or 1/3 cup heaping)  organic coconut flour - source
    1/4 cup  honey  - mine was wildflower runny honey
    1 tsp  baking soda
    1/2 tsp  organic lemon extract
    2 tsp  poppy seeds
    zest of one organic lemon

To make your lemon poppy cake:
   1.  Place coconut oil and warm water in a medium sized bowl, whisk vigorously for about 2 minutes or until white, glossy and homogenous (and no longer clumpy).
   2.  To the same bowl, add flour, and remaining ingredients. Whisk until incorporated.
   3.  Pour batter into a greased 9x13 pan (I used coconut oil), and bake at 350 degrees non-convection for exactly 20 minutes.
   4.  Pull pan from the oven and place on a baking rack to cool. Transfer to the fridge to cool some more. Cut into squares when cool, and spread with your favorite filling. I used grass-fed butter! Yum! Sun-butter or cashew butter would go nicely with these too.


Spread something fun inside and enjoy :) PS-- Don't you love my plates! I found them last year at Sur La Table, and I absolutely love them! I'm so happy they survived the trek from Southern California to Seattle!


Wednesday, January 16, 2013

Roasted Amber Cup Squash.

 
The medical school study load did not kept me from cooking (but it certainly did limit it), and I made one or two new discoveries this past fall.  One is this squash which I am about to share with you today.  I had never heard of Amber Cup squash before I saw it in my local grocery store.  Game to try anything, I bought it, took it home, popped it in the oven, and waaala!  The most amazingly delicious squash I'd ever had.  A squash that didn't need either butter or cinnamon to make it taste good.  It was good on its own!  It has a sweet taste, very smooth grain, and is neither starchy or watery like butternut squash can be.


Photo credit

Roasted Amber Cup Squash.
    makes a lot or a little, depending on the number of people, and how much you like the squash ;)

    1 or 2  amber cup squash

To make your squash:
  1.  Preheat your oven to 425 degrees.  Cut the squash down the middle from both knobs. Then cut the knobs off of each half. Then cut into slices. Place on a baking sheet.
  2.  In a different shallow pan, fill with water. Place this pan on the rack below the pan with the squash - it helps to create a steaming effect in the oven.
  3.  Roast squash for about 30-45 minutes or until fork tender.
  4.  Enjoy! Eat plain cold (this is good) or warm with some coconut oil, butter and or cinnamon.


I love me some veggies! (So sorry for the bad pictures, Seattle is not great for lighting!)


Monday, September 24, 2012

Cauliflower Garlic Mashed Faux-tatoes.


Like most people, I love mashed potatoes.  I think they are the best when the skins are left on, they are creamy but hold their shape, and they have a nice garlic flavor.  Every since going gluten-free, becoming healthy, and really changing my diet, mashed potatoes have gone out the window.  While they were a treat before, they are now a complete rarity.  Until now.

Since I found out about the Weston A. Price foundation and Primal eating, I have rediscovered mashed potatoes. Only now they aren't actually made of potatoes, they're made out of cauliflower!  I used to think cauliflower was ghastly, and I would say that it was just a bad tasting version of broccoli (I love broccoli).  Well I am a firm believer that vegetables must be tried in several preparations, and more than one time, before anyone can say they don't like them.  Because now, I love cauliflower.  And after trying several fruits and vegetables several times, I now like them.  Once I didn't like cucumbers!

Now that cauliflower has made it's way into my diet, I've decided to make them in mashed potatoes.  This idea has been floating around in the Primal community for a while, and while I have made "cauliflower mash" before.  This time was different.  I went all out.  Roasted garlic.  Butter.  Whole milk.  Food processor.  Super smooth texture.  Oh yeah! 


Cauliflower Garlic Mashed "Faux-tatoes."
   makes about 8 servings

    1 head of cauliflower, steamed or boiled
    1/4-1/2 cup  raw whole milk
    4T - 6T  real grass-fed butter
    8 cloves of home-roasted garlic
    1/2 tsp  unrefined sea salt
    1/2 tsp  black pepper

To make your mashed potatoes:
  1.  Place hot boiled or steamed cauliflower, in a food processor.  Add butter and roasted garlic cloves.  Blend until smooth. Add spices. Blend.  Lastly, add milk until desired consistency is reached.
  2.  Taste.  Modify if needed. (Becareful, these are really good, it was hard to stop eating them! ;)
  3.  Serve warm with some more butter (if desired) along with a nicely cooked protein, like grass-fed beef, chicken or turkey!


Leftovers (if there are any) keep really well in the fridge.  Eat within a week.  They are even great cold!  This recipe is a great side dish option for those of us who do best on low carb, low starch, Primal, paleo diets.

Saturday, September 1, 2012

Grain-free Unsweetened Banana Cake.


Today is my birthday, so I thought sharing a cake today would be only appropriate.  I didn't make this cake today, however, but made it sometime early summer.

Banana bread has always been one of my favorites.  Since going gluten-free, I've made lots of different versions.  Up until now, my best recipe has been my original banana cake recipe.  Then there was a banana cake made with oatmeal.  There was also my gluten-free whole-grain banana bread, which I adapted from my favorite wheat-based recipe when I first went gluten-free.  And now there is this banana cake.  Made with grain-free flours, left-over soured milk, and bananas, this banana bread is easy to digest, primal and absolutely delicious!  I also love it because it give me a use for raw milk that has gone a little bit too sour to be palatable.  Raw dairy is so valuable nutritionally, it's such a waste to not use it!


I've made this recipe twice now, and it's been fantastic.  The first time I made a frosting over the whole cake made with peanut butter, butter, yogurt and coconut oils.  It was fantastic and I ended up eating it for breakfast because it had enough protein and fat to make my metabolism happy :)  The pictures you see here have one layer of a peanut butter-butter frosting in the middle, but not over the entire cake.  I hope to tweak my peanut butter recipe, get it just right, and then share it with you.  For now, feel free to mix equal parts, butter, fresh ground peanut butter, a few drops of Stevia clear, and vanilla extract together to make a wonderfully nourishing peanut butter filling for the middle of these cakes.  And be sure to share with family!  It's so good (and makes a lot) so sharing should be mandatory!  This cake is also completely unsweetened (bananas only) and it's Primal!


Grain-free Unsweetened Banana Cake.
    makes two 9" rounds

    1 cup  blanched almond flour - source
    1 cup  organic coconut flour - source
    3 cups  ripe bananas, mashed
    6 small  real eggs
    2 cups  soured raw milk
    1 Tbsp  warm spice blend (mine was a mix of cinnamon, cloves, ginger, cardamom, nutmeg, allspice)
    1 Tbsp  vanilla
    1 tsp  baking soda
    1/2 tsp  unrefined sea salt
    2 Tbsp  grassfed butter (to grease the pan) - source


To make your banana cake:
  1.  Preheat the oven to 375 degrees (convection or non-convection, same results for this cake). Use your fingers to butter the cake pans liberally.
  2.  In a large bowl, mash bananas, whisk in eggs, sour milk, and vanilla.
  3.  In another medium sized bowl, combine flours, baking soda, and sea salt.
  4.  Mix wet ingredients into dry, using a spatula to incorporate.
  5.  Distribute batter evenly between both pans. Bake for about 35-40 minutes or until sides have pulled away from the pan and top is golden brown. When the cakes have cooled, remove from pans by gently inverting them onto your hand or a plate.  Wait until cakes are completely cooled to frost, if desired.

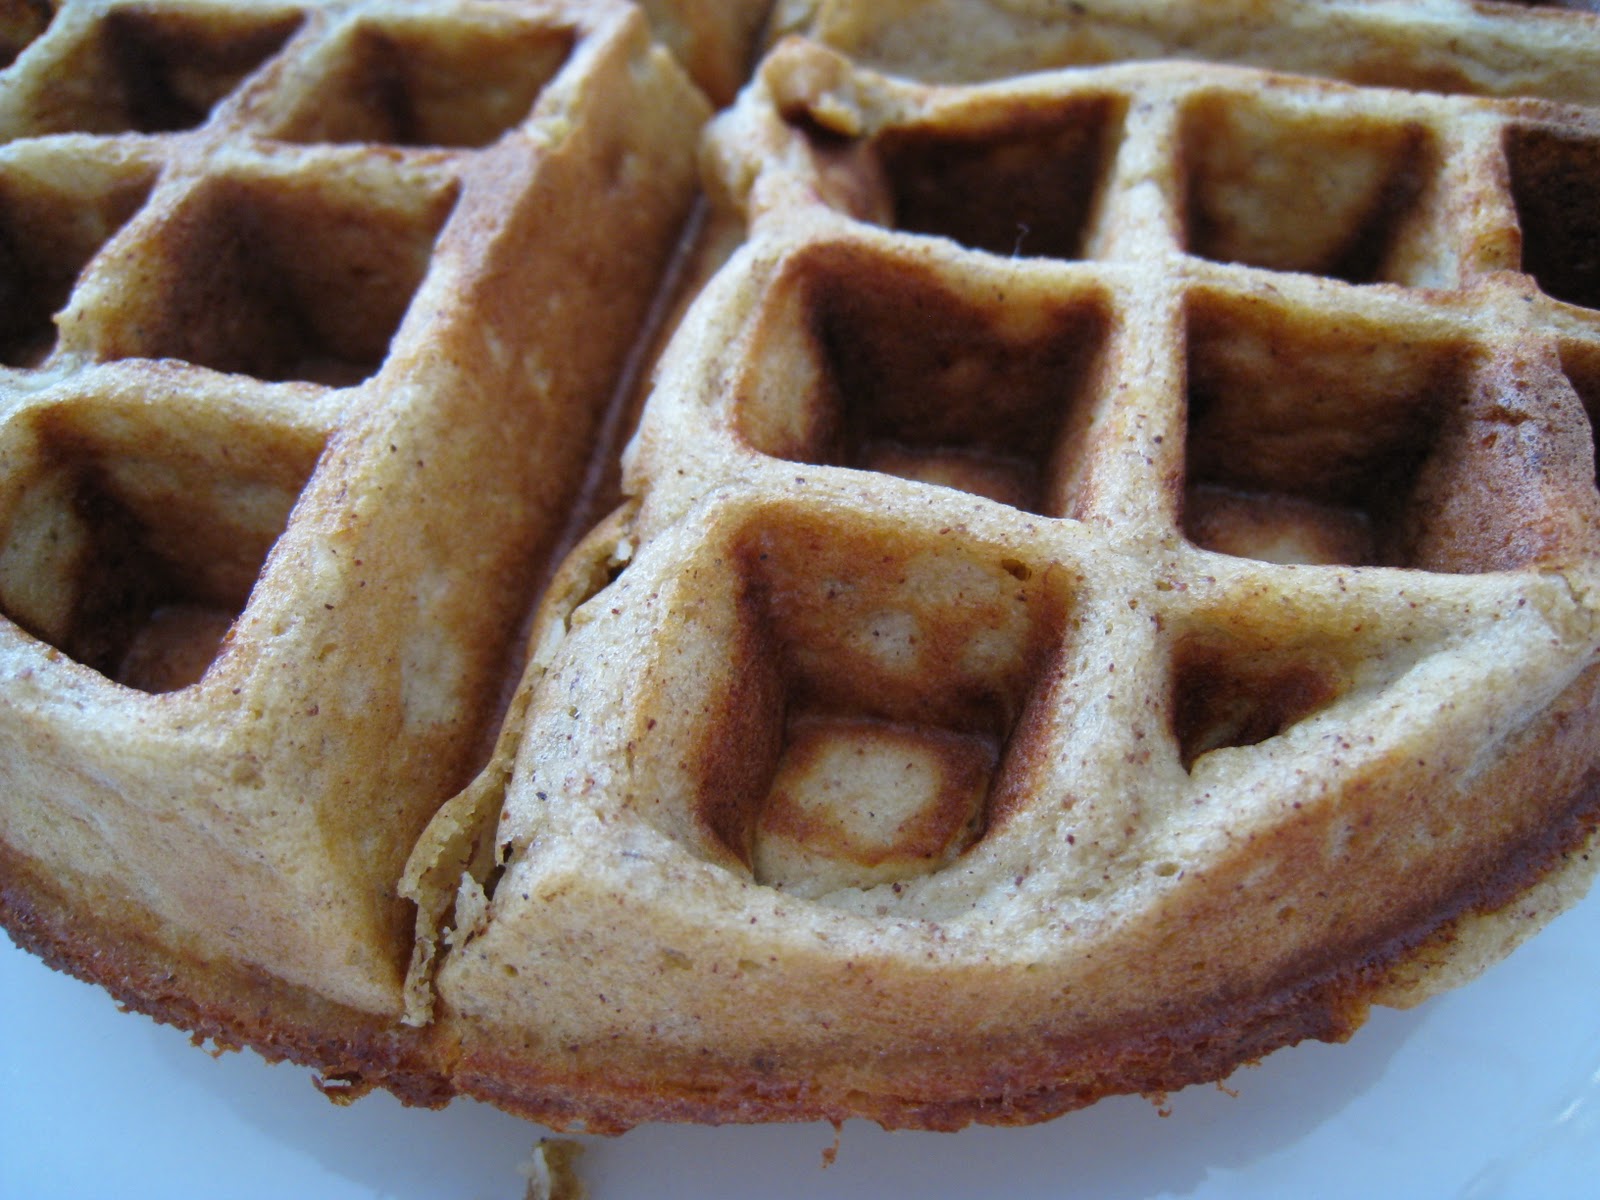
Texture up close.

This cake has quickly become one of my favorites, I hope you enjoy it too!

Sunday, July 8, 2012

Lactation (Oatmeal) Cookies.

My lovely sister in law just gave birth to TWINS!  I could not be more thrilled.  It is my first time being an Auntie!  Now I have two adorable little boys to love and spoil.  Now that the twins are here, my brother and sister in law have a lot to keep them busy! 


One thing that a lot of new moms struggle with (so I am told) is keeping up their milk supply, sleeping, and keeping their calories up sufficiently to breastfeed.  My friend Heather created the idea of a "lactation cookie" when she had her first child (and she has also had twins recently!).  This is exactly what nutrition is all about, using food to meet your bodies needs.

These lactation cookies are pretty much just like your standard oatmeal raisin cookie. (Men don't worry, you won't lactate if you eat these).  These are called lactation cookies because the main ingredient is oats, and they also have some flaxseed.  Oats are very well known to increase milk supply for mothers, and flax help increase milk supply too.  They also do not have a lot of sugar (you can eat many and not get blood sugar spikes), and the oats and almond flour provide some protein, which is crucial for breastfeeding!  Cookies are also great for new moms because suddenly life revolves around the baby(ies) and finding time to eat can be hard.  Having twins doesn't leave a lot of time on your hands!  Cookies can easily be grabbed and eaten with one hand.  Just make sure they're as nutritious as these!  Beware - I am told husbands like lactation cookies too!  Moms may want to guard them ;)

Lactation Oatmeal Cookies.
    makes over 2 dozen cookies

    2 1/2 cups  toasted rolled gluten-free oats (mine were sprouted and soaked oat groats)
    1 cup  blanched almond flour
    1 Tbsp  organic coconut flour - source
    2 sticks  grass-fed butter, softened - source
    1/2 cup  coconut sugar - source
    2  real eggs
    1 cup  organic unsweetened shredded coconut
    1 cup  organic raisins (can use chocolate chips)
    2 tsp  vanilla
    2 tsp  cinnamon
    1/4 tsp  unrefined sea salt
    2 Tbsp  organic raw honey -- for topping - source
    2 Tbsp  organic raw ground flax seed -- for topping
    2 Tbsp  warm water


To make your cookies:
  1.  To toast your oats, preheat oven to 350 degrees. Pour oats onto a silicone lined a baking sheet and spread evenly. Place in the oven for 5 minutes, stir and return to oven for another 5 minutes or until oats are toasty (be careful not to burn!).
  2.  In a large bowl combine almond flour, coconut flour, sugar, coconut, cinnamon and sea salt. Whisk until combined. Add toasted oats.
  3.  In another large bowl, beat together butter, eggs, and vanilla with an electric mixer.
  4.  Combine the dry into the wet ingredients, incorporating together with a spatula. Add raisins, and mix again.
  5.  On silicone lined baking sheets, use your hands to make balls of the dough and place cookies in rows 4x3.  Place sheets into the fridge to set for about 30 minutes.  Then pull from fridge and bake in oven for about 12 minutes until golden brown.
  6.  Make your topping in a small dish combine honey, warm water and ground flax.  Mix together with a pastry brush. Let cookies cool for about 10 minutes.  When cookies are warm, but not hot, brush the flax-honey mixture on top of the cookies.  Remove cookies from pan with a spatula, transfer to a wire rack, and place in the fridge to set the topping.
  7.  After about 10 minutes in the fridge, cookies are ready to eat!


Do the new moms in your life a favor - bring them these cookies :)


Friday, June 22, 2012

Grain-free Chocolate Cake.


My attempts at grain-free cakes have really come a long way.  Those of you who have ever made a grain-free cake know that it's not the easiest thing ;)  I started my journey with some of Elana's recipes at Elana's Pantry.  The results were better than I hoped, but I knew I could make it better.  Over the past three summers, I've made a couple versions of her chocolate cake.  I've scoured a countless number of other food blogs, drawing ideas from what other real food bloggers have done in grain-free cake land.  I've experimented with the amounts of liquids and ratios of flours and other ingredients, changing it as I went along, longing for a certain taste and mouth feel of cake.  Now I finally have a recipe entirely my own.  Each time I've learned something new, and now this is a cake I am really happy with.  I cannot say more about this cake's texture, flavor and ease of cooking.  I know that you'll love it too.


Grain-free Chocolate Cake.
    makes two nine inch round cakes

Cake:
  3/4 cup  organic coconut flour
  1/2 cup  blanched almond flour
  1/2 cup  cocoa powder - I used Ghirardelli
  12  real eggs
  1 cup  maple syrup - grade B
  1 cup  organic coconut oil, melted
  1 Tbsp  vanilla
  1/2 tsp  baking powder
  1 tsp  baking soda
  1 tsp  unrefined sea salt

Frosting:
  4 cups  organic powdered sugar
  1 stick  unsalted butter - I used KerryGold
  ~1/2 cup  raw whole milk
  1/2 tsp  unrefined sea salt
  optional: extract of choice for flavor, here I used mint extract


Chocolate Ganache, or use my Paleo Ganche recipe:
  1 - 12 oz  package chocolate chips - I used Trader Joes brand - feel free to use unsweetened also
  1/2  stick unsalted butter - I used KerryGold

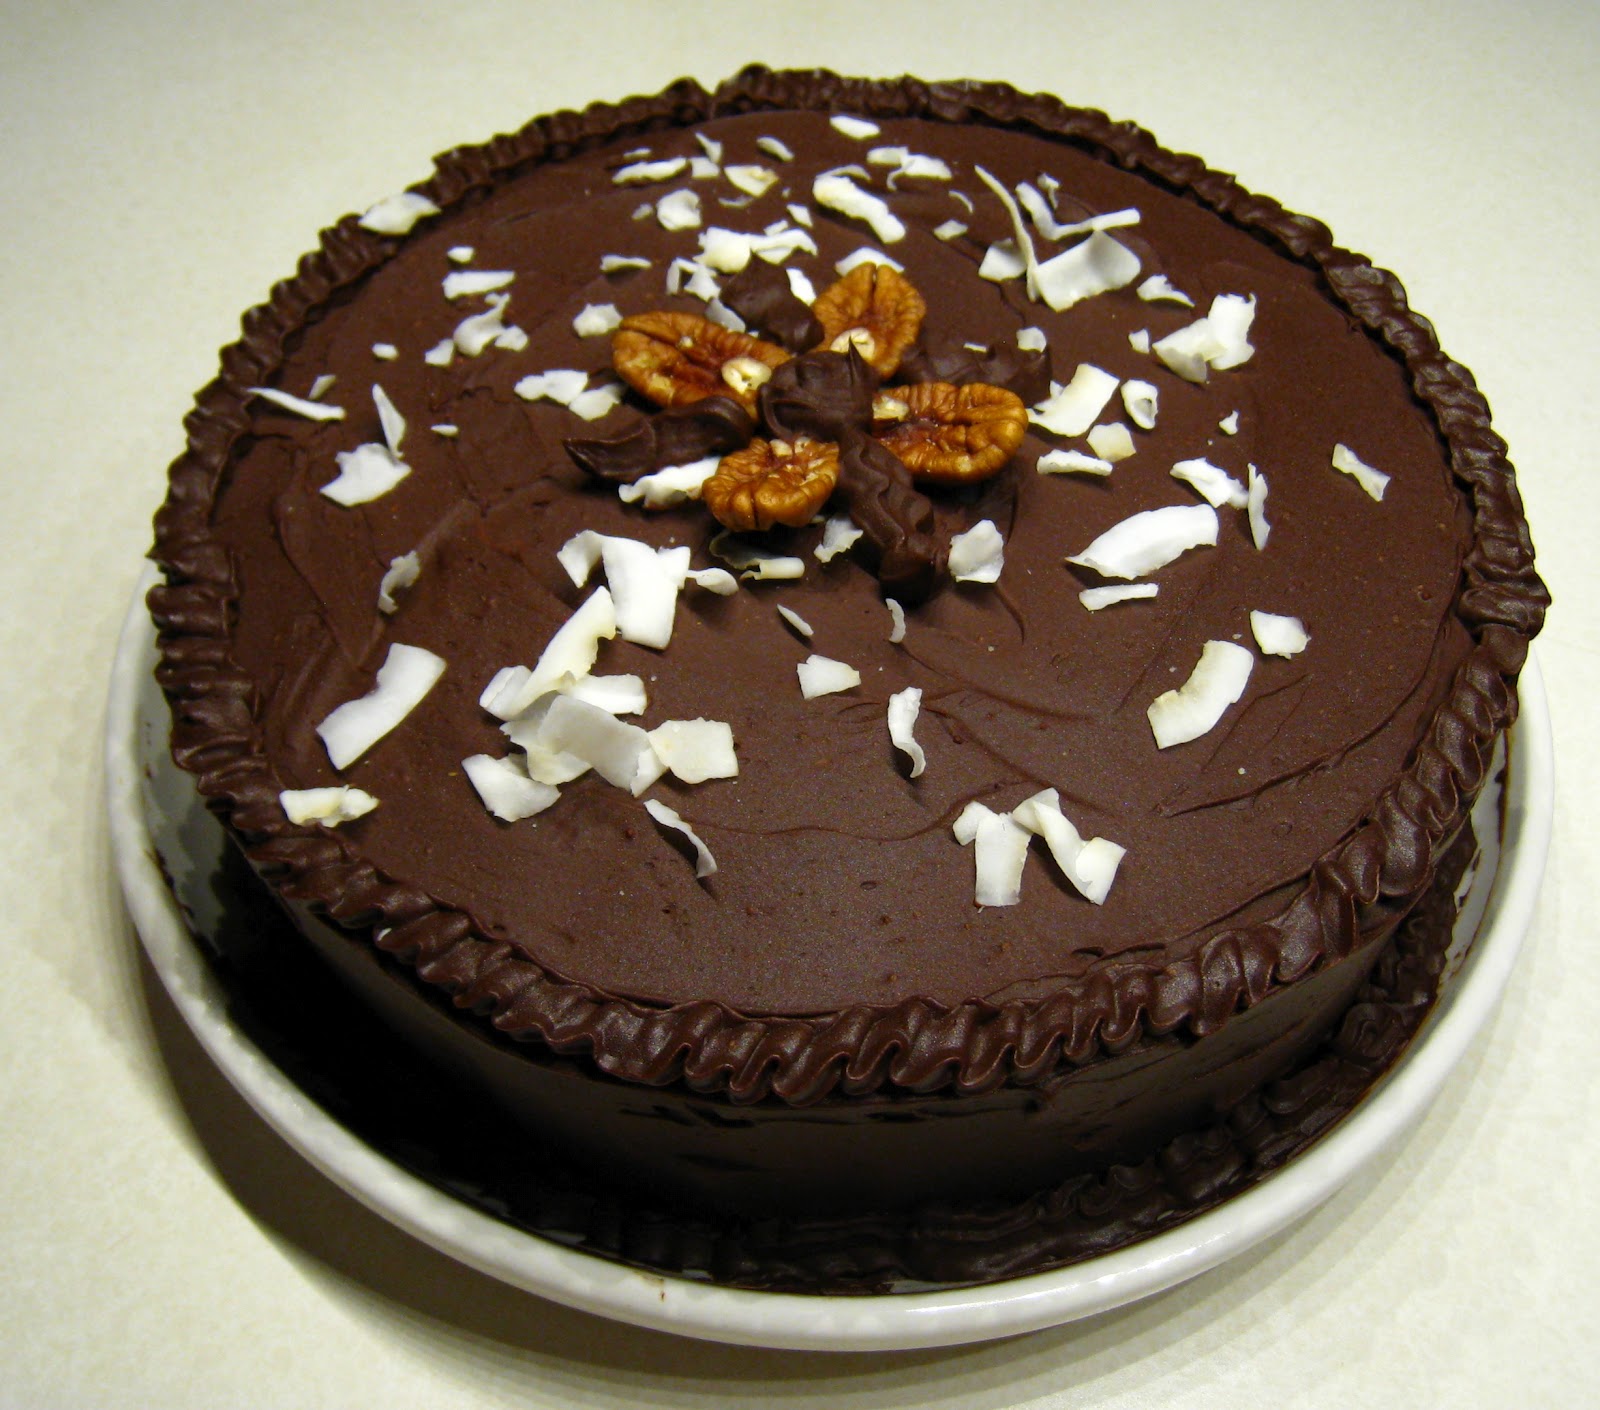
Here's the final product! Cake assembled and frosting+ganache set.

To make your chocolate cake:
  1.  Preheat oven to 350 degrees convection.
  2.  In a small bowl, combine cocoa powder, coconut flour, almond flour, sea salt, baking powder, baking soda. Whisk until there are no lumps.
  3.  In another bowl, whisk together eggs (room temp), maple syrup, melted coconut oil (make sure it's not hot), and vanilla.
  4.  Combine wet into dry ingredients until just combined.
  5. ****Grease and flour the sides of the pan - use butter (best) or coconut oil (ok). 
  6.  Pour equal amounts of cake batter into 2 9" round cake pans.
  7.  Bake at 350 degrees for about 35 minutes or until top springs back lightly when touched and sides are pulling away from the pan.
  8.  Let cool only until you can handle the pans, then run a knife around the edges before gently inverting the cakes and removing them from the pan. If you floured and greased the sides well, getting the cakes out of the pan shouldn't be an issue, but if you didn't, you might get only the top of the cake out!

To make your frosting and ganache:
  1.  For the frosting, with room temperature butter, cream butter and powdered sugar until fluffy. Add milk slowly as needed into the sugar and butter.
  2.  Add vanilla, extract (optional).
  3.  For the ganache, in a double boiler melt chocolate chips and butter. Remove from heat when 80% of the chocolate is melted. Stir. The heat will melt the remaining chips.
  4.  Let ganache cool, but still be spreadable.

Cake assembly:
  1.  Remove cake from the pans. Place one on a large plate.
  2.  Frost with one layer of frosting on the top of the cake.
  3.  Place the remaining cake on top of the frosted layer.
  4.  Frost with remaining frosting on top and sides of both layers.
  5.  Place cake in the fridge for the frosting to set.
  6.  Spread ganache on top of the cake. Return to the fridge and allow ganache to set.

Notes:
1) You can easily cut this recipe in half, and you'll have one 9" cake.
2) Do not make this with runny honey instead of maple syrup. There is less flavor and a bit less sweetness. When I made this with honey it just seemed to be lacking something.
3) Make sure your eggs are on the medium/large side. I've made this cake with small sized eggs, and the end product was a bit more on the dry side than I would like.

Here are some pictures of the first grain-free chocolate cakes I made:


At my house, cake is always served with real ice cream!


There was A LOT of filling inside, and it still wasn't enough ;)


German chocolate cake, completely finished!


This was my first attempt at grain-free chocolate cake. I wish I had remembered to snap a picture before cutting it up!


My brother's birthday is always during the summer, so I always have an excuse to make a cake.  It's my once a year cake indulgence!  However that is beginning to change since I've learned how to make these cakes so nourishing and healthy!  This summer will probably be a little different since my brother and his wife are having twins.  It's very exciting, but I doubt a birthday celebration with cake and ice cream will be the last thing on their mind ;)  This past week I made this cake in a banana version with peanut butter frosting!  It's so nourishing, low in sugar and high in protein, and I've been eating it with my yogurt and berries for breakfast.

Happy summer! Cake away :)


Thursday, March 1, 2012

Grain-free Almond Banana Waffles.


I have a new version of grain-free waffles to share!!  Those of you who have read my site for a while will remember my first grain-free waffles.  They taste really great, but these new waffles taste even better in my opinion.  (How is that possible?!)  One of the reasons I like this recipe so much is because they taste great plain, which is atypical of many grain-free versions!!  I also like how this grain-free waffle does not rely on coconut flour or eggs.  I love my other grain-free waffles, but they more dense compared to regular waffles and coconut flour is very filling.  They are, however, GAPS friendly.  Overall, this recipe has a bit more natural sweetness (from the banana) and isn't so dense.  The texture is FAB!  This recipe is also good for those who either don't care for coconut flour or just want a real food waffle recipe that doesn't use so many eggs!

I created this recipe on a whim one morning as I was whipping up some of my original grain-free waffles.  I wanted a recipe that did not use coconut flour.  And I wanted it to be easy!  So these waffles were born :) And I can tell you that they're here to stay

Grain-free Almond Banana Waffles.
    makes about 2 large Belgian waffles

    3 real eggs
    1 cup  blanched almond flour - source
    1/2 cup  organic shredded coconut - source
    2 Tbsp  almond butter - source
    4 Tbsp  butter, softened or melted - source
    1 ripe banana, mashed
    1 tsp  cinnamon - source
    1 tsp  vanilla - source

To make your waffles:
  1.  Turn on your waffle maker to medium heat. Spray it with olive oil - you don't want it to stick!
  2.  In a small bowl, crack eggs and beat with a whisk by hand until glossy yellow.
  3.  In a medium bowl, mix dry ingredients together. Make sure your coconut is finely shredded, and not in the form of flakes or chips.
  4.  Mix eggs and melted butter (but make sure butter is not boiling hot!) together, and whisk this into the bowl with the dry mixture.  **Add water to thin to right consistency, not too runny and not too thick (this step is optional, do if needed).
  4.  Pour batter into your waffle maker. Mine took over a whole cup of batter to fill and make one waffle. Depending on your waffle maker, your waffle yeild may vary, requiring less or more batter, or requiring more or less heat.
  5.  When done (mine beeps!), gently remove to a hot sheet pan in a 200 degree oven to keep warm as the other waffles are made.  Try using two forks or a fork and spatula for this step!
  6.  Enjoy your waffles!  Top them with BUTTER, yogurt, real maple syrup, peanut butter or fresh fruit.  And they're so good you can even eat them plain!!


I must admit, one of the best parts about these waffles is how great they are later, whether they're cold and left out for a few hours after making, or after they are frozen (for weeks) and then are thawed out.  And PS, they make great waffle sandwiches.  More on that in the next post!!

Happy waffling ;)
And Happy March!

Friday, February 3, 2012

4 Ingredient Almond Bars.


This grain-free nutritious snack is as easy to make as it is to eat!  Four easy ingredients that everyone typically has on hand, and four easy steps to make!  It's a great option for crumbling over yogurt in the morning for breakfast, or taking to-go as a snack on the run.  Protein from the almonds and fat from the butter will help keep you satisfied and fueled for a long time.  The short ingredient list makes these bars super easy to whip up as well, which saves a lot of time when you need some nutritious snack options but don't have time to make nourishing protein bars or grain-free zucchini bread.  Best of all, they do not require any special equipment, like a high powered blender or food processor.


4 Ingredient Almond Bars
    makes one 9x13 pan

    16  oz salted grass-fed butter*
    4  cups sliced almonds, crushed
    1/2  cup organic raisins
    1/2  cup honey, raw or runny

To make your almond bars:
  1.  In a large bowl, combine almonds, raisins, and honey.  Add butter and combine into nuts using your hands.
  2.  Pour mixture into any 9x13 pan and press down hard.  I used wax paper and my hands for this step.  Beat with a mallet to get it really compacted.
  3.  Bake in a 375 degree for about 13-15 minutes or until golden brown.  Watch it carefully to make sure the edges don't burn.
  4.  Let harden in the refrigerator.  Slice into squares and enjoy!  Store in the refridgerator.  These bars can also be frozen for the long-term.

Looking for more snack options? Check out these easy-to-make recipes:

Chocolate Chunk Bark
Green Fig Bars
Nourishing Protein Bars 1.0
Nourishing Protein Bars 2.0
Sunbutter Chocolate Raisin Bars
Grain-free Basil Crackers
Chocolate Peanut Butter "No Bake" Bars


These photos were taken on my iPhone, not too bad!

*Hello everyone who commented below about the amount butter used. It's not a typo, but since several people are having issues with the recipe, it is making me think I wrote down the wrong amount originally. Also, the butter is not melted, but cut into the almonds with your hands. This might make a difference. I'd suggest cutting the butter in half or in 2/3rds. Sorry for the issues! When I have time In the summer, will retest the recipe myself. 

Friday, January 13, 2012

Grain-free Lemon Biscuit Cookies


Need a grain-free and low-sugar but delicious and simple treat recipe?  This is it!  These biscuit like cookies are perfect for dunking into some raw milk eggnog, which is exactly what I did this past Christmas Eve!  The grain-free members of the family were so happy to have a fun cookie option.  Look at those shapes!  To get the shapes, I pressed 1 Tbsp of the cookie dough into a Christmas shaped cookie pan I scored from Bed Bath and Beyond last January which I bought in anticipation for this years Christmas baking.  It was a great find!  These cookies are also great on their own, thanks to their buttery cake-like texture and fresh lemon zest.  And kids will love to decorate these little guys with different colored icing!!


Lemon Biscuit Cookies
    makes almost 24 cookies

    3 cups  almond flour - source
    1 cup  organic coconut flour - source
    zest of one lemon
    1/2 tsp  unrefined sea salt - source
    1/4 cup  organic raw honey - source
    1  happy pastured egg
    1/4 cup  palm/coconut sugar - source
    1/2 cup (1 stick)  cold grassfed butter - source
    1/2 tsp  baking powder - source
    2 tsp  vanilla extract - source

To make your biscuit cookies:
    1.  Preheat oven to 350.
    2.  In a large bowl, mix together dry ingredients.  Zest lemon on top and mix again.
    3.  Take your butter, cut it into pieces with a sharp knife and work the butter into the dry ingredients with your hands until there are no big chunks.  BEWARE - this cookie dough is extremely good and quite addicting.  There's no such thing as a "small taste" of this dough.  Only the brave can have just a little bit, it's that good.  And if you eat less cookie dough you can form more cookies ;)
    4.  Press the cookie dough into your desired pan or mold filling it slightly less than completely full.  Bake until the edges of the cookies are slightly browned and flex to the touch.  The tops of the cookies will not brown.  The bottoms of the cookies WILL brown and you cannot see this happening.  Err on the side of less cooked than over baked.  Let cool for about 10-15 minutes and then carefully take cookies out of the mold onto a baking rack to cool completely.
This was my first batch of cookies, see how well they brown? Be careful!
    5.  Serve warm and slathered in butter, or cold and dunked in eggnog or you could even dip them in a homemade chocolate sauce or frost them with icing, or devour them plain!


Not all the cookie dough fit into my special pan, so the rest I scooped out and pressed into mini muffin tins!  They are fun to nibble.  The lemon zest is fantastic!!

These cookies are very versatile and have a mild flavor that goes with anything!  Eat them for breakfast as a biscuit, or crumbled on top of yogurt, for lunch dipped in eggnog, as a snack anytime of the day or for dinner as a not-too-sweet finish to the meal.  You could even fold some poppyseeds into the batter to go with the lemon zest!  Don't forget, you can make these anytime of year, just use a non-Christmas shaped cookie pan :)