Showing posts with label slow food. Show all posts

Friday, January 19, 2018

Dr. Meg's Homemade Blueberry Juice.

You guys, this stuff is RAD.  It's rad both because it tastes good and because it's good FOR you!

In medical school, we received extensive education on herbal medicine. One of the great Naturopathic doctors who helped integrate the use of botanicals and primary care naturopathic medicine was Dr. Bill Mitchell. His case books tell great stories of people acheiving wellness through natural therapies. I've seen this first hand in my own practice, also, which is why I became a Naturopathic doctor in the first place!

This berry juice was one of Dr. Mitchell's passions. His family still carries on his legacy, and sells a great product. I've used that product personally and with patients, and it's delicious, but I knew I could make something easily at home and reap similar benefits.

Berries, mostly the blue and dark dark colored berries, contain anthyocyanodins. Anthocyanodins are potent antioxidants, and they have a great affinity for the vascular system. Men, young and old, should be on this berry concentrate daily. Women benefit the most after menopause, as their cardiovascular health risk increases.


Here's the recipe: get cooking! Be sure to read the whole recipe first before embarking.

Dr. Meg's Blueberry Juice.
     makes 1 quart jar + berry "compote" leftovers

8 pints organic blueberries
8 pints organic blackberries
^ I previously lived in Seattle, and had access to local farms, this equates to 2 flats of berries
1 cup filtered water
1 Tbsp coconut oil

Directions:
  1) Turn your slow cooker on to WARM setting, you want things to heat up for extraction of constituents, but not to "cook" the berries.
 2) Add all your berries to the pot, add water, and coconut oil. Replace lid.
 3) Simmer on warm for 48 hours, stirring occassionally, only about 3 times per day.
 4) When done, berries should look "shriveled" like you defrosted frozen blueberries, and the juice should nearly cover the berries and be dark blue in color.
 5) With a fine mesh strainer, gently scoop the berries out, and press-out juice lightly with the back of wooden spoot into a funnel that goes into a large 1 qt mason jar. Do this in batches. You will be left with about 1 qt of berry juice and berries.
 6) Store in the fridge. I like to eat the berry portion with breakfast (see my recipe for chia pudding) and then take shots of the juice OR add to a large portion of water and drink throughout the day.
 7) The berry juice is not very sweet, so it won't affect your blood sugar levels much.


Enjoy :)


Friday, December 25, 2015

The Most Awesome Massaged Kale Salad.


A few months after getting on the "I love kale" band-wagon, I discovered just how great massaged kale salads taste. Also, they are incredibly easy to make. The massaging process only takes a few minutes, but is sufficient to break down the cellulose and other fibers in the kale, making the leaves more digestible and less chewy when eating. This version is super simple, and very customizable. I like to add parmesan cheese for a salty kick and an off-set to the slight bitterness of the kale leaf. But if dairy isn't your thing, feel free to leave it out.


The Most Awesome Massaged Kale Salad.
    serves 4-6 depending on your kale-love-level

    2 heads dino kale, stems removed, and cut into 1/4”-1/2” ribbons
    1/2 cup freshly grated parmesan cheese
    2 Tbsp tahini
    juice of one lemon
    1 Tbsp olive oil / drizzle of olive oil
    3 dashes nutmeg
    2 dashes cayenne pepper
    1 dash smoked hot paprika
    1/2 tsp red pepper flakes
    salt and pepper to taste

Directions:
  1)  Place kale in large bowl, add lemon juice, salt, pepper, and olive oil. Massage with bare hands for 3-5 minutes, until kale decreases in size by half and is soft and looks dark green.
  2)  Add parmesan, tahini, and spices. Mix thoroughly.
  3)  EAT and enjoy! This is even better the second or third day, but I doubt it will last you that long!

Feel free to add more heads of kale if you want to make a bigger portion, but you may have to adjust the amount of cheese and tahini; however, I've made this with 3 heads of kale and didn't add any more ingredients. It's that forgiving! The photos here are of the salad made with regular green kale, but I much prefer the dino kale, but both work and are equally delicious.

Possibly vegan, gluten-free, nutrient rich and delicious. Share it with all your family and friends. They’ll gobble it up! My family, friends and I surely did.

Xoxo,


Tuesday, May 19, 2015

Benefits of Coconut Flour.

Many of you readers (hello! long time no see!) know how much I loooove coconut flour.  Coconut flour has been such a great option for me, for many reasons, and I know many of you have learned the ins and outs of baking with coconut flour too and love it just as much as I do.

For those of you who are still on the fence, or just haven't hopped on the coconut train (it's a serious train that's been chugging very strong for several years now) then I'm here to convince you to give coconut flour a try.

My journey with coconut products began several years ago when I first learned about the paleo way of eating. Focusing on the paleo / primal template for my food choices was a great option for me, and during this time I discovered the awesomeness of coconut flour.

What makes coconut flour so awesome is mostly its nutrition stats, its affordability and its versatility. Today I'm here to tell you about why coconut flour is a healthy choice, so that will be my main focus, but I'll also touch on the other two points near the end.

Disclaimer - While I do have extensive training in nutrition, I am not a doctor, nutritionist or registered dietitian, so implement this information with your own discretion.


  Why I Love Coconut Flour 101

1) Contain healthy fats
- Healthy fats are so important for our bodies.  We need fat in order to make healthy skin, hair, and nails.  Fat is an essential part of our brains, as well as ALL our cell membranes which are basically a double stack of fat molecules, called a phospholipid bilayer.  Many sources of fat also contain cholesterol, which is an essential building block of almost all hormones.  Pregnant women need a higher intake of essential fatty acids (EFAs) in order to make the babies brain (most importantly).
- Coconut flour contains medium chain triglycerides (MCTs) aka medium chain fatty acids (MCFAs). You've probably heard about these before. What's great about MCTs is that they are metabolized very quickly by the body and so are used as an energy source right away, in contrast to LCFAs (long chain fatty acids) which need a more involved process in order to be broken down and utilized. MCTs are also very antimicrobial.
- Coconut flour is also rich in a type of fat called lauric acid, which along with MCTs, are very antimicrobial. Both together can help contribute to a healthy balance of body flora, on our skin and in our gut.
- In less than one ounce of coconut flour, it contains about 3 grams of saturated fat.
- It is also worth mentioning that coconut flour is low carb, which makes it a great alternative for those who medically need to choose a low carb diet, and for others who eat low carb diets by choice.
- Fats also contribute to feeling satisfied with the food you're eating, so you are more likely to stop eating and be satisfied with how much you've eaten, when you are feeling full.

2) Fiber content
- Many baking flours on the market are devoid of certain nutrients, and other properties like fiber, but coconut flour is NOT one of them! Coconut flour is rich in fiber, and if you've ever worked with coconut flour before you know that if not used properly, it will suck up all the liquid in your recipes and the end product will be very dry! That's because of all the fiber.
- In less than 1 ounce of coconut flour, there is 11 grams of fiber.
- Fiber is necessary in our diets because it is needed to detoxify hormones, to help move our bowels, and to feed the bacteria in our colons.

3) Protein
- Most flour products contain little or NO protein, but coconut flour actually does!
- In less than 1 ounce of coconut flour, there is 4.5 grams of protein.
- Both the fat, fiber, and protein contents of coconut flour make it very nourishing and satisfying at the same time. Making brownies or cookies or waffles with coconut flour will keep you full for hours, instead of lifting your blood sugar and crashing you down 2 hours later. Say good-bye to the blood sugar roller coaster. ;)
 

Many of my recipes use coconut flour - but these are some of my absolute favorites. They're also all grain-free! All the photos in this post feature recipes I've created using coconut flour.


I hope you all found this post to be useful, informative, and inspiring! Get baking ;)

Love to you all,
xoxo


I am wrote this post for Nuts.com because they are passionate about sharing information about healthy food!  It was good opportunity to join forces in order to spread information about making healthy choices.

Monday, January 5, 2015

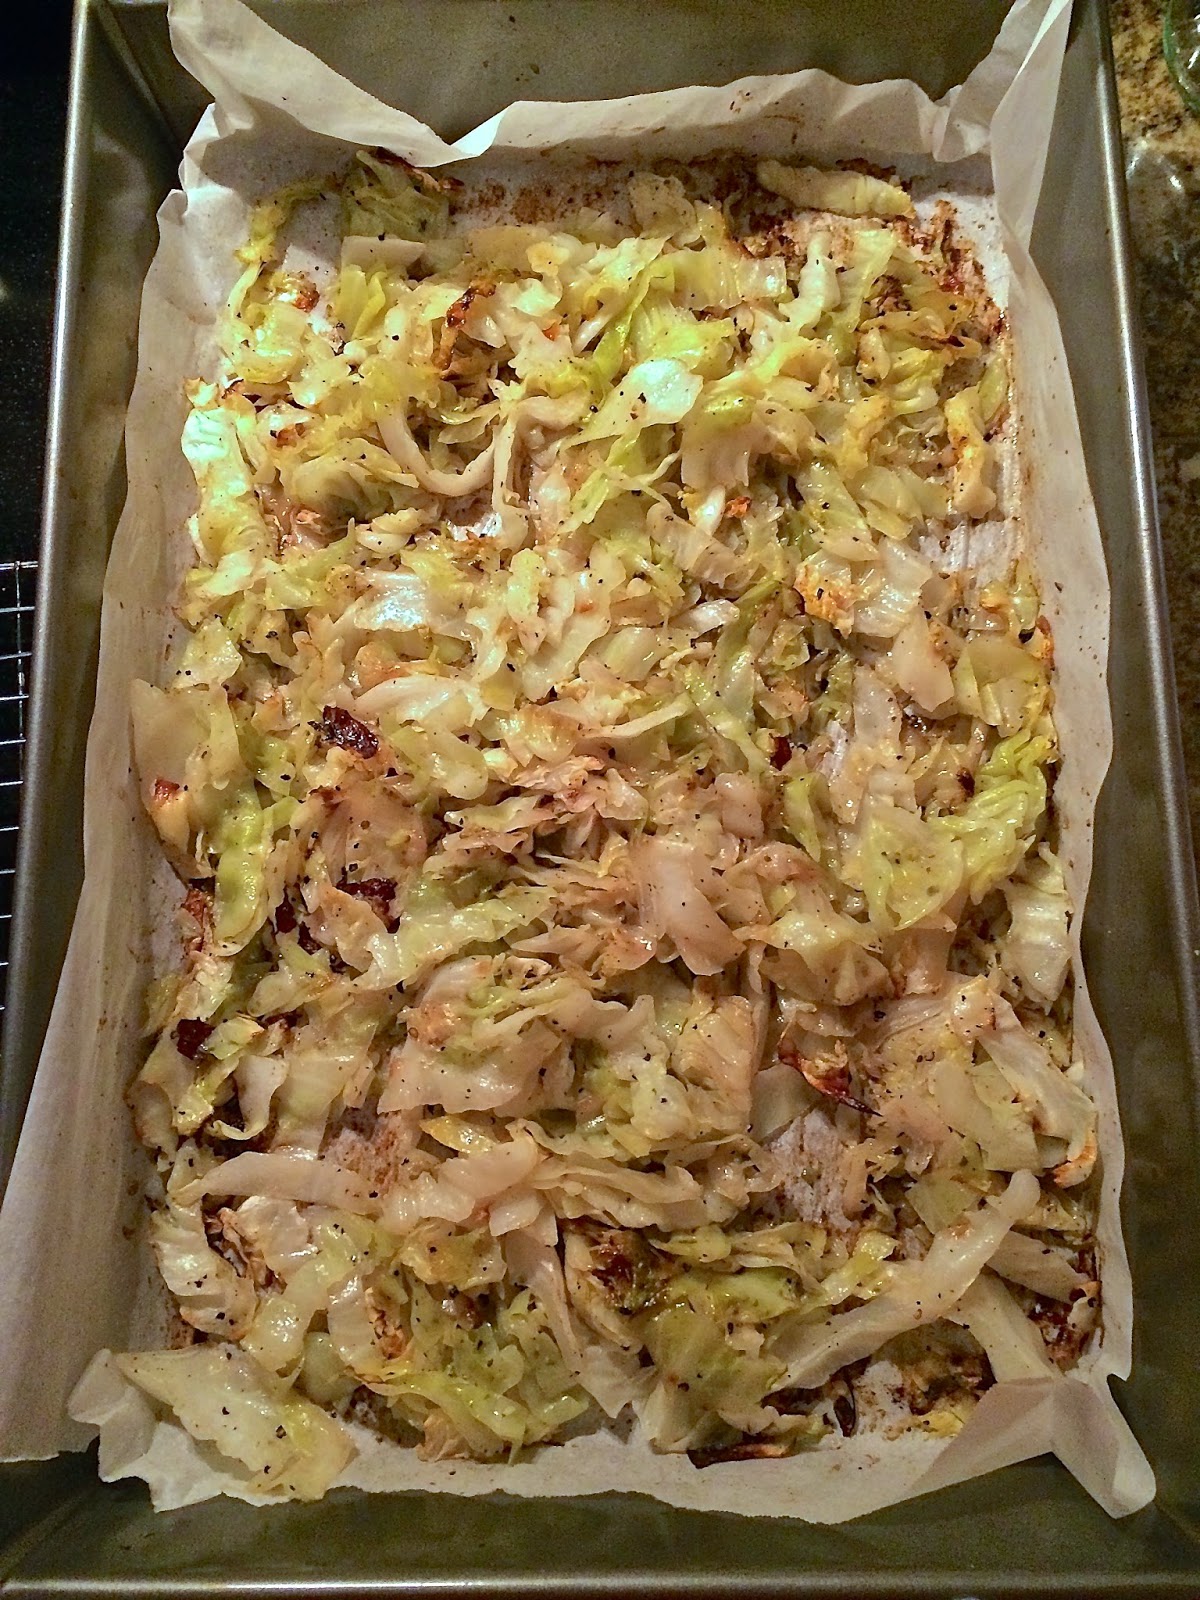
Olive Oil Roasted Cabbage.


I thought I was a foodie before I tried roasted cabbage. I was clearly wrong. Prepare to have your culinary minds blown. After all, it's only four, if you could even call it four, ingredients!!


I've been wanting to share this recipe with you guys for a while!! It's just too good to keep to myself. But I can also hear you saying: but Meg it's a simple recipe, so how can such flavor come from such simple ingredients? Cabbage? Come on!

You're right, this is a simple recipe. It's easy to prepare, easy to make, and easy to eat since it pairs well with many different foods. The taste of this dish, however, is anything BUT simple. The olive oil creates a rich flavor that compliments the sweet taste of the roasted green cabbage, and there are soft and sweet bits of cabbage intermingled with darkly browned crunchy delicious pieces.  Heaven!


Olive oil Roasted Green Cabbage. 
    makes enough cabbage for meals for one, for one week

    1 head of green cabbage - I don't buy organic here, since cabbage is part of the "clean fifteen"
    good quality olive oil for drizzling - source
    unrefined sea salt - source
    ground black pepper

To roast your cabbage:
  1)  Use a large roasting pan or baking sheet; line with either parchment paper or a Silpat silicone baking sheet.
  2)  Slice cabbage into 1/2" thick slices. The break apart leaves/pieces with your hands. (You can also cut along the inner part and keep the leaves attached in the middle - this makes "wedges" - and you can roast it that way too - I've done it both ways and like both equally)
  3)  Place in pan, drizzle liberally with olive oil (don't saturate, just get mild coverage over all cabbage), sprinkle with salt and pepper (don't be shy!) and TOSS well with your hands.
  4)  Spread cabbage evenly, and bake in a 400 degree (mine's non-convection) oven for anywhere from 20-40 minutes. Leaving in cabbage longer will give you some nicely browned pieces that get crispy and delicious. Baking for less time will give you a cabbage that isn't as fully cooked and is more on the crunchy side. I highly recommed baking it for longer :)
  5)  Remove from oven and enjoy! Keep in the fridge all week for snacks, salad toppings and as a main course side. I really enjoy pairing mine with homemade hummus, carrots and some chicken!


Yes, it's that simple, and yes, it's THAT good. Try it out!

(FYI - I haven't tried this process yet with red cabbage, but I'm sure you could do that too.)

Happy New Year my lovely readers! I go back to school today :)

Friday, June 20, 2014

Paleo Chocolate Sauce or Ganache.

(Hello everyone :) I am alive! I've been busy (with medical school), but here I am again!)


Sauce or ganache? Why the fuss?

Well, technically, this is a "ganache" recipe... since ganache is composed of melted chocolate + cream (coconut milk here), which makes it spreadable and allows it to just barely harden into a lovely smooth chocolate experience.

Chocolate sauce, on the other hand, tends to be more of a more syrupy/sugary composition that is perfect for drizzling. Chocolate sauces commonly include corn syrup, or a simple syrup, which gives it a characteristic sweet smoothness that holds its shape when swirled and twisted on a spoon (and on top of your ice cream!)

This recipe rides in the middle. Best of both worlds, I'd say :)

And it's paleo, primal, gluten-free, soy-free, and barely sweetened (my favorite). Which by default makes it amazing. Obviously.


Paleo Chocolate Sauce.
    makes enough for a crowd, or some for one and enough for later!
    Time to prepare = < 10 minutes

    3 oz  unsweetened Baker's chocolate* - or 3 oz of your favorite
    8 oz  unsweetened coconut milk - this one is my favorite**
    1 tsp to 1 Tbsp  runny honey*** (or more to taste)
    splash  vanilla
    dash  unrefined sea salt
    stevia drops - (optional and to taste)

To make your chocolate sauce:
  1)  In a double boiler, or a heavy bottomed pan, add chocolate chunks, coconut milk, honey. Heat on medium / medium-low until chocolate is melted. Whisk whisk whisk until smooth and entirely incorporated.
***To measure out the honey in this recipe, I usually stick a regular eating teaspoon into the honey, to get it moderately coated, and then place it into the chocolate sauce pan; I am estimating this is about 2 tsp to a whole tablespoon of honey. Feel free to use more if you want more sweetness.
  2)  Add vanilla extract, stevia (if desired) and salt. Whisk again. Taste. Add more stevia or honey if desired.
  3)  Enjoy! Dip in some strawberries, apple slices, spread on unsweetened pumpkin bread use to make into chocolate bark, use it as cake frosting (pictured); or put in a jar to use on ice cream! This sauce can do anything! Stored in the fridge this should last 1-2 weeks.

*I used the old size Baker's chocolate squares which I stocked up on right after they changed / halved the sizing of their packages.
** This brand is 100% coconut milk, and I can get it locally (if you're in Seattle, look at Central Market or PCC) for a great price (and no yucky canned coconut milk flavor!)


PS. I am now officially a third year medical student! I finished second year today. This will be a busy summer, as I am taking classes, starting clinic, and taking BOARDS in August, but you should hopefully hear more from me! I've got some recipes I've been meaning to share you guys. I hope to have some more time to get you some more yummies :) I know I've been completely MIA, and I appreciate my readers who still subscribe and share and benefit from my recipes!

PPS. The first picture is this chocolate sauce over my favorite grain-free gluten-free chocolate cake! (The sauce has harded at this point, and is exactly like a ganache!) I halved the ingredients to the cake and topped it with chocolate sauce, for a yummy dessert that is only minimally sweetened. The second picture is this chocolate sauce after being made, so it is still warm and in "sauce" vs ganache form. I love how versatile this recipe is!

XOXOOXO
Happy Day!


Sunday, February 16, 2014

Protein Balls 1.0. (Cinnamon Almond).

As I talked about last time, I've changed my diet every-day-food-selection recently. More protein! Less carb! Easy to digest things! And among all that I've found the need for an afternoon or pre-dinner snack that fits the bill. I've been eating too many Lara Bar Lemon Pie ALT bars, and Quest bars, and it's just not sustainable. I needed something that I could make at home, that was less costly, portable, protein rich, with just a little fat and a low CHO content... and so this recipe was born! (Oh, and it had to be easy, since I've got a busy schedule over here!)


This photo was taken right after I rolled them, before the fridge. I made two different kinds this morning, one which I will share at a later date (notice the balls lighter in color in the lower left hand corner).

And daaang, these babies are so good I don't know why I didn't do something like this sooner. They are also very easily customizable to make different flavors, providing you keep the general ratios the same ;)

Protein Balls 1.0. (Cinnamon Almond)
    inspired by deliciousness

    1/2 cup  homemade almond butter - or storebought - or nut butter of choice
    1/2 cup  rice protein powder - I use this one
    1/4 cup  ground flaxseed
    2 Tbsp  organic coconut oil, melted - source
    1 Tbsp  organic cinnamon - source
    1 Tbsp  local runny honey
    1/4 tsp  unrefined sea salt
    1-2 Tbsp water (optional)

(Be precise on measurements for best results. I'm an eyeballer too, but definitely get out your measuring cups for this one!)

To make your protein balls:
  1)  In a large bowl, combine almond butter, protein powder, ground flaxseed, cinnamon, salt, honey. Mix a little. Then add melted coconut oil. Mix until a dough like texture forms. Add water if necessary, I've found that every mixture is slightly different, but I've found you usually won't need to add the water.
  2)  Divide the dough equally into 10 balls. Roll dough with clean hands into balls. Then store in an air-tight container in the refridgerator. (They will soften outside of the fridge, like if you take one out and put it in your purse for later.)
  3)  Enjoy!

If you make 10 balls, here are the (approximate) stats (thanks to MyFitnessPal):

Calories - 159 kcal
Carbs - 7 g
Fat - 9 g
Protein - 13 g

Not bad, huh? I am not an advocate of counting calories, but sometimes it's good to see where recipes stand, especially if your aiming for something like a high protein snack, which I was. You can always make bigger or smaller balls to suit your own snack needs.

This is a great kid-friendly recipe as well - pour all the ingredients into a bowl - let them mix it - and let them help you roll them into balls! But no snitching, otherwise you'll throw off your macros ;)

There you go! Your very own homemade "protein bar!" Woot! Enjoy - and stay tuned for other versions soon. I have a feeling I am going to be making these alot ;)


Thursday, January 30, 2014

"Good For You" Hot Cocoa.

I recently posted about this on my Instagram account, and it was one of my most popular posts, so I thought I'd better share the recipe!


Hot cocoa or hot chocolate has been one of my favorite things ever since I was little. Unfortunately what I had when I was younger was the very processed, very sugary, completely fake Swiss Miss from a package, mixed with hot water. It tasted good at the time, but it was definitely not good for me!

Hot cocoa does not have to be hard to make to be tasty, and it doesn't have to be loaded with fat and sugar either! My version is light, satisfying, and won't cause any blood sugar spikes, as it has virtually ZERO sugar. Cocoa is also rich in flavanoids and good fats. You could have this every day!


"Good For You" Hot Cocoa.
    makes one serving (mine is a large 16 oz mug)

    2 tsp - 1.5 Tbsp*  unsweetened cocoa powder
    pinch or two of real salt, to taste!
    1 cup  unsweetened organic almond milk (I like to add a touch of stevia, vanilla and real salt right to the carton to make it taste better); you can also use whatever other milk suits your fancy; I also recommend coconut milk, raw goat milk, and raw cows milk
    1 tsp  vanilla extract
    1/2 to 1 dropper  Stevia clear liquid (adjust to desired level of sweetness) 
    8-16 oz boiling water (depending on the size of the mug and how rich / thick you want it)

To make your hot cocoa:
  1)  Boil water.
  2)  In a small saucepan, heat up almond milk gently on the stove. Stir frequently!
  3)  In a dry mug, add cocoa powder and sea salt.
  4)  When water is boiled, let it settle, then pour about 1/4 cup into mug with cocoa powder.
  5)  Use a small whisk, or spoon, and stir vigorously, to incorporate all cocoa powder, and to be sure there are no lumps.
  6)  Slowly pour in hot almond milk. Stir, stir, stir!
  7)  Add vanilla and stevia. Stir. Taste. Top it off with some more hot water. Adjust if needed. You can't add more chocolate at this point, however, otherwise it will clump!
  8)  Enjoy your piping hot delicious chocolate beverage :) This does make enough for two people to have a cup, so if you're so inclined to share.. then share away! :)


*The reason there is a range on the cocoa powder is because sometimes I want it slightly less chocolatey (yes, that is possible) or sometimes even more chocolatey! There is room to vary it for taste. I usually stick around 1 Tbsp cocoa powder, though. You can use whatever type of cocoa powder you have on hand, just as long as it's unsweetened. I've made this with raw cacao powder, Ghirardelli cocoa powder, and Trader joes cocoa powder; all yield a good result, just with different flavors of chocolate!

This hot cocoa will really warm you up.  What a perfect recipe for winter!  For even greater warming effect, add a dash of warming spices like nutmeg, cinnamon and ginger!


Wednesday, December 25, 2013

Almond Butter Banana Blueberry Muffins.


My mother introduced me to the idea of making muffins with almond butter after she had made some yummy muffins from one of our favorite bloggers, Megan, The Detoxinista. My sister in law is currently on a special diet and she was able to have these muffins; and she loved them! Both ladies spoke so highly of them that I knew I wanted to try making them myself. So the night before our family Christmas Eve celebration, I whipped some of these up, while making a few of my own changes ;)

I really like this recipe because it's so flavorful and so easy! It takes about 5 minutes to whip up, and about 20-25 minutes to bake, so within the hour you can have warm, cooled, ready to eat muffins for your friends and family! I highly suggest you wait for these muffins to cool. When they first come out of the oven the bottoms will feel a little "soggy" but they firm up as they cool. The texture of these muffins is fabulous!


Almond Butter Banana Blueberry Muffins.
     makes one dozen muffins
     inspired by this recipe

    1 cup  almond butter (mine was raw, but you can also use roasted, store-bought, or made at home)
    1/2 cup  mashed ripe banana (mine took 1 whole banana)
    1/4 cup (or even 2 Tbsp)  maple syrup (or runny honey)
    2  happy eggs
    1/2 tsp  baking soda
    1/4 tsp  unrefined sea salt
    1 Tbsp  cinnamon
    1 cup  frozen blueberries

To make your muffins:
  1)  Preheat your oven to 350 degrees, convection; line a muffin tin with paper liners.
  2)  In a large bowl, combine almond butter, banana, maple syrup, and eggs. Mix well. Add soda, salt, cinnamon, and mix again. Lastly, fold in the frozen blueberries. Do not overmix.
  3)  Using a 1/4 cup measuring scoop, transfer batter to muffin tin. Bake at 350 for 20-25 minutes, depending on your oven, and remove muffins when tops are slightly springy to the touch. Cool for 10 minutes in the pan, then transfer to a wire rack to cool more. Store in the fridge to keep for longer, or outside the fridge if eaten in 2-3 days.


These will freeze well also, and are a great "make ahead" option. They are also very portable, and will no doubt please a crowd. Kids and adults alike loved these muffins when I brought them to our Christmas Eve gathering. You can feel good about giving these muffins to your loved ones, as they are low in sugar, and high in fat and protein, which makes for a great snack, or side dish to eggs for breakfast.

Enjoy! I know I will be making these way more often from now on.


Wednesday, September 4, 2013

Banana Macadamia Muffins.

 
For the past two weeks I've been on a muffin craze, which has me seriously thinking why I don't make muffins more often. Perhaps the one thing between me and muffin-land is the belief that muffins take longer from start to finish. Well, after making 4 different batches of muffins in the past 2 weeks, I can definitely say, I am so totally wrong! Muffins are easy. Easy easy easy. Which means... More muffins! More muffins! Yay!

You will certainly feel my enthusiasm once you taste these muffins. I orginally found the recipe on Tropical Traditions coconut recipe website (which is great for inspiration), but have never made a recipe from there before. I never make a recipe from someone I don't know, or a blogger I don't respect. I've done it before, and they don't work out. Anyways! So these muffins looked so great, and after looking at the ingredient list I figured they couldn't go wrong, so I whipped up these muffins. I am so glad I did! They are moist, with just the right texture and not overloaded on any one ingredient. My favorite thing is that you can make these in one bowl quite easily, then pop them into the oven and you've got some delicious muffins to share!

I made some minor changes to the recipe, like subbing coconut water vinegar for lemon juice, since it's what I had on hand, and I didn't toast the coconut before adding it to the batter, since that would just be another step. I've also found that the recipe makes 14 muffins, so you'll need more than one muffin tin. Head over to thepaleomom.com for the original recipe!


Banana Macadamia Muffins.
    makes 14 muffins

    2/3 cup  macadamia nuts of choice, chopped
    2/3 cup  unsweetened coconut flakes
    1 cup  blanched almond flour
    ¼ cup  organic coconut flour - source
    3  ripe bananas, peeled and mashed
    2  eggs, room temperature
    1/3 cup  raw creamy honey
    1/3 cup  organic coconut oil, melted and cooled
    ¾ tsp  baking soda
    ½ tsp  unrefined sea salt
    1 tsp  coconut water vinegar or apple cider vinegar or lemon juice
    1 tsp  vanilla extract

To make your muffins:
  1. Preheat your oven to 350 degrees convection. Take out 2 muffin tins and place muffin liners inside.
  2. In a large bowl, add nuts, coconut, flours, baking soda, salt; mix to combine.
  3. To the same bowl, add eggs, bananas, honey, coconut oil, vinegar, vanilla; mix again to combine.
  4. Drop by tablespoons into the muffin tins. Fill 14 muffins full. *This will make 14 full sized muffins as long as there is no batter eaten in the process.
  5. Bake for about 30-35 minutes, rotating the pans at 20 minutes for best results. Let cool in pan for 5-10 minutes. Then move muffins to a cooling rack, which helps to firm up their bottoms. Enjoy!


These muffins can be frozen or refridgerated! I recommend storing them in the fridge, versus the countertop before eating. Be sure to share these with your family and friends, they're quite tasty!


Sunday, August 25, 2013

Banana Bread Muffins.


Banana bread is one of my favorite things in this whole wide world. After being inspired by some banana macadamia nut muffins I made, I knew that I could make some banana bread muffins that were absolutely delicious! So that's what I did. They're also grain-free and gluten-free (and wicked tasty)!

These little muffins taste just like banana bread, but are more portable! They're also super easy to whip up too, which will be great for when I start classes again.


Banana Bread Muffins.
    makes 14 muffins

    2/3 cup  walnuts, chopped
    2/3 cup  unsweetened coconut flakes
    1 cup + 2 Tbsp  blanched almond flour
    ¼ cup  organic coconut flour - source
    3  ripe bananas, peeled and mashed
    2  eggs, room temperature
    1/4 cup  raw creamy honey
    1/3 cup  organic coconut oil, melted and cooled
    ¾ tsp  baking soda
    ½ tsp  unrefined sea salt
    1 tsp  coconut water vinegar or apple cider vinegar or lemon juice
    1½ tsp  vanilla extract
    1½ tsp  cinnamon
    ½ tsp  freshly ground nutmeg
    toppings - optional

To make your banana bread muffins:
  1. Preheat your oven to 350 degrees convection. Take out 2 muffin tins and place muffin liners inside.
  2. In a large bowl, add nuts, coconut, flours, baking soda, salt; mix to combine.
  3. To the same bowl, add eggs, bananas, honey, coconut oil, vinegar, vanilla; mix again to combine.
  4. Drop by tablespoons into the muffin tins. Fill 14 muffins full. *This will make 14 full sized muffins as long as there is no batter eaten in the process.
  5. Bake for about 30-35 minutes, rotating the pans at 20 minutes for best results. Let cool in pan for 5-10 minutes. Then move muffins to a cooling rack, which helps to firm up their bottoms. Enjoy!


I am such a fan of banana bread, I know I will be making these often! And they are sure to please a crowd, so try bringing them to parties and sharing with friends and family!!

Sunday, August 18, 2013

Grain-free Blueberry Muffins 1.0.


I have loved all things blueberry for as long as I can remember. In fact, maybe I should ask my mom, as I am sure there was some point when I didn't like blueberries... but if there was a day, I don't want to remember!


August in New England means blueberries. Usually I get a bunch from some bushes we have on the land, but this year, either someone was picking them, or they just didn't have a good year, since I couldn't find nearly any! Lucky for us there are groceries stores that sell frozen blueberries and other farms to buy them from at the local farmers market!

These muffins were muffin #2 on my recent muffin kick. I am really excited about the flavor and 85% of the texture, but they seem to be a little on the crumbly side. I am going to work on this, and then edit the recipe, but I couldn't wait to share! They are just too delicious. The flavor is perfectly balanced.


Grain-free Blueberry Muffins 1.0.
    makes 18 muffins

    3/4 cup  organic coconut flour – sifted
    1/2 cup  blanched almond flour – sifted
    1/2 cup  raw honey
    1/2 cup  organic coconut oil, softened
    1/2 tsp  unrefined sea salt
    1/2 tsp  baking soda
    2  real eggs
    1 - 1½  cup  raw whole milk
    juice of half a lemon
    zest of one lemon
    1 cup  ground walnuts
    2 cup  frozen or fresh (large) blueberries
    sugar crystals for sprinkling - optional

To make your blueberry muffins:
  1.  Preheat oven to 350 degrees convection. Line muffin tins with paper liners.
  2.  In a large bowl, whisk coconut oil until glossy, white and homogenous. Add raw honey and whisk until combined. Add room temperature eggs, lemon juice, lemon zest.
  3.  Add coconut flour, almond flour, soda, salt and walnuts to wet ingredients, sifting the flours into the bowl. Combine with a spatula.
  4.  Add milk, and combine again. Gently fold in blueberries.
  5.  With a tablespoon, add batter to muffin tins until 3/4 full. Bake for 30-35 minutes, until golden brown on top. Let cool for a few minutes, then move muffins to a wire rack to cool.


If you don't anticipate eating these within a week (stored in the refridgerator) then freeze them! They'll keep for about 6 months, that is, if you don't eat them sooner ;)


Thursday, July 25, 2013

Triple Vanilla Ice Cream.


Vanilla ice cream is definitely one of  my favorite flavor of ice cream. I like to try sample at every ice cream shop I visit, to see if I have found the vanilla ice cream. So far my search has found some pretty good vanillas, and some pretty mediocre vanilla ice creams. By far, the standard of my comparison has been the storebought super premium ice cream, Double Rainbow. Since trying this ice cream, no other vanilla I've tried has stacked up to it's incredibly creamy, smooth, bright and comforting vanilla flavor.


So when I whipped up this ice cream last weekend, I thought that it would come out very well, but I didn't know how well. Even before pouring this ice cream into the ice cream maker to freeze, I knew this batch was special. It tastes like a dream, scoops like a dream, and melts like a dream (unlike some homemade ice creams which just seem to melt right away, or to never melt at all). I have to admit, it certainly rivals the amazing taste of Double rainbow, which is a feat in and of itself. I will definitely be making more vanilla ice cream exactly like this. Below is a photo from my brother's birthday celebration.


Since the vanilla sugar and cream are simmered together (in order to dissolve the sugar), the final product as a slight caramel taste! No doubt if you simmered the cream and sugar longer, you could easy make a dulche de leche version.


Triple Vanilla Ice Cream.
    makes two quarts

    6 oz  vanilla sugar - source or make your own
    4 cups (1 quart)  raw cow's milk cream
    1  vanilla bean
    1 Tbsp  vanilla extract
    1 Tbsp  coconut flour - source
    5  egg yolks
    1/2 tsp  unrefined sea salt

To make your ice cream:
  1. In a small sauce pan, combine sugar and 1 cup cream. Turn on high heat, bring almost to a boil, when first bubbles appear at sides reduce heat to simmer, and simmer, stirring frequently, for about 5-10 minutes. Mixture will thicken, coat the back of a spoon, and be caramel-like when ready. Remove from heat and allow to cool (this may take a while).
  2. In a separate bowl, combine coconut flour, salt, vanilla bean flecks, and egg yolks. Mix until yellow and thick. Add vanilla extract. Whisk in remaining 3 cups cream. Slowly add the cooled vanilla sugar mixture, whisking constantly.
  3. Add to your ice cream maker, and freeze according to manufacturers instructions. Mine churned for about 25 minutes. This ice cream comes out perfectly straight from the ice cream maker. Freeze overnight before scooping for hard ice cream. No need to remove ice cream from freezer for 10 minutes before serving. It's scoopable as is!
  4. This ice cream is so delicious, serve with your favorite brownies, chocolate sauce, nuts or whipped cream. Or you can serve along mint cake, like I did here! Enjoy :)


Want some cake with your ice cream? Try my grain-free chocolate cake! It's super easy, just make sure to follow instructions and to both grease and flour the pan.

Other ice creams I've made:
- Original vanilla ice cream - my first attempt, these basic proportions are what I use as a "template" for making all my other ice cream recipes
- French vanilla ice cream
- Chocolate ice cream
- Chocolate peanut butter ice cream

Have a lovely summer day!


Friday, July 12, 2013

Grain-free Sweet Potato French Toast.


Growing up I have a lot of fond memories of my mom's cooking.  On the weekends, she would make a special breakfast for us, and my brother and I would get to choose between either pancakes, french toast, or waffles.  French toast was my brother's particular favorite.  It always came out the same, (tasty), and it was the faster of the three options for my mother to prepare, which always meant breakfast would be sooner!


To be honest I haven't had regular french toast in a long time. Last summer I spontaneously took some left over sweet potato, combined it with some eggs and warm spices, and this recipe was born! I didn't write it down, however, and this last year of medical school has stopped virtually all my recipe development time. Since I am free this summer, I have more time, and so one morning last week I spent time in the kitchen whipping this up! It feels good to be cooking again :)

If you're paleo, primal, grain-free or just wish to avoid unecessary carbs, this recipe is for you. It doesn't actually contain any bread, just some delicious orange sweet potatoes. The eggs and warm spices combine to make the french-toast taste. The texture isn't like bread, but it's moist and melts in your mouth!! Yum!


Grain-free Sweet Potato French Toast.
    makes one 9x13 pan

    1 Tbsp  cinnamon
    1/2 tsp  fresh ground nutmeg
    3 dashes  ground cloves
    1/4 tsp  black pepper
    1/2 tsp  unrefined sea salt
    2 tsp  vanilla extract
    2 Tbsp  raw honey - source
    2 Tbsp  organic coconut oil, melted - source
    1/2 cup  organic raw milk
    6  happy pastured eggs

    3 large sweet potatoes, washed and peeled

    Toppings: (optional, choose your favorites!)
      pecans
      sunflower seeds
      coconut chips
      maple-cinnamon sugar - source

To make your french toast:
  1.  Wash and peel your sweet potatoes. Cut lengthwise in half, then cut each half into half moon shapes about a half inch thick. Arrange on a cookie sheet and roast at 425 degrees until just fork tender.
  2. In a large bowl, combine all spices, honey, oil, milk and eggs. Be sure coconut oil is not hot. Whisk until well combined and there are no lumps of spices or egg.
  3. Grease a 9x13 glass casserole dish with about 1 tablespoon of butter.
  4. Arrange pre-baked sweet potatoes on the bottom of the dish. Pour egg and spice mixture on top. Sprinkle with toppings of choice! I used pecans, sunflower seeds, coconut chips and a maple sugar-cinnamon mixture. Other good choices would be whole walnuts, shredded coconut, ground pecans, and raisins.
  5. Bake at 400 degrees convection, covered in foil, for a total of 45 minutes. At 30 minutes check to see how it's doing. For the last 5 minutes, remove foil. Let cool to set before serving warm with plain yogurt, thick greek yogurt or maple syrup. This will freeze very well and is also great for the next few days straight from the fridge. Enjoy!


This recipe would be a great brunch option, since you can easily make the sweet potatoes and egg mixture the day before and store it in the fridge. Then in the morning before guests arrive, grease the baking dish, add the sweet potatoes, pour in the egg mixture, add the toppings, and in an hour you'll have some delicious paleo french toast baked, cooled, and ready to be devoured! I'd serve it topped with your favorite greek yogurt and fresh blueberries or strawberries, with sizzling bacon on the side, and warm green tea in your mug!

I'd eat this up within a week after you make it, but then again I don't think that will be a problem :)

Sunday, March 24, 2013

Grain-free Coconut flour Spice Cake.


Calling this recipe cake isn't really fair.  Calling this recipe bread isn't really fair either.  It is actually similar to both, but with the best parts of each.  Light and airy (bread), but sweet and satisfying (cake).  Remember when I promised you I'd post other versions of my lemon poppyseed cake?  Well, this is actually my original recipe, as I made first made a spicy version, but instead shared the lemon poppyseed recipe with you all before this version, since I hadn't taken proper pictures.

This recipe reminds me of gingerbread, but without all the heavieness or sugar content of a thick cake, as this is more light and airy; something that you can eat everyday.  It's great by itself for a snack, or on the side of a salad for paleo/primal friendly treat.  I like to make this on the weekend and slowly eat the pan down over the next two weeks. This would free great too!


Grain-free Coconut flour Spice Cake.
    makes one 9x13 pan

    1/3 cup  organic coconut oil - source
    2/3 cup  warm water
    6  happy eggs
    1/3 cup + 2 Tbsp (or 1/3 cup heaping)  organic coconut flour - source
    2 Tbsp  honey - mine was wildflower runny honey
    2 Tbsp  molasses
    1 tsp  baking soda
    1/4 tsp  unrefined sea salt
    1 Tbsp  organic cinnamon
    3 Tbsp  ground ginger
    3 dashes  ground nutmeg
    2 dashes  ground gloves

To make your lovely simple spice cake:
   1.  Place coconut oil and warm water in a medium sized bowl, whisk vigorously for about 2 minutes or until white, glossy and homogenous (and no longer clumpy).
   2.  To the same bowl, add flour, and remaining ingredients. Whisk until incorporated.
   3.  Pour batter into a greased 9x13 pan (I used coconut oil), and bake at 350 degrees non-convection for exactly 20 minutes.
   4.  Pull pan from the oven and place on a baking rack to cool. Transfer to the fridge to cool some more. Cut into squares when cool, and spread with your favorite filling. I used grass-fed butter! Yum! Tahini, peanut or cashew butter would go nicely with these too.


Other spices like cardamom and allspice would be great in this cake too!  Use your favorite warm spice combination :)