Showing posts with label snack. Show all posts

Tuesday, May 19, 2015

Benefits of Coconut Flour.

Many of you readers (hello! long time no see!) know how much I loooove coconut flour.  Coconut flour has been such a great option for me, for many reasons, and I know many of you have learned the ins and outs of baking with coconut flour too and love it just as much as I do.

For those of you who are still on the fence, or just haven't hopped on the coconut train (it's a serious train that's been chugging very strong for several years now) then I'm here to convince you to give coconut flour a try.

My journey with coconut products began several years ago when I first learned about the paleo way of eating. Focusing on the paleo / primal template for my food choices was a great option for me, and during this time I discovered the awesomeness of coconut flour.

What makes coconut flour so awesome is mostly its nutrition stats, its affordability and its versatility. Today I'm here to tell you about why coconut flour is a healthy choice, so that will be my main focus, but I'll also touch on the other two points near the end.

Disclaimer - While I do have extensive training in nutrition, I am not a doctor, nutritionist or registered dietitian, so implement this information with your own discretion.


  Why I Love Coconut Flour 101

1) Contain healthy fats
- Healthy fats are so important for our bodies.  We need fat in order to make healthy skin, hair, and nails.  Fat is an essential part of our brains, as well as ALL our cell membranes which are basically a double stack of fat molecules, called a phospholipid bilayer.  Many sources of fat also contain cholesterol, which is an essential building block of almost all hormones.  Pregnant women need a higher intake of essential fatty acids (EFAs) in order to make the babies brain (most importantly).
- Coconut flour contains medium chain triglycerides (MCTs) aka medium chain fatty acids (MCFAs). You've probably heard about these before. What's great about MCTs is that they are metabolized very quickly by the body and so are used as an energy source right away, in contrast to LCFAs (long chain fatty acids) which need a more involved process in order to be broken down and utilized. MCTs are also very antimicrobial.
- Coconut flour is also rich in a type of fat called lauric acid, which along with MCTs, are very antimicrobial. Both together can help contribute to a healthy balance of body flora, on our skin and in our gut.
- In less than one ounce of coconut flour, it contains about 3 grams of saturated fat.
- It is also worth mentioning that coconut flour is low carb, which makes it a great alternative for those who medically need to choose a low carb diet, and for others who eat low carb diets by choice.
- Fats also contribute to feeling satisfied with the food you're eating, so you are more likely to stop eating and be satisfied with how much you've eaten, when you are feeling full.

2) Fiber content
- Many baking flours on the market are devoid of certain nutrients, and other properties like fiber, but coconut flour is NOT one of them! Coconut flour is rich in fiber, and if you've ever worked with coconut flour before you know that if not used properly, it will suck up all the liquid in your recipes and the end product will be very dry! That's because of all the fiber.
- In less than 1 ounce of coconut flour, there is 11 grams of fiber.
- Fiber is necessary in our diets because it is needed to detoxify hormones, to help move our bowels, and to feed the bacteria in our colons.

3) Protein
- Most flour products contain little or NO protein, but coconut flour actually does!
- In less than 1 ounce of coconut flour, there is 4.5 grams of protein.
- Both the fat, fiber, and protein contents of coconut flour make it very nourishing and satisfying at the same time. Making brownies or cookies or waffles with coconut flour will keep you full for hours, instead of lifting your blood sugar and crashing you down 2 hours later. Say good-bye to the blood sugar roller coaster. ;)
 

Many of my recipes use coconut flour - but these are some of my absolute favorites. They're also all grain-free! All the photos in this post feature recipes I've created using coconut flour.


I hope you all found this post to be useful, informative, and inspiring! Get baking ;)

Love to you all,
xoxo



I am wrote this post for Nuts.com because they are passionate about sharing information about healthy food!  It was good opportunity to join forces in order to spread information about making healthy choices.

Monday, December 22, 2014

Single Serving Protein Pancake.

FLUFFY

Hey everyone :) I know it's been a while, but this blog is no longer a tip top priority! Med school has me busy busy, along with all the typical life stuff that has to happen. Talk about a balancing act!

Today I bring you a recipe for a single serving pancake. I've been eyeing pancake recipes lately, especially the "single lady" ones, but I was never quite happy with the ingredients that were used, so I chose my own.

Banana slices hiding on the bottom, with greek yogurt and cooked strawberries and raspberries.

This pancake is everything I could ever want in a pancake :) It's fluffy, has a nice nutty flavor from the flaxseed, it's full of protein, and isn't too sweet, so it's easy to top it with things like a touch of maple syrup, butter or some yummy berries and yogurt.

The secret to success in this recipe is measuring the ingredients, and also using a non-stick pan. I know that non-stick pans are not at all the best choice health-wise, but there's really no alternative when you want to make some awesome pancakes.


Single Serving Protein Pancake.
    serves one or two

    15 grams / one serving of brown rice protein powder - I use Nutribiotic plain, you could use brown rice flour here also
    50 grams / ~1/2 one normal sized banana, mashed
    8 grams / 1 heaping Tbsp  ground brown flaxseed
    3 grams / 1 scant Tbsp  ground chia seed
    12 grams / ~1 tsp  runny honey
    2 eggs / about 100 grams  give or take depending on your egg size
    1 gram  baking soda (this is a very small amount)
    15 drops  vanilla extract (I used a dropper)
    pinch each: salt, ground cardamom

To make your pancake:
  1)  Combine all ingredients into a bowl and whisk well, scraping off the sides with a spatula and getting everything incorporated. The only lumps present should be a little bit of mashed banana. The batter will appear thin, and shiny from the eggs, resist adding more dry ingredients.
  2)  Preheat your nonstick pan on medium-low heat (#4 on my stove, point at small hand on the 7 in 7 o'clock).
  3)  Pour batter onto the pan. Do two batches, or pour it all in for one pancake (this is what I do).  Cook on one side for about 5 minutes. Pancake is ready when there are some bubbles on top and you can see the edges are beginning to set. Work your rubber spatual around the edges of the pancake and also the bottom. One pancake requires one massive or two normal sized spatulas to flip it.
  4)  Flip pancake and wait another 1-2 minutes.
  5)  Remove pancake to a plate with banana slices already on it. Place pancake on top of sliced bananas. Drizzle with maple syrup or whatever is desired. I like to put some butter on top, berries and homemade yogurt. ENJOY!

My first attempt; not quite right but topped with yum!


Because someone will want the stats ;) Thanks to myfitnesspal.com

I hope you are staying both warm and well this holiday season :) Love to all my readers :)
Merry Christmas!


PS - And no, this recipe will not work if you substitute the egg for something else.

Thursday, January 30, 2014

"Good For You" Hot Cocoa.

I recently posted about this on my Instagram account, and it was one of my most popular posts, so I thought I'd better share the recipe!


Hot cocoa or hot chocolate has been one of my favorite things ever since I was little. Unfortunately what I had when I was younger was the very processed, very sugary, completely fake Swiss Miss from a package, mixed with hot water. It tasted good at the time, but it was definitely not good for me!

Hot cocoa does not have to be hard to make to be tasty, and it doesn't have to be loaded with fat and sugar either! My version is light, satisfying, and won't cause any blood sugar spikes, as it has virtually ZERO sugar. Cocoa is also rich in flavanoids and good fats. You could have this every day!


"Good For You" Hot Cocoa.
    makes one serving (mine is a large 16 oz mug)

    2 tsp - 1.5 Tbsp*  unsweetened cocoa powder
    pinch or two of real salt, to taste!
    1 cup  unsweetened organic almond milk (I like to add a touch of stevia, vanilla and real salt right to the carton to make it taste better); you can also use whatever other milk suits your fancy; I also recommend coconut milk, raw goat milk, and raw cows milk
    1 tsp  vanilla extract
    1/2 to 1 dropper  Stevia clear liquid (adjust to desired level of sweetness) 
    8-16 oz boiling water (depending on the size of the mug and how rich / thick you want it)

To make your hot cocoa:
  1)  Boil water.
  2)  In a small saucepan, heat up almond milk gently on the stove. Stir frequently!
  3)  In a dry mug, add cocoa powder and sea salt.
  4)  When water is boiled, let it settle, then pour about 1/4 cup into mug with cocoa powder.
  5)  Use a small whisk, or spoon, and stir vigorously, to incorporate all cocoa powder, and to be sure there are no lumps.
  6)  Slowly pour in hot almond milk. Stir, stir, stir!
  7)  Add vanilla and stevia. Stir. Taste. Top it off with some more hot water. Adjust if needed. You can't add more chocolate at this point, however, otherwise it will clump!
  8)  Enjoy your piping hot delicious chocolate beverage :) This does make enough for two people to have a cup, so if you're so inclined to share.. then share away! :)


*The reason there is a range on the cocoa powder is because sometimes I want it slightly less chocolatey (yes, that is possible) or sometimes even more chocolatey! There is room to vary it for taste. I usually stick around 1 Tbsp cocoa powder, though. You can use whatever type of cocoa powder you have on hand, just as long as it's unsweetened. I've made this with raw cacao powder, Ghirardelli cocoa powder, and Trader joes cocoa powder; all yield a good result, just with different flavors of chocolate!

This hot cocoa will really warm you up.  What a perfect recipe for winter!  For even greater warming effect, add a dash of warming spices like nutmeg, cinnamon and ginger!


Saturday, September 14, 2013

"Reverse" Nourishing Protein Bars 1.0.


Cocoa butter is one of those ingredients that I've been wanting to flirt with for a while, yet the "high" price tag has always bothered me. Recently, however, some of my blogger friends have been using cocoa butter in their recipes, effectively making me jealous (well, more so curious!), so I jumped in and got some myself.

Cocoa butter is the fat that is extracted from the cocoa bean; and that's why it is white/yellowish in color, and not brown. Good quality cocoa butter should be at least $15/lb, and if it's less than that, you're either getting scammed or you just happened on a good deal. Look for a brand that has good reviews, is raw and organic, and can be used to make both food items and lotions. If you're using your cocoa butter for food applications, like here, you do not want to buy a non-food grade cocoa butter, so be sure to read the description on the product before you buy. I am a fan of Tisano brand organic cocoa butter, which you can find the link to on my ingredients page.

Cocoa butter comes in chunks or wafers (look for the kind made of chunks) and is easily meltable. For best results, store in the fridge before you're ready to work with it. And don't be afraid to try a chunk on it's own. I think it texture is like a bit like really smooth fatty coconut, but instead of coconut flavor, a hint of chocolate flavor instead! That being said, it's super versatile, and you can use it in chocolate sauces, puddings, and in things like these delicious protein bars :) I actually had a little bit left after making my protein bars, so I mashed some ripe bananas into it, added some cocoa powder, a little coconut sugar, ground chia, salt, and vanilla, and Viola! Chocolate pudding!


"Reverse" Nourishing Protein Bars 1.2.
    a spin off my original protein bars
 
    1 cup  whole raw walnuts
    1 cup  whole raw pumpkin seeds
    1/4 cup  ground chia seed
    1/2 cup  organic whole cranberries - mine were from Trader Joes
    1/2 cup  organic unsweetened coconut chips
    1/2 cup  organic sunbutter - mine was homemade :)
    1/2 tsp  unrefined sea salt
    1/2 cup  organic coconut oil, melted
    1-2 Tbsp  organic local wildflower honey
    2-3 tsp  vanilla
    ~  1 cup  organic raw cocoa butter, melted - source
    ~  1 cup  coconut cream concentrate - source
    ~  1/4-1/3 cup  organic coconut oil
    1 dropper  vanilla creme liquid stevia (optional)
    1 Tbsp  vanilla
 
* Please note the ingredients with an "about" sign in front of them are just estimates of amounts. I really just added some cocoa butter, ccc, and coconut oil to a double boiler and melted it together, adding the stevia (for sweetness) and vanilla (for flavor) at the end. I wanted a lot chocolate coating on my protein bars, but feel free to use less if desired.

To make your protein bars:
  1.  Place walnuts, pumpkin seeds, ground chia, cranberries, coconut, sunbutter and salt in a food processor. Pulse to combine.
  2.  In a small sauce pan, melt coconut oil using LOW heat. Remove from heat and add vanilla and maple syrup.
  3.  Add melted oil mixture to the food processor and pulse/grind ingredients until it forms a coarse paste.
  4.  Scoop out the mixture and press down hard into an square bar pan.
  5.  Melt coconut and cocoa butter in a double boiler, add stevia and vanilla last when finally melted. Pour the white mixture on top of the already pressed down bars, it should be liquid. Place into the fridge until chocolate has hardened. To serve, take bars out of fridge for at least 2 minutes. Work a knife around the edges gently, or insert a large knife on side and gently pop out the bar  and place pieces of plastic wrap or small baggies. Freeze for later or munch right away :)


You can even cut them into smaller or easier to bite shapes, like in the second photo. Enjoy this easy + nutritious option on the go!

Saturday, June 22, 2013

How To Make Peanut Butter More Nutritious.


Despite what a lot of people say, I think it's really tough to eat real food on a budget. Sure, real food costs SO MUCH less than processed foods, but for a girl like me that's only learned to shop for real food, I feel like I pay so much each week and month! Even though this happens, my philosophy is that I would rather pay for food now, and take care of my body, than I would to pay the doctor later.

A few weeks ago I had an extreme craving for peanut butter. I generally avoid the stuff since peanuts are a legume, and legumes should be soaked and cooked before eating like their cousin the bean family. Peanut butter in general is also very hard to digest for many people, and those of us who are allergic to soy can cross-react with peanuts. Peanut butter also contains a good amount of aflatoxin, a toxic substance in the mold created by specific microorganisms that grow on peanuts. Buying organic peanut butter is best for limiting your aflatoxin exposure, but doesn't negate it entirely.

I have been learning how to listen to my body, so I bought some peanut butter.  I think I went through 2 jars in the next two weeks before my cravings for it subsided. And then the addictive cravings started to happen, and because I know the difference between those two types of cravings, I started to cut back. As the weeks of my last quarter of medical school wore on, I still ate the peanut butter here and there, and even started making some peanut butter smoothies in my Vitamix (= mistake, they are so good!). But around the same time I noticed my digestion starting to get worse. Could it be the peanut butter? I did some experimenting and found that it was indeed causing my painful cramping and bloating. Clearly my body can only handle so much peanut butter.


But back to my real reason for this post. Bottom line is that real food costs money. There are several ways to help alleviate the expense, like buying in bulk, sharing with other people, buying meat one from source and freezing it, buying lots of a certain item when it's on sale, buying from farmers markets, and my favorite: always asking "do I really need this?" I find that 75% of the time the answer is no. At the end of the day, all I really need is some good quality protein, lots of veggies, and some fat. One thing that can help the food budget is making compromises where you're comfortable. For many, peanut butter can be a cheap and decent source of protein and fat. But how do you make it even more nutritious? That's where this post comes in.

When I was buying peanut butter a few weeks ago, I had the idea of pouring off the naturally separated peanut oil and replacing the peanut oil with good quality coconut oil. The results were easy and delicious! With each spoonful I knew I was getting some good quality MCT's from the coconut oil, which are great fuel source for the body and keeping your metabolism strong. Removing most of the peanut oil also decreased the amount of Omega-6 fatty acids that my body was getting. Having a low Om6/Om3 ratio in our bodies is vitally important for staying healthy.


To make your peanut butter more nutritious:
  1.  Buy your favorite natural creamy unsalted peanut butter, organic is best. Make sure that the oil has separated on the top. If not, try reaching to the back of the shelf and grabbing one that has separated.
  2.  At home, take the lid carefully off the jar and gently pour off the separated peanut oil. I like to tilt my jar around a few times to get as much off as possible.
  3.  With a large spoon, take about the same amount of coconut oil and stir it into your peanut butter. STIR well! These are fun, or do it by hand. If you don't like the taste of coconuts, you're seriously at the wrong blog, but nevertheless I will tell you that it does NOT make the peanut butter taste coconutty.
  4.  Lastly, add your favorite unrefined sea salt to the mix. Stir well again.
  5.  Sample some off the spoon/knife to double check that it is delicious. Some people like more or less salt.
  6.  Then stick your peanut butter in the refridgerator! It will solidify a little and will spread just like Jiff! But without all the gunk! As it sits out at room temperature on your spoon it will start to melt a little and be more runny. ENJOY!

 
If peanut butter isn't your thing, or if you prefer almond butter, try this with storebought almond butter!

If you'd rather make your own homemade nut butter, check out this cashew cookie butter recipe. Or use either storebought or homemade almond butter to make some cinnamon honey almond butter, or what I like to call CHAB. Which my mom is obsessed with and she calls me every so often saying "Guess what I made today! CHAB!"

One final note: Adam's brand peanut butter is the PNW's equivalent to Smuckers on the East Coast, or Laura Scudders down in California. I've liked these kinds before, so it was cool to learn it's all the same company. Kind of like Dreyer's ice cream vs Edy's ice cream on the West Coast vs East Coast.

Happy mixing!

Sunday, March 24, 2013

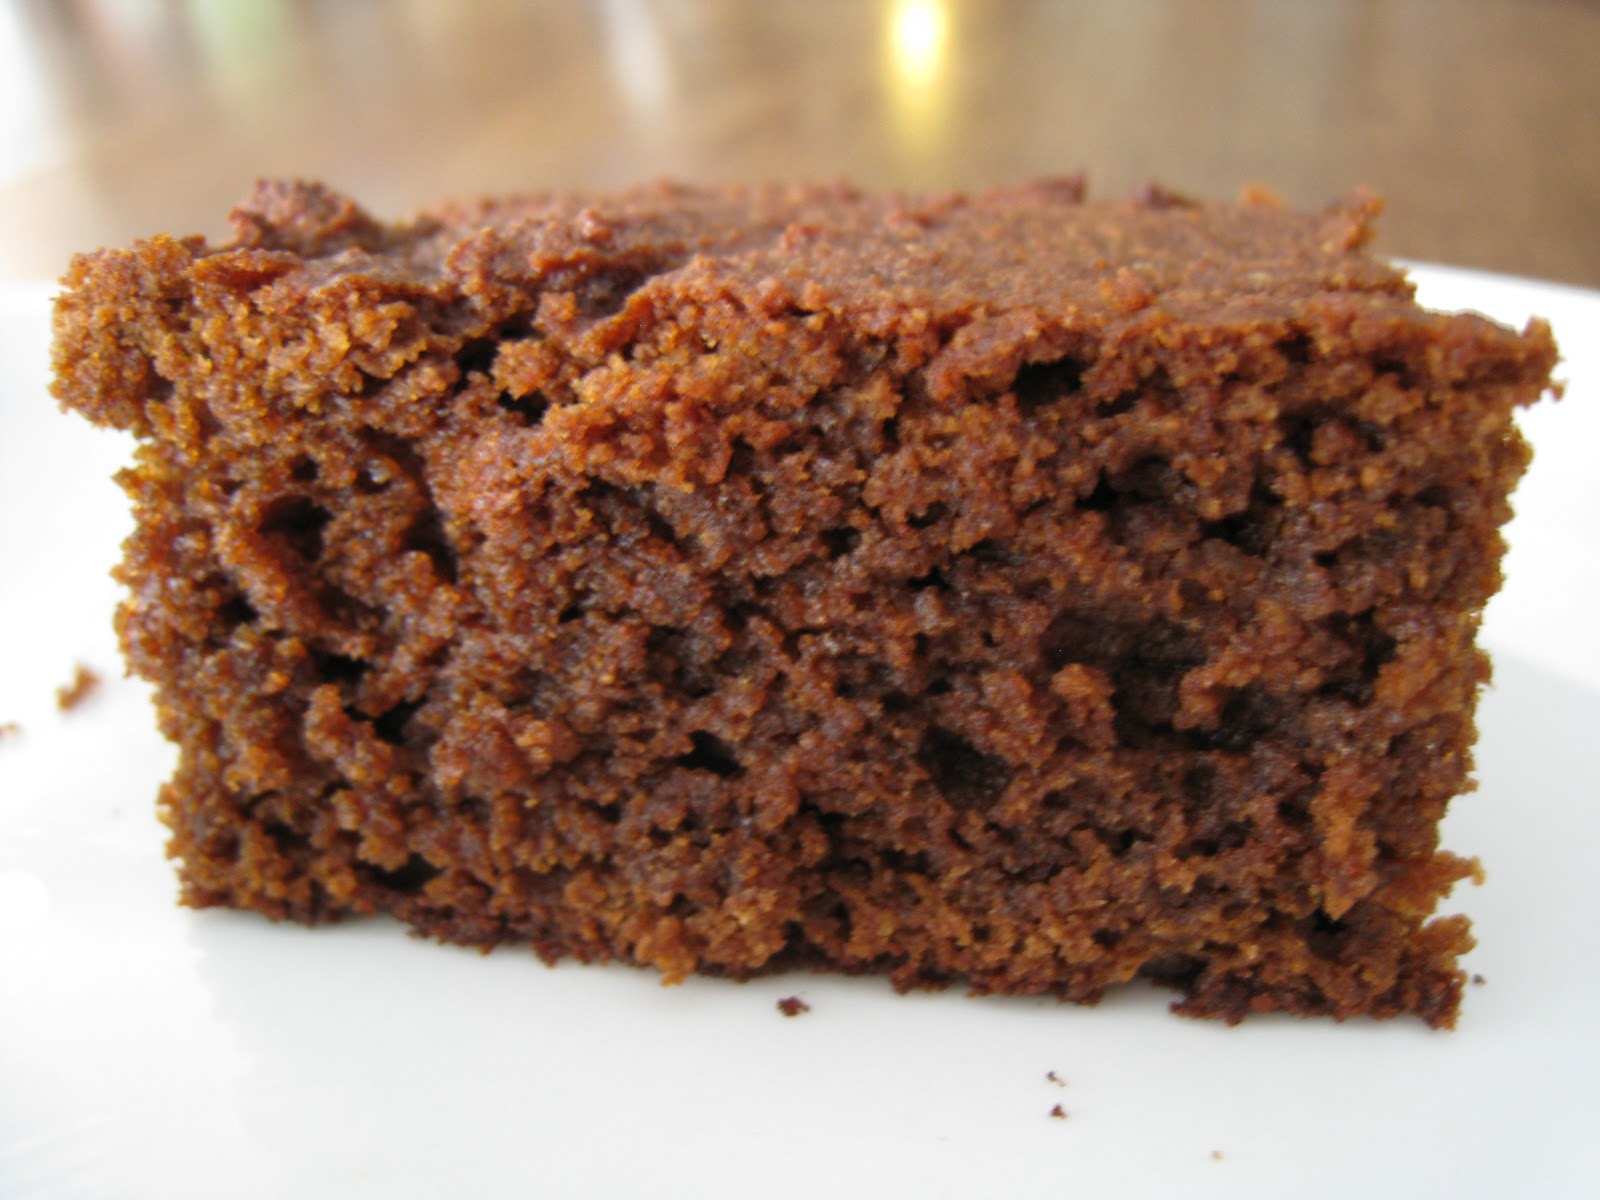
Grain-free Coconut flour Spice Cake.


Calling this recipe cake isn't really fair.  Calling this recipe bread isn't really fair either.  It is actually similar to both, but with the best parts of each.  Light and airy (bread), but sweet and satisfying (cake).  Remember when I promised you I'd post other versions of my lemon poppyseed cake?  Well, this is actually my original recipe, as I made first made a spicy version, but instead shared the lemon poppyseed recipe with you all before this version, since I hadn't taken proper pictures.

This recipe reminds me of gingerbread, but without all the heavieness or sugar content of a thick cake, as this is more light and airy; something that you can eat everyday.  It's great by itself for a snack, or on the side of a salad for paleo/primal friendly treat.  I like to make this on the weekend and slowly eat the pan down over the next two weeks. This would free great too!


Grain-free Coconut flour Spice Cake.
    makes one 9x13 pan

    1/3 cup  organic coconut oil - source
    2/3 cup  warm water
    6  happy eggs
    1/3 cup + 2 Tbsp (or 1/3 cup heaping)  organic coconut flour - source
    2 Tbsp  honey - mine was wildflower runny honey
    2 Tbsp  molasses
    1 tsp  baking soda
    1/4 tsp  unrefined sea salt
    1 Tbsp  organic cinnamon
    3 Tbsp  ground ginger
    3 dashes  ground nutmeg
    2 dashes  ground gloves

To make your lovely simple spice cake:
   1.  Place coconut oil and warm water in a medium sized bowl, whisk vigorously for about 2 minutes or until white, glossy and homogenous (and no longer clumpy).
   2.  To the same bowl, add flour, and remaining ingredients. Whisk until incorporated.
   3.  Pour batter into a greased 9x13 pan (I used coconut oil), and bake at 350 degrees non-convection for exactly 20 minutes.
   4.  Pull pan from the oven and place on a baking rack to cool. Transfer to the fridge to cool some more. Cut into squares when cool, and spread with your favorite filling. I used grass-fed butter! Yum! Tahini, peanut or cashew butter would go nicely with these too.


Other spices like cardamom and allspice would be great in this cake too!  Use your favorite warm spice combination :)

Sunday, March 3, 2013

Meat + Egg Protein Bites.

I am finding that I have very little time for cooking now that I am in medical school, and I've been searching for easier and easier ways of eating home cooked real food that doesn't take a lot of time, or create a lot of dishes, which I will inevitably have to do myself.


One evening as an experiment (and since I was short on time), I took some grass-fed ground beef which I had defrosted, stuffed it into a mini muffin tin, and baked it. Turns out my experiment worked very well, and I decided to do it on a larger scale.  This time I used a normal sized muffin tin and cracked an egg on top - a definite success!

This is the what the underside looks like :)

This recipe is so easy because all you have to do is take your meat of choice, section it into a muffin tin, press down and bake! In less than a half hour you have easy bites of protein which can be conveniently topped on a salad, warmed with a side of veggies, or eaten quick and on the go. I seasoned mine with only a little bit of salt, but feel free to sprinkle on top whatever spice you fancy. Cheese and ketchup were my other experiments, which turned out great too! Please note - do not grease the muffin tins, there is enough fat in the meat and there will be no sticking. The meat actually shrinks away from the sides and will look like it's "swimming" in fat when you take them out of the oven. I really like this because you can so easily lift out each little bite / piece and place on a paper towel, and then discard (or save) the meat fat / tallow that has rendered out of the meat!


Meat + Egg Protein Bites.
    makes 1 dozen

    1 lb  grass-fed ground meat - I used pet burger 
    12  pastured happy eggs
    sprinkle unrefined sea salt
    spices - optional
    ketchup - optional
    cheese - optional

To make your protein bites:
  1.  Evenly section out beef between the holes of a normal sized muffin pan.
  2.  Press down with your fingers. Add optional spices or cheese.
  3.  Crack an egg on top. Sprinkle each with unrefined sea salt
  4.  Bake in a preheated oven at 350 degrees (don't believe mine is convection), for 25-30 minutes. Bites will be ready when eggs are cooked through. Remove from oven and promptly grab bites out of the tin with tongs, placing then on a paper towel drain. When cool, store in a glass container in the fridge for grabbing whenever you need some protein :) ENJOY!


Even though this idea is quite simple, they taste so good. It would be possible to make this with ground chicken, turkey or bison, but I would suggest greasing the sides of each muffin cup with olive oil first; these meats have very low fat content and therefore may stick.

 I hope you find these a useful addition to your food plans for busy weeks :)

Monday, January 28, 2013

Grain-free Lemon Poppy Seed Coconut Flour Cake.


It's a rather odd sounding title, isn't it?  This recipe was a spin off my primal gingerbread cake, as well as my grain-free waffle recipe.  I wanted a simple coconut flour-based grain-free baked good that I could whip up fast and was super easy.  So I experimented, and made this!  It was delicious on the first go! This cake has just the right amount of cakey-ness to satisfy my (occasional) bread cravings, but without being loaded with sugar or refined gluten-free grains.  It is also nut-free and Paleo!  My first version was a spiced flavor with lots of ginger and a touch of molasses, and my second (this version) was lemon poppy seed, but feel free to change spices and flavor extracts for a different taste.  I know I will be sharing several different versions as time allows me :)  This bread bakes thin in the pan, so I used two squares and spread some grass-fed butter in between both sides, to make little "sandwich" looking treats.  The whole batch lasted me nearly two weeks, and I was very happy to have something interesting (besides veggies) to nibble on at lunch time :)  It's also a great way to add some more coconut oil and grass-fed butter to your diet, which are rich in good for you saturated fats and fat-soluble activators, which our bodies, brains, and hearts desperately need!


Grain-free Lemon Poppy Seed Coconut Flour Cake.
    makes one 9x13 pan

    1/3 cup  organic coconut oil - source
    2/3 cup  warm water
    6  happy eggs
    1/3 cup + 2 Tbsp (or 1/3 cup heaping)  organic coconut flour - source
    1/4 cup  honey  - mine was wildflower runny honey
    1 tsp  baking soda
    1/2 tsp  organic lemon extract
    2 tsp  poppy seeds
    zest of one organic lemon

To make your lemon poppy cake:
   1.  Place coconut oil and warm water in a medium sized bowl, whisk vigorously for about 2 minutes or until white, glossy and homogenous (and no longer clumpy).
   2.  To the same bowl, add flour, and remaining ingredients. Whisk until incorporated.
   3.  Pour batter into a greased 9x13 pan (I used coconut oil), and bake at 350 degrees non-convection for exactly 20 minutes.
   4.  Pull pan from the oven and place on a baking rack to cool. Transfer to the fridge to cool some more. Cut into squares when cool, and spread with your favorite filling. I used grass-fed butter! Yum! Sun-butter or cashew butter would go nicely with these too.


Spread something fun inside and enjoy :) PS-- Don't you love my plates! I found them last year at Sur La Table, and I absolutely love them! I'm so happy they survived the trek from Southern California to Seattle!


Monday, December 31, 2012

Grain-free Gingerbread.

 
Holiday baking is always a lot of fun for me.  Since I just completed my undergraduate degree, and have now begun medical school, I don't exactly have a lot of time to bake!  I've been home for Christmas for the past few weeks, and it's been really nice to be "on vacation," and have time to read books, bake, workout, and sleep at my leisure!

When discussing what we wanted to make during the time I am home, as well as for our family Christmas celebrations, my mom suggested we make a gingerbread cake, since my gingerbread men cookies are just too delicious!  (And hooow long has it been since there's been gingerbread in the house??  Apparently years!!)  You see, gingerbread used to be a favorite of mine, but today I realized I haven't had gingerbread cake in probably about 10 years!  What a shock!

So today, I got out my bowl, my favorite spatula, a bunch of yummy molasses and baked this goodness.  My family and I love the cakey texture of this gingerbread, the rich flavor of the molasses, and the punch of the ginger.  And it's not overly sweet, which is what I prefer!


Grain-free Gingerbread Cake.
    makes one 9x13 pan

    1/2 cup  organic palm oil shortening - source
    1/4 cup  homemade vanilla sugar - or any sugar of choice
    4  REAL eggs
    1 cup  molasses
    1 cup  organic coconut flour - source
    1/2 cup  blanched almond flour - source
    1/2 cup  arrowroot flour/starch - source
    1/2 cup  organic applesauce
    1 tsp  baking soda
    1/2 tsp  unrefined sea salt
    lots of ginger + cinnamon (probably 2 T ginger, and 1 T cinnamon)

To make your gingerbread cake:
  1.  Preheat oven to 375 degrees (convection). Grease a 9x13 pan liberally with butter.
  2.  In a large bowl, cream together shortening and sugar until fluffy. Add one egg at a time until just incorporated.
  3.  To the same bowl add spices, coconut flour, almond flour, arrowroot, sea salt, baking soda, molasses. Mix. Add applesauce. Mix until combined.
  4.  Pour batter into the prepared pan and smooth top with spatula. Bake for about 20-25 minutes, depending on the heat of your oven.
  5.  Remove for oven when sides are slightly browned, and center of cake is springy. Let pan cool on a baking rack for about 20 minutes, then slice and transfer to desired container.  Feel free to freeze for later! Top with whipped cream, ice cream or eat it warm and slather it with cinnamon butter.


Try it cold (you can REALLY taste the ginger punch this way) and topped with some fresh whipped cream! Yum! And don't forget to share it with all your primal, paleo, or grain-free friends! :)


Monday, September 10, 2012

Cashew Cookie Butter.


Rarely do I ever see a recipe online and go out and buy all the ingredients and then make it.  But I did exactly that with this recipe (and in less than 24 hours!)... it just looked too good.  This recipe comes from Studio Cuisine blog.  I love to try different combinations of nut butters, like my cinnamon honey almond butter, and this one was fantastic!  It tastes amazing -- just like sugar cookies! But it has none of the undigestible grains or refined sugars, and the cashews make it full of protein.  Therefore it makes a great snack, or a great spread for breakfast!  If you love cashew butter, you'll love this cookie butter.


Cashew Cookie Butter.
    adapted from Studio Cuisine
    makes one cup

    1.5 cups  organic whole raw cashews
    1/3 cup  unsweetened organic banana chips
    1 T  organic coconut sugar/palm sugar - source
    4 tsp  organic coconut oil
    1/3 tsp  vanilla
    1/4 tsp  cream of tartar (optional - for flavor)
    1/4 tsp  baking soda (optional - for flavor)


To make your cookie butter:
  1.  In a food processor, blend coconut sugar, banana chips and cashews together until it become homogenous and balls up.
  2.  Add honey, vanilla, cream of tartar, baking soda, and blend again.  Lastly, add coconut oil and blend until smooth.  If you'd like your butter a little more runny, add more coconut oil.  Mine was a perfect consistency at just 4 tsp.
  3.  Store in an airtight container.  It keeps outside for a little over a week.  For longer storage, refrigerate.


I can't wait to try some of this in my Vitamix! Make sure you share it with your friends :)

Thursday, July 19, 2012

Cinnamon Honey Almond Butter.


Almond butter is one of my mom's favorite foods.  We enjoy using to make protein bars, waffles, and as a topping of one of our morning breakfast bowls.  It's a great primal peanut butter alternative, and it is much more digestible than peanut butter.  We've both tried lots of almond butter over the years, raw, roasted, organic, natural, salted, unsalted, fresh ground, homemade, either fresh or in jars of all forms.

After trying all the different varieties, I can definitely say that fresh ground, either raw or roasted, is the best.  Fresh ground almond butter comes just like fresh ground peanut butter from those nut grinders you can find at Whole Foods or your local health food store, except these grinders have dry roasted almonds in them instead of peanuts!


I have also found that fresh roasted peanut and almond butters from these machines (that you grind right in front of you! :) are much more digestible than the jars you can buy at the store.  I think that's because fresh ground is, well, fresh, and the stuff in the jar has been there for who knows how long.  The oils there have likely become old and rancid.  That said, I always stick to fresh ground nut butters.

One day I had some of fresh ground almond butter on hand and I decided to make it a little bit more exciting.  First I added coconut oil for some nourishing MCFA's, then some raw honey for some raw enzymes and probiotics, then molasses for flavor and iron, and then some cinnamon and sea salt to really make the sweetness of the honey and almond butter come out.  What I got was a lovely new take on almond butter.  Why try to buy this in the store when you can make it yourself?  This stuff is very flavorful, spreadable and delicious!  It's also Primal and paleo!


Cinnamon Honey Almond Butter.
    makes about 24 ounces

    16 oz  fresh ground dry roasted almond butter
    4 oz  organic coconut oil
    2 oz  organic raw honey
    1T  blackstrap molasses
    1 tsp  cinnamon
    1/2 tsp  unrefined sea salt

To make your almond butter:
  1.  In a large bowl, combine all ingredients together.  You can use less honey and it will be less sweet.  Personally, 2 ounces tastes very sweet to me.
  2.  Transfer to a jar of choice.  Eat within 2 weeks or store in the fridge for longer periods.

Try spreading cinnamon honey AB on homemade banana or zucchini bread for a delicious snack!  This would also go great with cacao nibs and celery to make celery logs snacks.  Or even on top of grain-free pancakes or yogurt and berry breakfast bowls!

Enjoy :D

Thursday, March 1, 2012

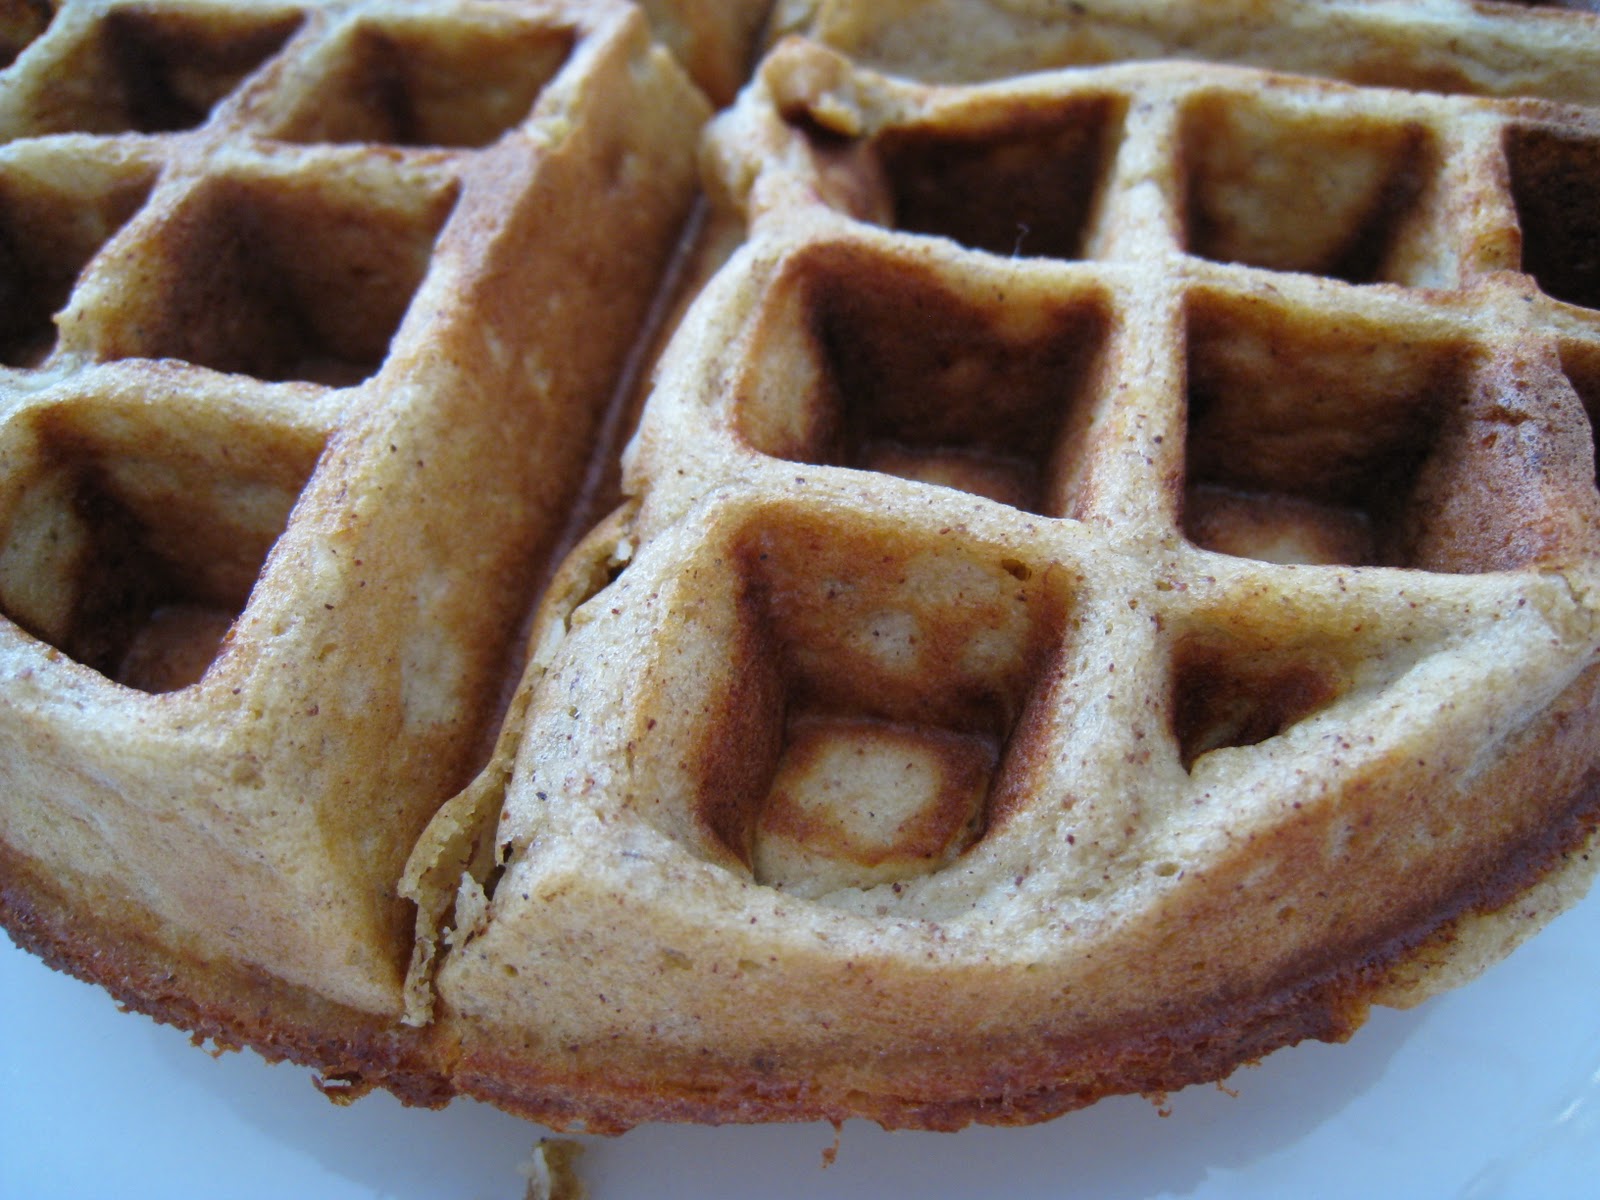
Grain-free Almond Banana Waffles.


I have a new version of grain-free waffles to share!!  Those of you who have read my site for a while will remember my first grain-free waffles.  They taste really great, but these new waffles taste even better in my opinion.  (How is that possible?!)  One of the reasons I like this recipe so much is because they taste great plain, which is atypical of many grain-free versions!!  I also like how this grain-free waffle does not rely on coconut flour or eggs.  I love my other grain-free waffles, but they more dense compared to regular waffles and coconut flour is very filling.  They are, however, GAPS friendly.  Overall, this recipe has a bit more natural sweetness (from the banana) and isn't so dense.  The texture is FAB!  This recipe is also good for those who either don't care for coconut flour or just want a real food waffle recipe that doesn't use so many eggs!

I created this recipe on a whim one morning as I was whipping up some of my original grain-free waffles.  I wanted a recipe that did not use coconut flour.  And I wanted it to be easy!  So these waffles were born :) And I can tell you that they're here to stay

Grain-free Almond Banana Waffles.
    makes about 2 large Belgian waffles

    3 real eggs
    1 cup  blanched almond flour - source
    1/2 cup  organic shredded coconut - source
    2 Tbsp  almond butter - source
    4 Tbsp  butter, softened or melted - source
    1 ripe banana, mashed
    1 tsp  cinnamon - source
    1 tsp  vanilla - source

To make your waffles:
  1.  Turn on your waffle maker to medium heat. Spray it with olive oil - you don't want it to stick!
  2.  In a small bowl, crack eggs and beat with a whisk by hand until glossy yellow.
  3.  In a medium bowl, mix dry ingredients together. Make sure your coconut is finely shredded, and not in the form of flakes or chips.
  4.  Mix eggs and melted butter (but make sure butter is not boiling hot!) together, and whisk this into the bowl with the dry mixture.  **Add water to thin to right consistency, not too runny and not too thick (this step is optional, do if needed).
  4.  Pour batter into your waffle maker. Mine took over a whole cup of batter to fill and make one waffle. Depending on your waffle maker, your waffle yeild may vary, requiring less or more batter, or requiring more or less heat.
  5.  When done (mine beeps!), gently remove to a hot sheet pan in a 200 degree oven to keep warm as the other waffles are made.  Try using two forks or a fork and spatula for this step!
  6.  Enjoy your waffles!  Top them with BUTTER, yogurt, real maple syrup, peanut butter or fresh fruit.  And they're so good you can even eat them plain!!


I must admit, one of the best parts about these waffles is how great they are later, whether they're cold and left out for a few hours after making, or after they are frozen (for weeks) and then are thawed out.  And PS, they make great waffle sandwiches.  More on that in the next post!!

Happy waffling ;)
And Happy March!

Tuesday, February 14, 2012

Thea's Spiced Nuts


Don't these nuts look good?  I am addicted to them.  My sister-in-law, Thea, brought these to our Christmas celebration.  They were so good I think the five of us ate the whole container in about half-a-day.  Well, almost.  When nuts were about 90% gone and I realized that I had to hide them in order for us to stop!  Where is a good place to hide delicious-tasty-spicy-sugary-crunchy nuts?  The freezer!!  I stuck them in there to stop our munching and then I found them there the next morning, still safe and sound.  But before I knew it they were out on the table for breakfast and my older brother had already finished them off!!


These nuts are that good!  They are very easy to make, too.  Luckily my sister-in-law had given my Dad his own separate container of nuts for Christmas, so I was able to get pictures!  Thea explained the recipe to me and it really was quite easy so I decided to make a big batch and hand them out for my family's Christmas goodie bags we give out each year.  The Christmas mix this year included these spiced nuts, honeyed cashews (recipe to come!), crystallized ginger chunks, white chocolate chips, red and brown MMs, and dried cranberries.

Goodie bags all ready to go!

One Christmas gift I received was David Lebovitz' book The Perfect Scoop, which is the book to get about ice cream making.  I have an ice cream maker and enjoy making my favorite raw milk french vanilla ice cream.  This book was on my Amazon wishlist for a long time!  Thank you dearest brother for the gift!  In the book I discovered that David has a nut recipe exactly like what my sister-in-law had described to me.  So I took his recipe and her advice, multiplied the recipe by four, and went to work.


Because the recipe is in David's ice cream book, I am not going to share it here, it's just not fair.  I highly recommend the book and encourage everyone to go pick it up at their local bookstore, Amazon or download it through Kindle.  The recipe is very basic, and I will only describe the process to you.  It is a fantastic way to use leftover egg whites, which sometimes accumulate fast and I have no idea what to do with.  You can also Google "spiced nuts" or "egg white nuts" and several recipes will pop up.

Thea's Spiced Nuts
    adapted from David Lebovitz

First, choose the kind of nuts you would like to use.
Second, froth some leftover egg whites with a fork.
Third, add your favorite spices and granulated sugar of choice to the egg whites.  Warm spices like cinnamon, nutmeg and ginger will steal the show.
Fourth, toss this all together in a bowl, spread on a parchment lined baking sheet and bake at low temperature for 30 minutes.  No need to stir.  Do not overbake.  Nuts will crisp up a bit once out of the oven.  Let cool before storing in Christmas tins or baggies, or before serving.  Store in an airtight container in cool, dry place.  Refridgeration is not needed.  And they are so good you might want to hide them from other family members.

I did get a picture of my nuts BEFORE they were baked though!

These nuts make the house smell FANTASTIC, so if you need to sell your house or wow some guests, make a batch of these and you'll have a warm house full filled with the sweet aroma of caramelized sugar and roasted cinnamon!