Showing posts with label coconut flour. Show all posts

Tuesday, May 19, 2015

Benefits of Coconut Flour.

Many of you readers (hello! long time no see!) know how much I loooove coconut flour.  Coconut flour has been such a great option for me, for many reasons, and I know many of you have learned the ins and outs of baking with coconut flour too and love it just as much as I do.

For those of you who are still on the fence, or just haven't hopped on the coconut train (it's a serious train that's been chugging very strong for several years now) then I'm here to convince you to give coconut flour a try.

My journey with coconut products began several years ago when I first learned about the paleo way of eating. Focusing on the paleo / primal template for my food choices was a great option for me, and during this time I discovered the awesomeness of coconut flour.

What makes coconut flour so awesome is mostly its nutrition stats, its affordability and its versatility. Today I'm here to tell you about why coconut flour is a healthy choice, so that will be my main focus, but I'll also touch on the other two points near the end.

Disclaimer - While I do have extensive training in nutrition, I am not a doctor, nutritionist or registered dietitian, so implement this information with your own discretion.


  Why I Love Coconut Flour 101

1) Contain healthy fats
- Healthy fats are so important for our bodies.  We need fat in order to make healthy skin, hair, and nails.  Fat is an essential part of our brains, as well as ALL our cell membranes which are basically a double stack of fat molecules, called a phospholipid bilayer.  Many sources of fat also contain cholesterol, which is an essential building block of almost all hormones.  Pregnant women need a higher intake of essential fatty acids (EFAs) in order to make the babies brain (most importantly).
- Coconut flour contains medium chain triglycerides (MCTs) aka medium chain fatty acids (MCFAs). You've probably heard about these before. What's great about MCTs is that they are metabolized very quickly by the body and so are used as an energy source right away, in contrast to LCFAs (long chain fatty acids) which need a more involved process in order to be broken down and utilized. MCTs are also very antimicrobial.
- Coconut flour is also rich in a type of fat called lauric acid, which along with MCTs, are very antimicrobial. Both together can help contribute to a healthy balance of body flora, on our skin and in our gut.
- In less than one ounce of coconut flour, it contains about 3 grams of saturated fat.
- It is also worth mentioning that coconut flour is low carb, which makes it a great alternative for those who medically need to choose a low carb diet, and for others who eat low carb diets by choice.
- Fats also contribute to feeling satisfied with the food you're eating, so you are more likely to stop eating and be satisfied with how much you've eaten, when you are feeling full.

2) Fiber content
- Many baking flours on the market are devoid of certain nutrients, and other properties like fiber, but coconut flour is NOT one of them! Coconut flour is rich in fiber, and if you've ever worked with coconut flour before you know that if not used properly, it will suck up all the liquid in your recipes and the end product will be very dry! That's because of all the fiber.
- In less than 1 ounce of coconut flour, there is 11 grams of fiber.
- Fiber is necessary in our diets because it is needed to detoxify hormones, to help move our bowels, and to feed the bacteria in our colons.

3) Protein
- Most flour products contain little or NO protein, but coconut flour actually does!
- In less than 1 ounce of coconut flour, there is 4.5 grams of protein.
- Both the fat, fiber, and protein contents of coconut flour make it very nourishing and satisfying at the same time. Making brownies or cookies or waffles with coconut flour will keep you full for hours, instead of lifting your blood sugar and crashing you down 2 hours later. Say good-bye to the blood sugar roller coaster. ;)
 

Many of my recipes use coconut flour - but these are some of my absolute favorites. They're also all grain-free! All the photos in this post feature recipes I've created using coconut flour.


I hope you all found this post to be useful, informative, and inspiring! Get baking ;)

Love to you all,
xoxo



I am wrote this post for Nuts.com because they are passionate about sharing information about healthy food!  It was good opportunity to join forces in order to spread information about making healthy choices.

Sunday, June 29, 2014

Grain-free Unsweetened Paleo Banana Bread.


I've been wanting to share this recipe with y'all for too long. Banana bread is one of my all-time favorite things (which is no secret, see below for more banana-centric recipes), and for a long-time I've been elusively searching for and experimenting with the perfect-for-me banana bread recipe. Two years ago I created my delicious grain-free unsweetened primal pumpkin bread, and I love that recipe so much that I believed it had to be possible to morph it into a banana bread instead. After a few different tries, what I'm sharing with you now is a paleo banana bread recipe I am most proud of :)


Grain-free Unsweetened Paleo Banana Bread.
    makes one standard loaf

    1 cup  blanched almond flour
    1/2 cup  organic coconut flour
    3 happy eggs - mine were large
    1/2 cup  coconut oil - mine was soft
    1 1/2 cups  mashed ripe bananas (about 2 large)
    1 tsp  baking soda
    1/2 tsp  unrefined sea salt
    1 Tbsp  raw apple cider vinegar
    1 tsp  ground nutmeg
    1 Tbsp  cinnamon
    2 tsp  vanilla
    20 drops  clear stevia

To make your banana bread:
1) Preheat oven to 375 degrees.
2) Pour all ingredients into a high speed blender (Vitamix!)
3) Blend briefly until incorporated.
4) Pour into a glass, standard loaf pan, that has been greased with coconut oil, and floured with coconut or almond flour.
5) Bake for about 20 minutes, check on the bread and maybe rotate the pan, and bake for another 20-30 minutes depending on your oven. Let bread cool in the pan, then carefully turn out and slice. Store it in the fridge, or the freezer! But most likely your family will gobble it up in no time!


And now, I invite you to explore my other banana lovin' recipes!

Banana Bread Muffins

Grain-free Zucchini Bread

Banownies

Banana Macadamia Nut Muffins

Almond Butter Banana Blueberry Muffins

Grain-free Post-surgery Banana Bread

Grain-free Almond Banana Waffles

Grain-free Unsweetened Banana Cake

My Original Banana Cake

Fruity Vegan Oatmeal Bake


Enjoy your banana bread. It's great spread with some almond or peanut butter or slathered with some juice-sweetened black raspberry jam :) YUM. Or even butter, if you're so inclined.

And I know the pictures aren't super great. It's been really hard to adjust to all the poor Seattle lighting!


Thursday, December 19, 2013

Grain-free "Recovery" Banana Bread.


One of my lovely family members just recently had surgery and an overnight hospital stay [everything is going well, thanks :)], and so I thought I would share this recipe, as it has been great for her recovery.

Let me explain...

My loved one recently had to have surgery. Post-operation she was having trouble swallowing because she felt so sore. She only wanted cold, soft things, and was also barely able to eat due to the nausea caused by pain meds. Turns out that I had just made some grain-free banana bread that week, in an endeavor to start recipe development for my own grain-free banana bread recipe that I would love just as much my grain-free pumpkin bread recipe. Well, the recipe was not perfect, and was very soft and moist (ie, the texture isn't quite there yet, and therefore not bloggable), but it was still had great flavor and tasted delicious, so I had kept it and was planning on nibbling on it throughout the week.

This "recipe" failure ended up being a blessing, as it's smooth and soft texture was very easy to swollow for my patient, but also gave her the feeling that she was "eating something solid." Win win!

For this recipe I used a smaller loaf pan, not the standard size. It was a medium sized Pyrex glass loaf pan which probably measures 4" x 8" and is tall, not wide, like standard loaf pans. It's very easy to whip up, and is a great idea to bring to the hospital to help your loved one recover! It sets up best in the fridge. So after the bread cools, turn it out, and place it in the fridge.

Grain-free "Recovery" Banana Bread.
    makes one loaf pan, size above

    2  very ripe bananas (or 3 small)
    1 cup  almond flour 
    1/3 cup  coconut flour
    2  medium/large eggs
    1/4 cup runny honey
    1/3 cup  coconut oil - mine was not melted
    3/4 cup  coconut milk - mine is always unsweetened
    1 Tbsp raw apple cider vinegar
    1 tsp  baking soda
    1-2 tsp  cinnamon or more if desired
    1.5 tsp vanilla

To make your recovery bread:
  1)  Preheat oven to 375 degrees; mine is non-convection.
  2)  Put ingredients in order listed into Vitamix or blender. Blend. Pour into coconut oil greased loaf pan (mine is a glass loaf pan).
  3)  Bake for over 1 hour. LET COOL. Store in fridge. Bread will be moist but will firm up in the fridge.
  4)  Eat with a spoon, or slice it thick. Spread with your favorite nut or coconut butter, for even more nutrition!


Enjoy this bread! I hope it will help your recovering family members, as it did mine, whether they are sick at home or are recovering from major surgery! In fact, we ate up this banana bread so fast because it was so tasty, and I am baking another one right now!

xoxo :)


P.S. I am home for Christmas break. This in the medical school world are going very well. I am tired, but loving my classes and assignments. Stay tuned for some delicious recipes that I can hopefully share with you during the time I am home. As always, thanks for continue to read my blog even though things are slow now-a-days!


Wednesday, September 4, 2013

Banana Macadamia Muffins.

 
For the past two weeks I've been on a muffin craze, which has me seriously thinking why I don't make muffins more often. Perhaps the one thing between me and muffin-land is the belief that muffins take longer from start to finish. Well, after making 4 different batches of muffins in the past 2 weeks, I can definitely say, I am so totally wrong! Muffins are easy. Easy easy easy. Which means... More muffins! More muffins! Yay!

You will certainly feel my enthusiasm once you taste these muffins. I orginally found the recipe on Tropical Traditions coconut recipe website (which is great for inspiration), but have never made a recipe from there before. I never make a recipe from someone I don't know, or a blogger I don't respect. I've done it before, and they don't work out. Anyways! So these muffins looked so great, and after looking at the ingredient list I figured they couldn't go wrong, so I whipped up these muffins. I am so glad I did! They are moist, with just the right texture and not overloaded on any one ingredient. My favorite thing is that you can make these in one bowl quite easily, then pop them into the oven and you've got some delicious muffins to share!

I made some minor changes to the recipe, like subbing coconut water vinegar for lemon juice, since it's what I had on hand, and I didn't toast the coconut before adding it to the batter, since that would just be another step. I've also found that the recipe makes 14 muffins, so you'll need more than one muffin tin. Head over to thepaleomom.com for the original recipe!


Banana Macadamia Muffins.
    makes 14 muffins

    2/3 cup  macadamia nuts of choice, chopped
    2/3 cup  unsweetened coconut flakes
    1 cup  blanched almond flour
    ¼ cup  organic coconut flour - source
    3  ripe bananas, peeled and mashed
    2  eggs, room temperature
    1/3 cup  raw creamy honey
    1/3 cup  organic coconut oil, melted and cooled
    ¾ tsp  baking soda
    ½ tsp  unrefined sea salt
    1 tsp  coconut water vinegar or apple cider vinegar or lemon juice
    1 tsp  vanilla extract

To make your muffins:
  1. Preheat your oven to 350 degrees convection. Take out 2 muffin tins and place muffin liners inside.
  2. In a large bowl, add nuts, coconut, flours, baking soda, salt; mix to combine.
  3. To the same bowl, add eggs, bananas, honey, coconut oil, vinegar, vanilla; mix again to combine.
  4. Drop by tablespoons into the muffin tins. Fill 14 muffins full. *This will make 14 full sized muffins as long as there is no batter eaten in the process.
  5. Bake for about 30-35 minutes, rotating the pans at 20 minutes for best results. Let cool in pan for 5-10 minutes. Then move muffins to a cooling rack, which helps to firm up their bottoms. Enjoy!


These muffins can be frozen or refridgerated! I recommend storing them in the fridge, versus the countertop before eating. Be sure to share these with your family and friends, they're quite tasty!


Sunday, August 25, 2013

Banana Bread Muffins.


Banana bread is one of my favorite things in this whole wide world. After being inspired by some banana macadamia nut muffins I made, I knew that I could make some banana bread muffins that were absolutely delicious! So that's what I did. They're also grain-free and gluten-free (and wicked tasty)!

These little muffins taste just like banana bread, but are more portable! They're also super easy to whip up too, which will be great for when I start classes again.


Banana Bread Muffins.
    makes 14 muffins

    2/3 cup  walnuts, chopped
    2/3 cup  unsweetened coconut flakes
    1 cup + 2 Tbsp  blanched almond flour
    ¼ cup  organic coconut flour - source
    3  ripe bananas, peeled and mashed
    2  eggs, room temperature
    1/4 cup  raw creamy honey
    1/3 cup  organic coconut oil, melted and cooled
    ¾ tsp  baking soda
    ½ tsp  unrefined sea salt
    1 tsp  coconut water vinegar or apple cider vinegar or lemon juice
    1½ tsp  vanilla extract
    1½ tsp  cinnamon
    ½ tsp  freshly ground nutmeg
    toppings - optional

To make your banana bread muffins:
  1. Preheat your oven to 350 degrees convection. Take out 2 muffin tins and place muffin liners inside.
  2. In a large bowl, add nuts, coconut, flours, baking soda, salt; mix to combine.
  3. To the same bowl, add eggs, bananas, honey, coconut oil, vinegar, vanilla; mix again to combine.
  4. Drop by tablespoons into the muffin tins. Fill 14 muffins full. *This will make 14 full sized muffins as long as there is no batter eaten in the process.
  5. Bake for about 30-35 minutes, rotating the pans at 20 minutes for best results. Let cool in pan for 5-10 minutes. Then move muffins to a cooling rack, which helps to firm up their bottoms. Enjoy!


I am such a fan of banana bread, I know I will be making these often! And they are sure to please a crowd, so try bringing them to parties and sharing with friends and family!!

Sunday, August 18, 2013

Grain-free Blueberry Muffins 1.0.


I have loved all things blueberry for as long as I can remember. In fact, maybe I should ask my mom, as I am sure there was some point when I didn't like blueberries... but if there was a day, I don't want to remember!


August in New England means blueberries. Usually I get a bunch from some bushes we have on the land, but this year, either someone was picking them, or they just didn't have a good year, since I couldn't find nearly any! Lucky for us there are groceries stores that sell frozen blueberries and other farms to buy them from at the local farmers market!

These muffins were muffin #2 on my recent muffin kick. I am really excited about the flavor and 85% of the texture, but they seem to be a little on the crumbly side. I am going to work on this, and then edit the recipe, but I couldn't wait to share! They are just too delicious. The flavor is perfectly balanced.


Grain-free Blueberry Muffins 1.0.
    makes 18 muffins

    3/4 cup  organic coconut flour – sifted
    1/2 cup  blanched almond flour – sifted
    1/2 cup  raw honey
    1/2 cup  organic coconut oil, softened
    1/2 tsp  unrefined sea salt
    1/2 tsp  baking soda
    2  real eggs
    1 - 1½  cup  raw whole milk
    juice of half a lemon
    zest of one lemon
    1 cup  ground walnuts
    2 cup  frozen or fresh (large) blueberries
    sugar crystals for sprinkling - optional

To make your blueberry muffins:
  1.  Preheat oven to 350 degrees convection. Line muffin tins with paper liners.
  2.  In a large bowl, whisk coconut oil until glossy, white and homogenous. Add raw honey and whisk until combined. Add room temperature eggs, lemon juice, lemon zest.
  3.  Add coconut flour, almond flour, soda, salt and walnuts to wet ingredients, sifting the flours into the bowl. Combine with a spatula.
  4.  Add milk, and combine again. Gently fold in blueberries.
  5.  With a tablespoon, add batter to muffin tins until 3/4 full. Bake for 30-35 minutes, until golden brown on top. Let cool for a few minutes, then move muffins to a wire rack to cool.


If you don't anticipate eating these within a week (stored in the refridgerator) then freeze them! They'll keep for about 6 months, that is, if you don't eat them sooner ;)


Thursday, July 25, 2013

Triple Vanilla Ice Cream.


Vanilla ice cream is definitely one of  my favorite flavor of ice cream. I like to try sample at every ice cream shop I visit, to see if I have found the vanilla ice cream. So far my search has found some pretty good vanillas, and some pretty mediocre vanilla ice creams. By far, the standard of my comparison has been the storebought super premium ice cream, Double Rainbow. Since trying this ice cream, no other vanilla I've tried has stacked up to it's incredibly creamy, smooth, bright and comforting vanilla flavor.


So when I whipped up this ice cream last weekend, I thought that it would come out very well, but I didn't know how well. Even before pouring this ice cream into the ice cream maker to freeze, I knew this batch was special. It tastes like a dream, scoops like a dream, and melts like a dream (unlike some homemade ice creams which just seem to melt right away, or to never melt at all). I have to admit, it certainly rivals the amazing taste of Double rainbow, which is a feat in and of itself. I will definitely be making more vanilla ice cream exactly like this. Below is a photo from my brother's birthday celebration.


Since the vanilla sugar and cream are simmered together (in order to dissolve the sugar), the final product as a slight caramel taste! No doubt if you simmered the cream and sugar longer, you could easy make a dulche de leche version.


Triple Vanilla Ice Cream.
    makes two quarts

    6 oz  vanilla sugar - source or make your own
    4 cups (1 quart)  raw cow's milk cream
    1  vanilla bean
    1 Tbsp  vanilla extract
    1 Tbsp  coconut flour - source
    5  egg yolks
    1/2 tsp  unrefined sea salt

To make your ice cream:
  1. In a small sauce pan, combine sugar and 1 cup cream. Turn on high heat, bring almost to a boil, when first bubbles appear at sides reduce heat to simmer, and simmer, stirring frequently, for about 5-10 minutes. Mixture will thicken, coat the back of a spoon, and be caramel-like when ready. Remove from heat and allow to cool (this may take a while).
  2. In a separate bowl, combine coconut flour, salt, vanilla bean flecks, and egg yolks. Mix until yellow and thick. Add vanilla extract. Whisk in remaining 3 cups cream. Slowly add the cooled vanilla sugar mixture, whisking constantly.
  3. Add to your ice cream maker, and freeze according to manufacturers instructions. Mine churned for about 25 minutes. This ice cream comes out perfectly straight from the ice cream maker. Freeze overnight before scooping for hard ice cream. No need to remove ice cream from freezer for 10 minutes before serving. It's scoopable as is!
  4. This ice cream is so delicious, serve with your favorite brownies, chocolate sauce, nuts or whipped cream. Or you can serve along mint cake, like I did here! Enjoy :)


Want some cake with your ice cream? Try my grain-free chocolate cake! It's super easy, just make sure to follow instructions and to both grease and flour the pan.

Other ice creams I've made:
- Original vanilla ice cream - my first attempt, these basic proportions are what I use as a "template" for making all my other ice cream recipes
- French vanilla ice cream
- Chocolate ice cream
- Chocolate peanut butter ice cream

Have a lovely summer day!


Sunday, March 24, 2013

Grain-free Coconut flour Spice Cake.


Calling this recipe cake isn't really fair.  Calling this recipe bread isn't really fair either.  It is actually similar to both, but with the best parts of each.  Light and airy (bread), but sweet and satisfying (cake).  Remember when I promised you I'd post other versions of my lemon poppyseed cake?  Well, this is actually my original recipe, as I made first made a spicy version, but instead shared the lemon poppyseed recipe with you all before this version, since I hadn't taken proper pictures.

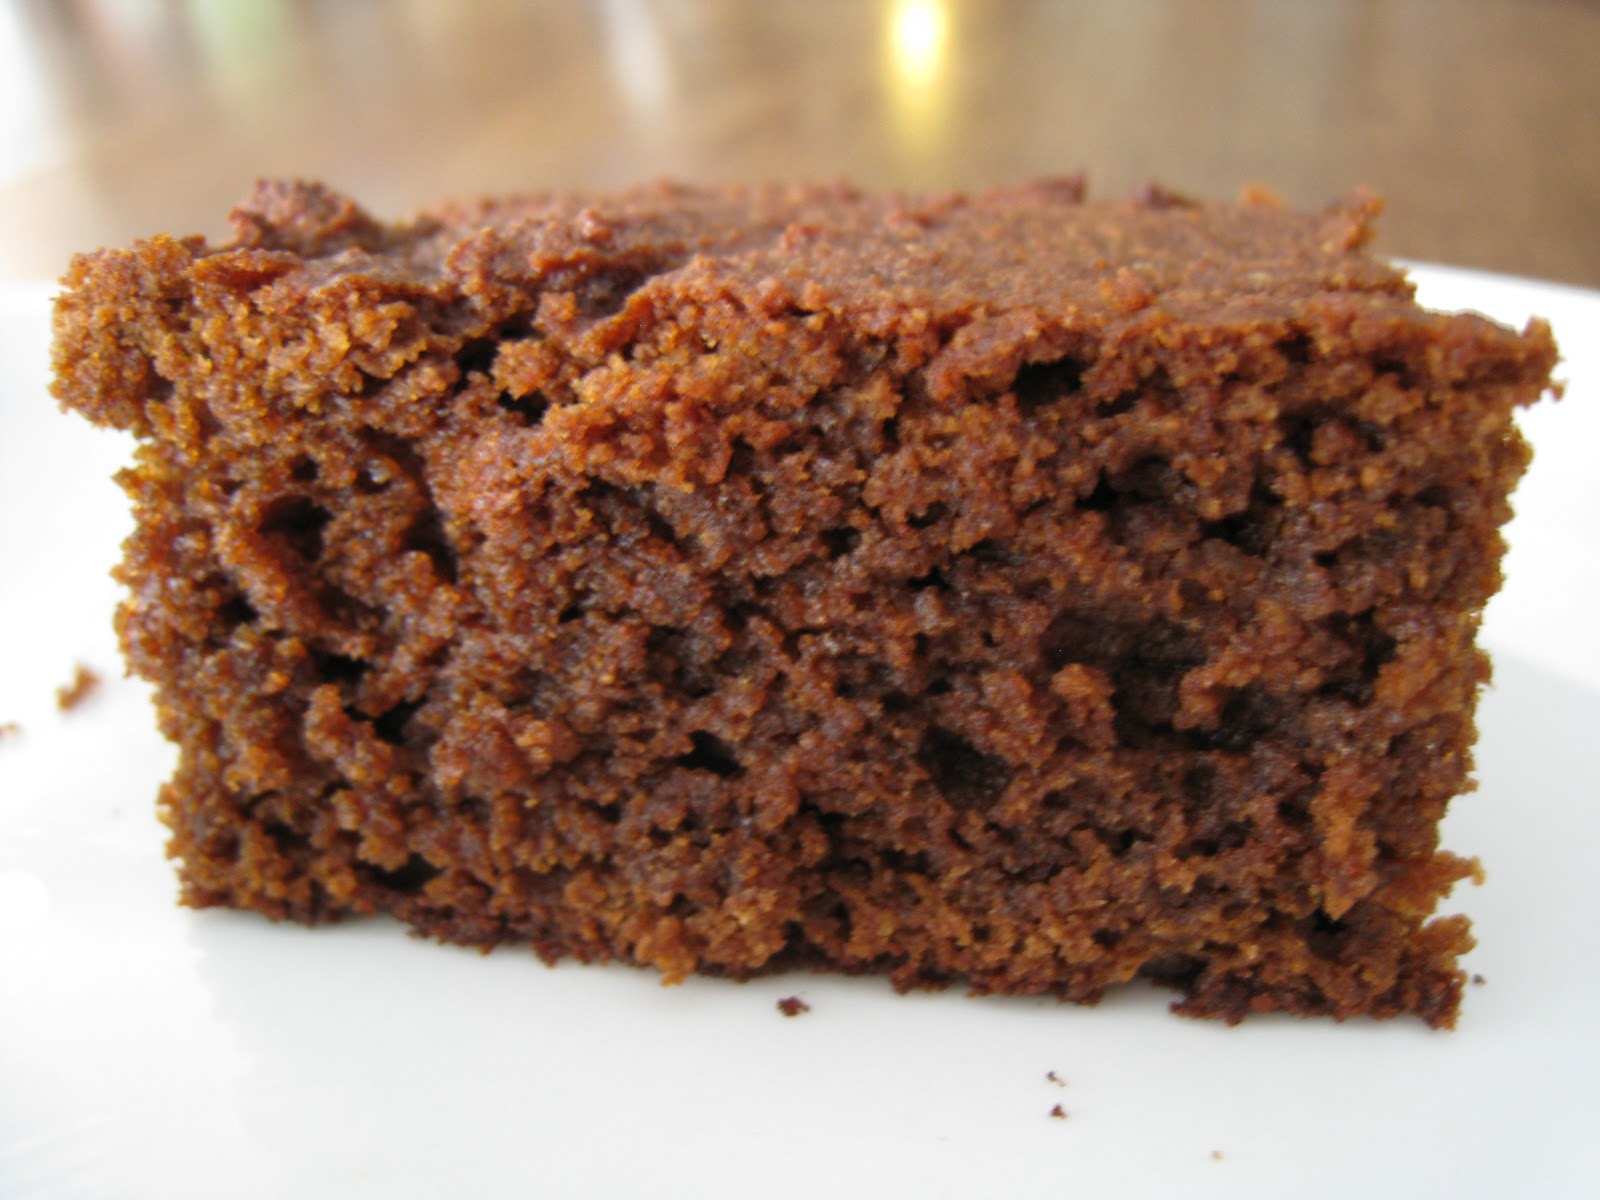
This recipe reminds me of gingerbread, but without all the heavieness or sugar content of a thick cake, as this is more light and airy; something that you can eat everyday.  It's great by itself for a snack, or on the side of a salad for paleo/primal friendly treat.  I like to make this on the weekend and slowly eat the pan down over the next two weeks. This would free great too!


Grain-free Coconut flour Spice Cake.
    makes one 9x13 pan

    1/3 cup  organic coconut oil - source
    2/3 cup  warm water
    6  happy eggs
    1/3 cup + 2 Tbsp (or 1/3 cup heaping)  organic coconut flour - source
    2 Tbsp  honey - mine was wildflower runny honey
    2 Tbsp  molasses
    1 tsp  baking soda
    1/4 tsp  unrefined sea salt
    1 Tbsp  organic cinnamon
    3 Tbsp  ground ginger
    3 dashes  ground nutmeg
    2 dashes  ground gloves

To make your lovely simple spice cake:
   1.  Place coconut oil and warm water in a medium sized bowl, whisk vigorously for about 2 minutes or until white, glossy and homogenous (and no longer clumpy).
   2.  To the same bowl, add flour, and remaining ingredients. Whisk until incorporated.
   3.  Pour batter into a greased 9x13 pan (I used coconut oil), and bake at 350 degrees non-convection for exactly 20 minutes.
   4.  Pull pan from the oven and place on a baking rack to cool. Transfer to the fridge to cool some more. Cut into squares when cool, and spread with your favorite filling. I used grass-fed butter! Yum! Tahini, peanut or cashew butter would go nicely with these too.


Other spices like cardamom and allspice would be great in this cake too!  Use your favorite warm spice combination :)

Monday, January 28, 2013

Grain-free Lemon Poppy Seed Coconut Flour Cake.


It's a rather odd sounding title, isn't it?  This recipe was a spin off my primal gingerbread cake, as well as my grain-free waffle recipe.  I wanted a simple coconut flour-based grain-free baked good that I could whip up fast and was super easy.  So I experimented, and made this!  It was delicious on the first go! This cake has just the right amount of cakey-ness to satisfy my (occasional) bread cravings, but without being loaded with sugar or refined gluten-free grains.  It is also nut-free and Paleo!  My first version was a spiced flavor with lots of ginger and a touch of molasses, and my second (this version) was lemon poppy seed, but feel free to change spices and flavor extracts for a different taste.  I know I will be sharing several different versions as time allows me :)  This bread bakes thin in the pan, so I used two squares and spread some grass-fed butter in between both sides, to make little "sandwich" looking treats.  The whole batch lasted me nearly two weeks, and I was very happy to have something interesting (besides veggies) to nibble on at lunch time :)  It's also a great way to add some more coconut oil and grass-fed butter to your diet, which are rich in good for you saturated fats and fat-soluble activators, which our bodies, brains, and hearts desperately need!


Grain-free Lemon Poppy Seed Coconut Flour Cake.
    makes one 9x13 pan

    1/3 cup  organic coconut oil - source
    2/3 cup  warm water
    6  happy eggs
    1/3 cup + 2 Tbsp (or 1/3 cup heaping)  organic coconut flour - source
    1/4 cup  honey  - mine was wildflower runny honey
    1 tsp  baking soda
    1/2 tsp  organic lemon extract
    2 tsp  poppy seeds
    zest of one organic lemon

To make your lemon poppy cake:
   1.  Place coconut oil and warm water in a medium sized bowl, whisk vigorously for about 2 minutes or until white, glossy and homogenous (and no longer clumpy).
   2.  To the same bowl, add flour, and remaining ingredients. Whisk until incorporated.
   3.  Pour batter into a greased 9x13 pan (I used coconut oil), and bake at 350 degrees non-convection for exactly 20 minutes.
   4.  Pull pan from the oven and place on a baking rack to cool. Transfer to the fridge to cool some more. Cut into squares when cool, and spread with your favorite filling. I used grass-fed butter! Yum! Sun-butter or cashew butter would go nicely with these too.


Spread something fun inside and enjoy :) PS-- Don't you love my plates! I found them last year at Sur La Table, and I absolutely love them! I'm so happy they survived the trek from Southern California to Seattle!


Monday, December 31, 2012

Grain-free Gingerbread.

 
Holiday baking is always a lot of fun for me.  Since I just completed my undergraduate degree, and have now begun medical school, I don't exactly have a lot of time to bake!  I've been home for Christmas for the past few weeks, and it's been really nice to be "on vacation," and have time to read books, bake, workout, and sleep at my leisure!

When discussing what we wanted to make during the time I am home, as well as for our family Christmas celebrations, my mom suggested we make a gingerbread cake, since my gingerbread men cookies are just too delicious!  (And hooow long has it been since there's been gingerbread in the house??  Apparently years!!)  You see, gingerbread used to be a favorite of mine, but today I realized I haven't had gingerbread cake in probably about 10 years!  What a shock!

So today, I got out my bowl, my favorite spatula, a bunch of yummy molasses and baked this goodness.  My family and I love the cakey texture of this gingerbread, the rich flavor of the molasses, and the punch of the ginger.  And it's not overly sweet, which is what I prefer!


Grain-free Gingerbread Cake.
    makes one 9x13 pan

    1/2 cup  organic palm oil shortening - source
    1/4 cup  homemade vanilla sugar - or any sugar of choice
    4  REAL eggs
    1 cup  molasses
    1 cup  organic coconut flour - source
    1/2 cup  blanched almond flour - source
    1/2 cup  arrowroot flour/starch - source
    1/2 cup  organic applesauce
    1 tsp  baking soda
    1/2 tsp  unrefined sea salt
    lots of ginger + cinnamon (probably 2 T ginger, and 1 T cinnamon)

To make your gingerbread cake:
  1.  Preheat oven to 375 degrees (convection). Grease a 9x13 pan liberally with butter.
  2.  In a large bowl, cream together shortening and sugar until fluffy. Add one egg at a time until just incorporated.
  3.  To the same bowl add spices, coconut flour, almond flour, arrowroot, sea salt, baking soda, molasses. Mix. Add applesauce. Mix until combined.
  4.  Pour batter into the prepared pan and smooth top with spatula. Bake for about 20-25 minutes, depending on the heat of your oven.
  5.  Remove for oven when sides are slightly browned, and center of cake is springy. Let pan cool on a baking rack for about 20 minutes, then slice and transfer to desired container.  Feel free to freeze for later! Top with whipped cream, ice cream or eat it warm and slather it with cinnamon butter.


Try it cold (you can REALLY taste the ginger punch this way) and topped with some fresh whipped cream! Yum! And don't forget to share it with all your primal, paleo, or grain-free friends! :)


Saturday, September 1, 2012

Grain-free Unsweetened Banana Cake.


Today is my birthday, so I thought sharing a cake today would be only appropriate.  I didn't make this cake today, however, but made it sometime early summer.

Banana bread has always been one of my favorites.  Since going gluten-free, I've made lots of different versions.  Up until now, my best recipe has been my original banana cake recipe.  Then there was a banana cake made with oatmeal.  There was also my gluten-free whole-grain banana bread, which I adapted from my favorite wheat-based recipe when I first went gluten-free.  And now there is this banana cake.  Made with grain-free flours, left-over soured milk, and bananas, this banana bread is easy to digest, primal and absolutely delicious!  I also love it because it give me a use for raw milk that has gone a little bit too sour to be palatable.  Raw dairy is so valuable nutritionally, it's such a waste to not use it!


I've made this recipe twice now, and it's been fantastic.  The first time I made a frosting over the whole cake made with peanut butter, butter, yogurt and coconut oils.  It was fantastic and I ended up eating it for breakfast because it had enough protein and fat to make my metabolism happy :)  The pictures you see here have one layer of a peanut butter-butter frosting in the middle, but not over the entire cake.  I hope to tweak my peanut butter recipe, get it just right, and then share it with you.  For now, feel free to mix equal parts, butter, fresh ground peanut butter, a few drops of Stevia clear, and vanilla extract together to make a wonderfully nourishing peanut butter filling for the middle of these cakes.  And be sure to share with family!  It's so good (and makes a lot) so sharing should be mandatory!  This cake is also completely unsweetened (bananas only) and it's Primal!


Grain-free Unsweetened Banana Cake.
    makes two 9" rounds

    1 cup  blanched almond flour - source
    1 cup  organic coconut flour - source
    3 cups  ripe bananas, mashed
    6 small  real eggs
    2 cups  soured raw milk
    1 Tbsp  warm spice blend (mine was a mix of cinnamon, cloves, ginger, cardamom, nutmeg, allspice)
    1 Tbsp  vanilla
    1 tsp  baking soda
    1/2 tsp  unrefined sea salt
    2 Tbsp  grassfed butter (to grease the pan) - source


To make your banana cake:
  1.  Preheat the oven to 375 degrees (convection or non-convection, same results for this cake). Use your fingers to butter the cake pans liberally.
  2.  In a large bowl, mash bananas, whisk in eggs, sour milk, and vanilla.
  3.  In another medium sized bowl, combine flours, baking soda, and sea salt.
  4.  Mix wet ingredients into dry, using a spatula to incorporate.
  5.  Distribute batter evenly between both pans. Bake for about 35-40 minutes or until sides have pulled away from the pan and top is golden brown. When the cakes have cooled, remove from pans by gently inverting them onto your hand or a plate.  Wait until cakes are completely cooled to frost, if desired.

Texture up close.

This cake has quickly become one of my favorites, I hope you enjoy it too!