Showing posts with label quick bread. Show all posts
Thursday, December 19, 2013
Grain-free "Recovery" Banana Bread.
One of my lovely family members just recently had surgery and an overnight hospital stay [everything is going well, thanks :)], and so I thought I would share this recipe, as it has been great for her recovery.
Let me explain...
My loved one recently had to have surgery. Post-operation she was having trouble swallowing because she felt so sore. She only wanted cold, soft things, and was also barely able to eat due to the nausea caused by pain meds. Turns out that I had just made some grain-free banana bread that week, in an endeavor to start recipe development for my own grain-free banana bread recipe that I would love just as much my grain-free pumpkin bread recipe. Well, the recipe was not perfect, and was very soft and moist (ie, the texture isn't quite there yet, and therefore not bloggable), but it was still had great flavor and tasted delicious, so I had kept it and was planning on nibbling on it throughout the week.
This "recipe" failure ended up being a blessing, as it's smooth and soft texture was very easy to swollow for my patient, but also gave her the feeling that she was "eating something solid." Win win!
For this recipe I used a smaller loaf pan, not the standard size. It was a medium sized Pyrex glass loaf pan which probably measures 4" x 8" and is tall, not wide, like standard loaf pans. It's very easy to whip up, and is a great idea to bring to the hospital to help your loved one recover! It sets up best in the fridge. So after the bread cools, turn it out, and place it in the fridge.
Grain-free "Recovery" Banana Bread.
makes one loaf pan, size above
2 very ripe bananas (or 3 small)
1 cup almond flour
1/3 cup coconut flour
2 medium/large eggs
1/4 cup runny honey
1/3 cup coconut oil - mine was not melted
3/4 cup coconut milk - mine is always unsweetened
1 Tbsp raw apple cider vinegar
1 tsp baking soda
1-2 tsp cinnamon or more if desired
1.5 tsp vanilla
To make your recovery bread:
1) Preheat oven to 375 degrees; mine is non-convection.
2) Put ingredients in order listed into Vitamix or blender. Blend. Pour into coconut oil greased loaf pan (mine is a glass loaf pan).
3) Bake for over 1 hour. LET COOL. Store in fridge. Bread will be moist but will firm up in the fridge.
4) Eat with a spoon, or slice it thick. Spread with your favorite nut or coconut butter, for even more nutrition!
Enjoy this bread! I hope it will help your recovering family members, as it did mine, whether they are sick at home or are recovering from major surgery! In fact, we ate up this banana bread so fast because it was so tasty, and I am baking another one right now!
xoxo :)
P.S. I am home for Christmas break. This in the medical school world are going very well. I am tired, but loving my classes and assignments. Stay tuned for some delicious recipes that I can hopefully share with you during the time I am home. As always, thanks for continue to read my blog even though things are slow now-a-days!
Labels:
almond flour,
bread,
cinnamon,
coconut flour,
coconut milk,
coconut oil,
dairy free,
easy,
egg,
family,
gluten free,
grain-free,
honey,
organic,
quick bread,
real food,
soy free,
vanilla,
Vitamix,
winter
Sunday, August 18, 2013
Grain-free Blueberry Muffins 1.0.
I have loved all things blueberry for as long as I can remember. In fact, maybe I should ask my mom, as I am sure there was some point when I didn't like blueberries... but if there was a day, I don't want to remember!
August in New England means blueberries. Usually I get a bunch from some bushes we have on the land, but this year, either someone was picking them, or they just didn't have a good year, since I couldn't find nearly any! Lucky for us there are groceries stores that sell frozen blueberries and other farms to buy them from at the local farmers market!
These muffins were muffin #2 on my recent muffin kick. I am really excited about the flavor and 85% of the texture, but they seem to be a little on the crumbly side. I am going to work on this, and then edit the recipe, but I couldn't wait to share! They are just too delicious. The flavor is perfectly balanced.
Grain-free Blueberry Muffins 1.0.
makes 18 muffins
3/4 cup organic coconut flour – sifted
1/2 cup blanched almond flour – sifted
1/2 cup raw honey
1/2 cup organic coconut oil, softened
1/2 tsp unrefined sea salt
1/2 tsp baking soda
2 real eggs
1 - 1½ cup raw whole milk
juice of half a lemon
zest of one lemon
1 cup ground walnuts
2 cup frozen or fresh (large) blueberries
sugar crystals for sprinkling - optional
To make your blueberry muffins:
1. Preheat oven to 350 degrees convection. Line muffin tins with paper liners.
2. In a large bowl, whisk coconut oil until glossy, white and homogenous. Add raw honey and whisk until combined. Add room temperature eggs, lemon juice, lemon zest.
3. Add coconut flour, almond flour, soda, salt and walnuts to wet ingredients, sifting the flours into the bowl. Combine with a spatula.
4. Add milk, and combine again. Gently fold in blueberries.
5. With a tablespoon, add batter to muffin tins until 3/4 full. Bake for 30-35 minutes, until golden brown on top. Let cool for a few minutes, then move muffins to a wire rack to cool.
If you don't anticipate eating these within a week (stored in the refridgerator) then freeze them! They'll keep for about 6 months, that is, if you don't eat them sooner ;)
Labels:
allergen free,
almond flour,
breakfast,
coconut flour,
coconut oil,
dairy free,
easy,
gluten free,
grain-free,
honey,
muffins,
nuts,
organic,
Primal,
quick bread,
real food,
slow food,
soy free,
summer
Sunday, March 24, 2013
Grain-free Coconut flour Spice Cake.
Calling this recipe cake isn't really fair. Calling this recipe bread isn't really fair either. It is actually similar to both, but with the best parts of each. Light and airy (bread), but sweet and satisfying (cake). Remember when I promised you I'd post other versions of my lemon poppyseed cake? Well, this is actually my original recipe, as I made first made a spicy version, but instead shared the lemon poppyseed recipe with you all before this version, since I hadn't taken proper pictures.
This recipe reminds me of gingerbread, but without all the heavieness or sugar content of a thick cake, as this is more light and airy; something that you can eat everyday. It's great by itself for a snack, or on the side of a salad for paleo/primal friendly treat. I like to make this on the weekend and slowly eat the pan down over the next two weeks. This would free great too!
Grain-free Coconut flour Spice Cake.
makes one 9x13 pan
1/3 cup organic coconut oil - source
2/3 cup warm water
6 happy eggs
1/3 cup + 2 Tbsp (or 1/3 cup heaping) organic coconut flour - source
2 Tbsp honey - mine was wildflower runny honey
2 Tbsp molasses
1 tsp baking soda
1/4 tsp unrefined sea salt
1 Tbsp organic cinnamon
3 Tbsp ground ginger
3 dashes ground nutmeg
2 dashes ground gloves
To make your lovely simple spice cake:
1. Place coconut oil and warm water in a medium sized bowl, whisk vigorously for about 2 minutes or until white, glossy and homogenous (and no longer clumpy).
2. To the same bowl, add flour, and remaining ingredients. Whisk until incorporated.
3. Pour batter into a greased 9x13 pan (I used coconut oil), and bake at 350 degrees non-convection for exactly 20 minutes.
4. Pull pan from the oven and place on a baking rack to cool. Transfer to the fridge to cool some more. Cut into squares when cool, and spread with your favorite filling. I used grass-fed butter! Yum! Tahini, peanut or cashew butter would go nicely with these too.
Other spices like cardamom and allspice would be great in this cake too! Use your favorite warm spice combination :)
Monday, January 28, 2013
Grain-free Lemon Poppy Seed Coconut Flour Cake.
It's a rather odd sounding title, isn't it? This recipe was a spin off my primal gingerbread cake, as well as my grain-free waffle recipe. I wanted a simple coconut flour-based grain-free baked good that I could whip up fast and was super easy. So I experimented, and made this! It was delicious on the first go! This cake has just the right amount of cakey-ness to satisfy my (occasional) bread cravings, but without being loaded with sugar or refined gluten-free grains. It is also nut-free and Paleo! My first version was a spiced flavor with lots of ginger and a touch of molasses, and my second (this version) was lemon poppy seed, but feel free to change spices and flavor extracts for a different taste. I know I will be sharing several different versions as time allows me :) This bread bakes thin in the pan, so I used two squares and spread some grass-fed butter in between both sides, to make little "sandwich" looking treats. The whole batch lasted me nearly two weeks, and I was very happy to have something interesting (besides veggies) to nibble on at lunch time :) It's also a great way to add some more coconut oil and grass-fed butter to your diet, which are rich in good for you saturated fats and fat-soluble activators, which our bodies, brains, and hearts desperately need!
Grain-free Lemon Poppy Seed Coconut Flour Cake.
makes one 9x13 pan
1/3 cup organic coconut oil - source
2/3 cup warm water
6 happy eggs
1/3 cup + 2 Tbsp (or 1/3 cup heaping) organic coconut flour - source
1/4 cup honey - mine was wildflower runny honey
1 tsp baking soda
1/2 tsp organic lemon extract
2 tsp poppy seeds
zest of one organic lemon
To make your lemon poppy cake:
1. Place coconut oil and warm water in a medium sized bowl, whisk vigorously for about 2 minutes or until white, glossy and homogenous (and no longer clumpy).
2. To the same bowl, add flour, and remaining ingredients. Whisk until incorporated.
3. Pour batter into a greased 9x13 pan (I used coconut oil), and bake at 350 degrees non-convection for exactly 20 minutes.
4. Pull pan from the oven and place on a baking rack to cool. Transfer to the fridge to cool some more. Cut into squares when cool, and spread with your favorite filling. I used grass-fed butter! Yum! Sun-butter or cashew butter would go nicely with these too.
Spread something fun inside and enjoy :) PS-- Don't you love my plates! I found them last year at Sur La Table, and I absolutely love them! I'm so happy they survived the trek from Southern California to Seattle!
Labels:
allergen free,
breakfast,
butter,
cake,
coconut flour,
coconut oil,
dairy free,
easy,
egg,
gluten free,
grain-free,
honey,
low carb,
low sugar,
lunch,
organic,
Primal,
quick bread,
snack,
soy free
Friday, October 21, 2011
Grain-free Unsweetened Primal Pumpkin Bread.
One of the cool things about Blogger is that I can see what people are searching for on my blog. These past few weeks one of the most popular searches involved PUMPKIN! Must be that time of year! Which makes the timing of this post perfect :)
This past Sunday night I was feeling antsy, and I quickly diagnosed myself specifically with baking antsy. There's really only one remedy for baking antsy and that's... baking!
Baking antsy: a phenomenon in which an individual must bake something immediately to release creative juices and simultaneously make a delicious product
| Can you see the flecks of cinnamon and nutmeg? |
Have you experienced this before? Fortunately for those in my house, this is not an entirely rare occurrence for me, but on the other hand it's not grossly common either (both of which are probably good ;). One reason why I enjoy cooking so much is the creative aspect. Going to the kitchen, pulling out the mixing bowls and getting something into action and watching to see the turn out is fun. Blogging about it is like sharing the fun, which allows YOU to bake the fun later. What a happy way of viewing baking!
Grain-free Unsweetened Primal Pumpkin Bread.
makes one medium loaf pan (~4x8)
1 cup blanched almond flour
1/2 cup organic coconut flour
3 happy eggs - mine were large
1/2 cup coconut oil - mine was spreadable soft, soften on the stove top if your's is rock solid
1 1/2 cups pumpkin puree
1 tsp baking soda
1/2 tsp sea salt
1 Tbsp raw apple cider vinegar
1 tsp ground nutmeg
1 Tbsp cinnamon
2 tsp vanilla
20 drops clear stevia
5 drops vanilla stevia
Water as needed - probably about 1 cup
Coconut and almonds, for topping, optional
To make your unsweetened pumpkin bread:
1. Preheat oven to 375 degrees Farenheit. My oven in my apartment is NOT convection (at least, I think so since there isn't a blower).
2. In a large bowl, add almond and coconut flours, baking soda, sea salt, cinnamon and nutmeg, whisking to combine.
3. In the center of the bowl, add eggs, coconut oil, pumpkin puree, apple cider vinegar and stevia, mixing with a wooden spoon or spatula. Mixture will have a thick "pate" like consistency.
4. Add water to batter to make more fluid. Batter should appear like cake batter, not too runny but not too stiff. Remember coconut flour likes moisture, but too much will affect the action of the leavening agents and prohibit adequate rising height from being acheived.
5. Pour the silky pumpkin batter into a medium sized (this is key) glass loaf pan. DON'T forget to GREASE the sides using either coconut oil, butter or olive oil. This time I used olive oil. Pay special attention to the bottom of the pan.
6. Smooth out the top, and if desired sprinkle finely shredded coconut and push in some almonds along the top. Bake in oven for 30 minutes or until top begins to brown. Check for doneness with a cake pick. Return to oven with a foil tent for a remaining 10-20 minutes until middle is well cooked. Keep an eye on it, overcooked bread is hard to enjoy and undercooked bread is just soggy!
Overall, I was very pleased with this recipe... how it rose, the texture and mouthfeel of the bread, the color and appearance. The first recipe came out a little on the salty side, so I've decreased the amount of salt here. Next time if I have some molasses on hand, I might add a tablespoon of that; I also want to add some ginger and allspice, but didn't have any in my pantry.
| Look at the texture! |
I am pleased to finally present recipe for us grain-free individuals who want to watch our sugar intake!
Labels:
allergen free,
almond flour,
breakfast,
cinnamon,
coconut flour,
dairy free,
easy,
gluten free,
grain-free,
low carb,
low sugar,
organic,
quick bread,
real food,
snack,
soy free,
stevia,
sugar free
Friday, October 22, 2010
Grain-free, dairy-free Banana Cake III.
By now you have probably figured out that I love any baked good that has to do with bananas. That's obvious here, where I made some great banana cake with almond flour, and here, where I made a different version of it instead with soaked oats and coconut flour. Both recipes are very good. I also seem to be obsessed with brownies, but that is another story. Can you handle another version?
I think so.
You can see cinnamon specks!
|
I've been wanting to make a version of banana cake like this for a long time. Grain free and no dairy, but not lacking in flavor. Some of you readers can't eat any dairy, or live a Primal/Paleo lifestyle. You should be able to enjoy banana cake too. In my own life also, I have discovered that grains really aren't necessary in the human diet. I feel better without them. Believe me, you certainly won't miss them in this recipe!
Banana Cake III (three?!)
1 1/4 - 1 1/2 cup ripe ripe bananas (I used one normal/large banana and two small)
6 large real eggs
1/4 cup raw honey
1/4 cup coconut oil (I did not melt mine since it was soft, but not liquid)
1/2 cup coconut flour (I did not sift, mine was closer to packed)
1 Tbsp cinnamon
1 tsp baking powder
1/2 tsp sea salt
To make your banana cake:
1. In a small bowl, puree bananas, coconut oil, raw honey, cinnamon and salt, together with a hand blender.
2. Last, add the baking powder and coconut oil, switch the attachment to the whisk and blend together. The batter should come together nicely, hold it's shape, but still be fluid and not stiff.
3. Grease your favorite 8x8 pan with a small bit of coconut oil.
4. Pour in the batter and smooth out the top.
5. Place immediately into a preheated 350 degree oven (I confess I am not sure if my school's oven is convection or regular), and bake for about 30-40 minutes, until golden and springy when touched.
6. Let cool before slicing and eating. For refridgerator storage, cut into squares and wrap individually with plastic wrap and store in a large plastic baggie.
Look at that texture!
|
I confess that I ate probably a 1/4 cup of the batter raw before the oven. It was too good! When I tried it straight out of the oven though, I wasn't quite a fan. Something was missing. But I decided to let it "age" a little bit (think the fridge overnight) and then see how it tasted. Some things are better a few hours later. After it had some time to rest and chill out, I really like the results. It is definitely cakey! That's a hard texture to acquire in gluten free baking. It also holds together very well and is not crumbly. You can really taste the banana and the cinnamon. For those of you who are averse to coconut, do not worry, this cake does not have a strong coconut flavor. In the end, I recommend letting this cool or eating it the next day for the maximum flavor and "enjoyableness." It made a scrumptious breakfast for several weeks :)
*This version is inspired by these recipes: Original Banana cake, Banana cake II, and Coconut Flour Orange cake @ Nourishing Days.
Try it out and let me know what you think! But try not to eat half the pan yourself. Believe me, I was tempted and I have good self control.
Friday, March 12, 2010
Nourished Breakfast
Mhmm... don't we all need a good start to the day every now and then? I feel that breakfast is the highest offender in terms of nutrition in the typical American diet. Grains, sugar, industrial fats, processed dairy, empty calories. Those of us who have discovered real food have found a more nourishing and tastier way to eat. Why did we ever eat that other stuff before?
I whipped up this recipe this afternoon after a long day of class - prelab - lab. Lab was an adventure, I got to see my heart beat, because we did EKGs! In one portion of the procedure, we had to raise our heart rate to see the difference between that and resting state. I had to run out of the building and around a part of campus to get my heart rate up enough! (I had electrodes stuck to both legs and one arm, and I took off my Rainbows so I could run easier -- I must have been a funny sight to watch: a crazy girl running barefoot around campus with funny things stuck to her arms and legs!) I tried doing stairs but soon after my heart returned to normal rate. I am happy to have a healthy heart!
This is very similar to my breakfast carrot creation, and my fruity vegan oatmeal bake. I like doing these nourishing breakfast "quick breads." They are easy to make and give me an easy option for a college student breakfast on the go. This version uses roasted sweet potatoes, which I surprisingly happened to have on hand.
Upside-down Creamy Sweet Potato breakfast cake
(It's kinda like baked oatmeal meets sweet potatoes! and you know me, I always must have some creative name.)
2 cups soured raw milk + 1 1/2 cups GF rolled oats - mix well, place in glass jar, cover loosely with a dishtowel, set in an undisturbed spot to ferment and soak for 3 whole days
1 cup pureed sweet potatoes - mine were cooked and I even pureed the skin
1/2 cup melted organic coconut oil
1 medium banana
1/4 scant cup raw honey
2 tsp vanilla extract
1/4 cup organic coconut flour
1/2 cup raisins
2 tsp baking powder
1/2 tsp baking soda
1 Tbsp cinnamon
1/2 tsp sea salt
1 handful chopped roasted/salted macademia nuts
2 Tbsp real butter - cut into chunks
1/2 cup shredded organic coconut
To make your nourishing breakfast:
1. Preheat your oven to 350 degrees F.
2. To your fermented oats add: sweet potato, banana, vanilla, raw honey and coconut oil. Puree well with a hand blender. I added my raw honey to my melted [warm] coconut oil to help make it more blendable.
3. In a separate large bowl, add: coconut flour, raisins*, leaveners, cinnamon, salt. Toss well with fingers until distributed.
4. In a 8x8 pan, rub some butter or spray with Misto to lubricate the pan on all sides especially the bottom. Place chopped macademia nuts on the bottom of the pan, followed by coconut and then distributed the chunks of butter evenly on top.
5. Combine wet oat mixture with raisin-flour mixture and stir well to combine.
6. Using several large spoonfuls, dollop the mixture on top of the coconut into the pan. Spread out evenly with a spatula, being careful not to disturb the bottom!
7. Bake at 350 for 45-55 minutes depending on your oven. The cake will be risen, set, have cracks and sound "bubbly," with the sides pulling away from the pan. Take out and let cool on the counter overnight. Cake will fall in or "rest" slightly. Wait to cut it until the morning, it's gooey inside :) When you take it out of the pan, flip it over and find the nuts and coconut all buttery and delicious on the bottom.
*It's important to mix the raisins with the flour. If you skip this step and just fold them in, then they will fall to the bottom of the pan while baking.
-Update 3/14/10-
This cake is dense and has a really cream consistency! I totally tastes like sweet potato! I might even try pumpkin next time! The texture is so smooth you can't even tell it has oats in it! It actually kinda reminded me of fudge :) It is not sweet, so I would suggest adding in some stevia drops and swapping the raw honey for a full 1/4 cup of organic maple syrup. The macademia nuts kinda get lost in the sweet potato flavor, so next time I will swap them for a more flavor assertive nut, like pecans or walnuts. It also seems that 1 Tbsp of cinnamon was not enough!! I will increase the amount and also add some allspice and nutmeg to warm up the flavor a bit. I definitely want more raisins too! This is totally a work in progress recipe, though some of you might like it just the way it is. Normally I wouldn't post a recipe until it's ready, but cooking is fun, and we can all learn together! Also, this recipe is a success, the flavors are just lacking a little bit, and that is easily fixed. I think the best way to eat this cake is how I did this morning - warmed for 40 seconds in the microwave (or even better use a toaster oven!) topped with real butter, extra raisins, sliced banana, cinnamon and raw cocoa nibs. Delish!
-Update 3/15/10-
I had my friend K taste test my creation. She absolutely loved it, and said she wouldn't change a thing! Her favorite part was the gooey cake part in contrast to the crunchy and chewy raisins and nuts.
I love Friday nights. I try to let it be my time to do "nothing." At least nothing having to do with school! This is my first baking endeavor of the semester. Hopefully it won't be my last, but it is time consuming and it's March (typically the month of HW horror).
Spring break is the first week of April. We have a beach house (temporarily, no we didn't buy one), and it has a kitchen! Success :) There will be cooking!!
Enjoy your yummy new breakfast option; feel free to experiment and tell me what you think!
Tuesday, December 29, 2009
Gluten-free Lemon Bread.
My grandmother has been responsible over the years, as are most grandma's, for always bringing certain baked goods to family functions. I can remember Mimi bringing her lemon bread to every Thanksgiving, Christmas, and Easter celebration ever since I can remember family gatherings! It is especially popular with my immediate family and my brother G usually steals/eats most of the loaf. Ever since my Mom + Dad and I have needed to be gluten-free, we've missed lemon bread. My brother begs for me to make it and I had never attempted a gluten-free version until now.
Normally I would try to make a recipe more healthy, but some recipes are just favorites and just cannot changed too drastically. This is not an everyday quick bread, so making it an extremely quick bread was not high on my priority list. Also because I use real grass-fed butter, there is certainly some vital nutrition to this yummy quick bread!
Gluten-free Lemon Bread
adapted from the kitchen of my Grandmother
yields one loaf
6 Tbsp grass-fed butter (I always use Kerrygold)
1 cup sugar (I used organic cane sugar)
2 REAL eggs
1 1/2 cups gluten free flour (1/2 cup brown rice flour, 1/2 cup tapioca flour, 1/4 cup arrowroot, 1/4 cup sorghum)*
1 tsp baking powder
pinch salt
1/2 cup raw whole milk
1 whole lemon, zested
topping:
1/2 cup walnuts, ground or chopped
1 lemon, juice of - optional
1/3 cup sugar - optional
To make your lemon bread:
1. In a medium bowl, cream butter and sugar.
2. Add eggs one at a time, beating well after each addition.
3. In a separate bowl, mix together gluten free flours, baking powder, and salt.
4. Slowly incorporate the dry into the wet, beating on low speed. Add milk and lemon zest.
5. Sprinkle top with walnuts.
6. Pour into greased or MISTOed normal sized loaf pan.
7. Bake at 325 for over an hour, or until the bread has browned and a toothpick comes out clean.
8. Optional step: In a small bowl, whisk together lemon juice and sugar. When the bread comes out of the oven and is still hot, pour the mixture over the top and allow it to soak through. This is so delicious, but I sometimes I leave it off because the bread has adequate amounts of sugar already.
*Feel free to use whatever combination of gluten free flours are your favorite. Depending on what I am baking I mix together flours that I think will achieve the texture and flavor I want. This combination was perfect! In general, my family and I really tend to like sorghum, arrowroot, brown rice, teff, almond, and coconut flours the best. These flours also offer some great nutrition, which is often missing in gluten free baking. I will never go back to the white rice flour, potato starch and tapioca mixture that lots of gluten free bakers use because it is so nutritionally devoid (not to mention high in starch, sugar and calories, and low in protein and fiber). We also do not like bean flours, and I generally never cook with them.
In general, this lemon bread has always been a little bit crumbly, even in the original wheat version, so don't worry if there are crumblies here and there. It is quite tasty though and my whole family agrees. This recipe has been passed down for generations!
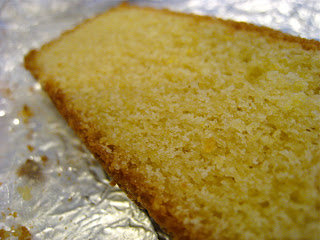
I'm sorry about the pictures - but this was the last piece left! I should have taken a picture right away before everyone ate it!
Update -- I will be making a grain-free version of lemon bread in the future!
Subscribe to:
Posts (Atom)