Showing posts with label arrowroot. Show all posts

Wednesday, August 8, 2012

Peanut Butter Frozen Yogurt.


Happy August everyone!  As I type this post, it's July, and I anticipate some hot weather ahead for New Englanders in August.  But as you read this post, it's August, and I am busy busy studying Organic Chemistry.  I am completing my last pre-requisite before starting the ND program (naturopathic medicine program) in the fall at Bastyr University in Seattle, Washington.   This East Coast girl, turned California girl, is now a Seattlite(?)  I never imagined this!  Now can say I've lived in all four corners of the USA.  I was born and raised in Florida, lived in New Hampshire until college, lived in Southern California for my undergrad, and now I am pursuing my doctoral degree in Washington state!  How cool.  Even though I haven't moved around "a lot" in comparison to some people, I still feel as if I have.  Am I an East Coaster now?  Or a West Coaster?  For the past four plus years the West Coast has been my home, and now for the next four plus years (at least) the West Coast will continue to be my home, only instead of the Southwest I'll be in the Pacific Northwest.  Once I was just starting to feel like a true CA girl,  I'm off to Seattle.  Sunshine to rain.  Dirty LA traffic, to clear Seattle roads.  It's a new adventure.


But enough about traveling.  Let's take a look at this yogurt.  YUMMY.  This recipe was inspired by a guest post over at Kimi Harris' blog The Nourishing Gourmet.  I didn't have exactly the right ingredients the original recipe called for, so I made some changes, and now instead of honey and tahini ice cream, it's more like peanut butter frozen yogurt.  The 1/2 cup of raw honey was a little sweet for my taste, so next time I will probably reduce to either 1/3 or 1/4 cup.  If you aren't partial to peanut butter, feel free to use tahini, cashini, cashew butter, almond butter, coconut butter, sunflower seed butter, etc.  But if you're a peanut butter fan (in moderation of course) like me, you'll love this recipe!  Chocolate chips would go great with this too!


Peanut Butter Frozen Yogurt.
    Makes almost 2 quarts

    3 cups  raw milk yogurt
    1 cup  raw whole milk or full-fat coconut milk (mine was mixture of both)
    ½ cup  organic peanut butter
    ½ cup  organic raw honey
    2  real eggs
    1T  vanilla extract
    1T  arrowroot powder
    ¼ tsp  unrefined sea salt

To make your delicious peanut butter fro-yo:
  1.  Mix all ingredients in a blender.
  2.  Pour into ice cream maker and churn per manufacturers instructions.
  3.  When ready, scoop into reused plastic yogurt containers (or another vessel) and freeze for at least 12 hours.  Serve when frozen yogurt has hardened.  You may also want to remove from freezer a few minutes before serving.  Enjoy!


Make this frozen yogurt as a healthy "cool-off" treat to beat the August heat.  East Coast humidity is something that I definitely don't miss on the West Coast!  You can also put this fro-yo into popsicle molds for yourself or the little kiddos in your life.  I can't wait to do this when my little nephews get older!

Question for you: how much does your location relate to your identity?

Monday, August 1, 2011

Grain-free Zucchini Bread


Every once and a while I find a recipe that just tastes SO good! A recipe that you just can not stop eating. It happened especially with my original banana cake, nourishing protein barschocolate chunk bark, the best cornbread, gluten-free gingerbread men, and now it's happening again. I'll admit, while this phenomenon of finding an excellent recipe is preferable, it is a problem. Recipes that are just too good are a problem simply because it's extremely tempting to eat the final product in one sitting. Eating a whole batch of baked goods in one sitting (while it may be delicious) is not recommended for good digestion or my girl-ish figure. May this be your warning that this grain-free zucchini bread is quite good :)

Great texture!

Summer means zucchini, zucchini means zucchini bread, and zucchini bread means happy stomach. But only if you're baking with real fresh eggs, health fats and simple ingredients. This bread has all of that! For lack of a better word (augh here it comes) this bread is moist, sweet, and nutritious. Anyone else not like using the word "moist"? Bananas, eggs, and zucchini make the bread moist/soft/creamy; the banana, coconut sugar and maple syrup make the bread sweet (I am going to cut back next time); and the zucchini, eggs, and cinnamon make this bread super nutritious.


Grain-free Zucchini Bread
     Makes one standard loaf 

     4  real eggs
     38 g  coconut sugar (palm sugar)
     4.1 oz  maple syrup (I use grade B)  
     70 g  organic coconut oil - softened
      2 g  cinnamon
      4 g  vanilla
      2 g  sea salt
     88 g  organic coconut flour
     81 g  natural almond flour (unblanched - I use Honeyville)
     35 g  arrowroot flour
     4 g  baking powder
     50 g  organic coconut flakes
     176 g  ripe banana (2 medium)
     12.2 oz  organic farmer's market zucchini - shredded (weighed after draining)
     80 g  organic raisins
     chopped walnuts for topping

To make your zucchini bread:
  1.  Preheat oven to 350 degrees convection.
  2.  In your food processor, grate zucchini. Turn zucchini into a tea towel and squeeze out the natural water of the zucchini. Let sit while preparing other ingredients, and squeeze hard once more before adding to bowl.
  3.  Place first three ingredients in a small bowl and whisk vigorously together by hand one minute.
  4.  To that bowl, add next four ingredients and whisk until combined. Small lumps are ok.
  5.  To the same bowl, add next six ingredients and mash together.
  6.   Finally, fold in zucchini and raisins. Pour batter into a greased (with old butter wrappers or coconut oil) standard loaf pan. Top with ground walnuts if desired.
  7.   Bake in oven until bread rises, cracks slightly on top, walnuts are browned, sides have pulled away from pan and a stick inserted in the middle comes out clean; about an hour.


These measurements are given in grams or ounces, and I do not know the cup or metric conversions. I have found that baking with a food scale, not only is easier, but takes much less time. After my experience baking and in food service, it's hard for me to use measuring utensils, as I am used to "scaling out" every ingredient.

Yummy walnut topping!

Also, as I mentioned earlier, this bread is very sweet. I included my original measurements in this recipe, but next time I know I will use less coconut sugar and maple syrup. I enjoy the sweetness, but it makes this bread just too good and a bit too sweet for my taste. Enjoy this grain-free version of zucchini bread :) I sure did!

Tuesday, January 18, 2011

Grain-free Apple Crunchy-Crisp


Craving apple crisp during a snow day we had last week, and deciding to remedy my want for warm buttery gooey apples, I whipped up this recipe. It was a real crowd pleaser. Between my parents and I, we ate the whole thing in 2 days. Like 48 hours. It was soo good! I actually enjoyed it for breakfast the next day under some greek yogurt. This recipe is so nourishing you can have it for breakfast. And the ice cream too! Perhaps best of all, it will make your insides nice and warm after coming in from shoveling all that snow!

Delicious topping!

Feel free to use whatever apples you have on hand. I only had grannies, but I really like the combination of grannies, gala and yellow delicious in a warm fruit dessert. Granny smith apples are the typical stand-by, but in my opinion, its the yellow delicious that really steal the show. So if you have more than one kind of apple in the fridge, I highly suggest you use a few different kinds. Either way, this apple crisp is delicious. It is very low in sugar, sweetened by the apples, dates and a bit of maple syrup. This is a dessert is such a nutritional powerhouse that it's kind of crazy to call it a dessert!

Apple Crunchy-Crisp
     serves six with no leftovers

6 small granny smith apples, peeled, cored, cut into slices
2 Tbsp maple syrup
1 Tbsp arrowroot flour/starch
1 Tbsp lemon juice
1 tsp cinnamon
1/2 pumpkin pie spice

4 Tbsp real butter
1/2-3/4 cup unblanched almond flour
1/2 cup sliced almonds
1/4 cup chopped walnuts
10-15 pitted dates, chopped
dash cinnamon
2 Tbsp butter, reserved

To make your crispy cobbler:
1. With an apple apparatus, prepare your apples. Cover with water and lemon juice (prevents oxidation and brown discoloration).
2. Prepare the topping: roughly chop dates, combine with walnuts, cinnamon and almonds. In a separate bowl cut butter into almond flour. Mix flour/butter mixture with other toppings.
3. Drain water from apples. Toss with maple syrup, arrowroot starch and spices. Spread out (do not flatten) in a glass baking dish. Sprinkle topping over the top in an even layer. Slice remaining butter into small squares and distribute evenly over the topping.
4. Cover with tin foil and bake in a 375 degree oven until warm and bubbly, about 30 minutes. Turn up to 400 degrees without the foil and finish for 10 minutes or until topping has browned slightly (watch burning, since this topping has no sugar cane it will not "brown" like other pie toppings).
5. Let cool for a few minutes. It is best served warm with fresh raw cream and homemade french vanilla ice cream or homemade vanilla ice cream.

Finished product :) with ice cream
What a lovely chewy crunchy top!

Currently I am enjoying working at home and having another SNOW DAY! Second week in a row. If you are from the North East... what is your opinion on snow days? Love them, hate them? How do you deal with them?


Sunday, August 15, 2010

Chocolate Peanut Butter Ice Cream.

(Holy Cow - I just found this post in my archives from JANUARY. I must have been waiting to post it because of a picture? Who knows!)

Sometimes making homemade ice cream can be a bit tricky. All of you who have tried it probably know what I mean. It takes a some time and some internet research to find out what works! The ice cream can come out too icy, freeze too hard, taste too sweet, taste too strong or be lacking in either flavor or texture. It's also disappointing when you spend so much time and dollars on ingredients, only to find that the batch did not turn out as you hoped.

Homemade Almond Joy Ice Cream on top with whipped cream and
Chocolate Peanut Butter Ice cream on the bottom! Delicious.
Unfortunately I don't have a better picture than this!
I've been making homemade ice cream this whole month with my lovely ice cream maker I received for my birthday this summer. Some batches have been good, but others have been rock hard, and not in a good way!

One of my family's favorite ice cream flavors is chocolate peanut butter cup. I have not had this flavor of ice cream in years ever since learning about my allergies. So after doing some research, I finally mustered up the courage to tackle this ice cream flavor!

I could not be happier with the results, and I think you will like it too. It's hard not to eat the whole tub at once!! Chocolate and peanut butter. I cannot tell you how highly I regard the culinary combination of chocolate and peanut butter. To say that I love it, crave it and think it is so incredibly tasty is an understatement. I love chocolate and peanut butter.

Chocolate Peanut Butter Ice Cream
    makes 2 quarts, with inspiration from here

    4 cups  raw cream (or 2 cups cream, 2 cups raw whole milk)
    1/2 cup  raw whole milk
    1 cup  organic cane sugar - I use Whole Foods brand
    1  scant cup unsweetened cocoa powder (about 3/4s cup)
    2 Tbsp  organic maple syrup
    2 Tbsp  organic vanilla
    1 1/2  Tbsp arrowroot powder
    4  egg yolks

Peanut chunks:
    1 cup  smooth organic peanut butter - my (current) favorite is Maranatha
    1 cup  organic cane sugar or confectioners sugar

To make your ice cream:
  1.  Put your raw cream and freezing bowl (the tub you scoop the ice cream into- NOT your ice cream maker's freezer insert) into the freezer to get really cold as you prep the other ingredients.
  2.  Get out a sheet pan and place some plastic wrap on it. In a small bowl, mix together peanut butter and sugar. Using two knives, dip one into the peanut butter mixture and use the other to scrap off a small quarter sized dollop of peanut butter onto the cookie sheet. Repeat until you use up the whole bowl. Place the sheet pan in the freezer. The peanut butter "coins" will freeze and will make it easy to incorporate it into the ice cream later.
  3.  In a large bowl, crack out your egg yolks, add arrowroot powder and cocoa powder - sifting both through a metal strainer. Sprinkle sugar into the bowl. Drizzle in 1/2 cup milk, vanilla and maple syrup, and whisk all ingredients until well combined. It will look like flourless dark chocolate cake batter. Make sure these ingredients are well mixed, that there are no lumps, that it is slightly thickened and that the mixture is smooth.
  4.  Take the raw cream out of the freezer and slowly pour it into the bowl while whisking.
  5.  Rush to the freezer, grab the ice cream maker bowl, tear off the plastic wrap (protects the bowl from freezer burn), put it into your ice cream machine, turn it on and pour in your chocolate ice cream mixture.
  6.  Churn for 30 minutes until the machine sounds slightly labored and the ice cream is thick and creamy, or "freeze according to your manufacturers instructions."
  7.  Take out your peanut butter chips and ice cream freezing tub/bowl from the freezer. Scoop out the ice cream in layers, placing several peanut butter chips on top of the ice cream for each layer. It should look like this - bottom of the bowl, ice cream, peanut butter chips, ice cream, peanut butter chips, ice cream... continue this until ice cream and chips are gone. Freeze immediately and lick up the dribbles on the counter. The ice cream will be ready to eat after it has been in the freezer overnight.
  8.  Take out ice cream from freezer. Try. Spoon. Mouth. Swoon. Scoop into bowls. Spoon. Mouth. Eat. Gone. Enjoy!

This ice cream, if made with 4 cups cream, is rich. If your taste buds are accustomed to eating sugar, the amount of sugar listed will taste perfect to you, or if you are like me and do not eat much sugar at all, this will taste very sweet and you may want to decrease the sugar content a little.

Tuesday, December 29, 2009

Gluten-free Lemon Bread.


My grandmother has been responsible over the years, as are most grandma's, for always bringing certain baked goods to family functions.  I can remember Mimi bringing her lemon bread to every Thanksgiving, Christmas, and Easter celebration ever since I can remember family gatherings!  It is especially popular with my immediate family and my brother G usually steals/eats most of the loaf.  Ever since my Mom + Dad and I have needed to be gluten-free, we've missed lemon bread.  My brother begs for me to make it and I had never attempted a gluten-free version until now.

Normally I would try to make a recipe more healthy, but some recipes are just favorites and just cannot changed too drastically.  This is not an everyday quick bread, so making it an extremely quick bread was not high on my priority list.  Also because I use real grass-fed butter, there is certainly some vital nutrition to this yummy quick bread!

Gluten-free Lemon Bread
     adapted from the kitchen of my Grandmother
     yields one loaf

    6 Tbsp grass-fed butter (I always use Kerrygold)
    1 cup sugar (I used organic cane sugar)
    2 REAL eggs
    1 1/2 cups gluten free flour (1/2 cup brown rice flour, 1/2 cup tapioca flour, 1/4 cup arrowroot, 1/4 cup sorghum)*
    1 tsp baking powder
    pinch salt
    1/2 cup raw whole milk
    1 whole lemon, zested

topping:
    1/2 cup walnuts, ground or chopped
    1 lemon, juice of - optional
     1/3 cup sugar - optional

To make your lemon bread:
  1.  In a medium bowl, cream butter and sugar.
  2.  Add eggs one at a time, beating well after each addition.
  3.  In a separate bowl, mix together gluten free flours, baking powder, and salt.
  4.  Slowly incorporate the dry into the wet, beating on low speed. Add milk and lemon zest.
  5.  Sprinkle top with walnuts.
  6.  Pour into greased or MISTOed normal sized loaf pan.
  7.  Bake at 325 for over an hour, or until the bread has browned and a toothpick comes out clean.
  8.  Optional step: In a small bowl, whisk together lemon juice and sugar. When the bread comes out of the oven and is still hot, pour the mixture over the top and allow it to soak through. This is so delicious, but I sometimes I leave it off because the bread has adequate amounts of sugar already.

*Feel free to use whatever combination of gluten free flours are your favorite.  Depending on what I am baking I mix together flours that I think will achieve the texture and flavor I want.  This combination was perfect!  In general, my family and I really tend to like sorghum, arrowroot, brown rice, teff, almond, and coconut flours the best.  These flours also offer some great nutrition, which is often missing in gluten free baking.  I will never go back to the white rice flour, potato starch and tapioca mixture that lots of gluten free bakers use because it is so nutritionally devoid (not to mention high in starch, sugar and calories, and low in protein and fiber).  We also do not like bean flours, and I generally never cook with them.

In general, this lemon bread has always been a little bit crumbly, even in the original wheat version, so don't worry if there are crumblies here and there.  It is quite tasty though and my whole family agrees.  This recipe has been passed down for generations!

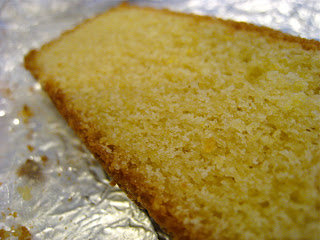
I'm sorry about the pictures - but this was the last piece left!  I should have taken a picture right away before everyone ate it!

Update -- I will be making a grain-free version of lemon bread in the future!

Tuesday, August 11, 2009

Namaste Parmesan Crackers


Mhmm, crackers! Ever since going gluten free my mom has been craving her crackers. One day I decided to put an end to it and experiment in the kitchen. Viola!

To make this recipe I took my favorite gluten free pizza crust mix, Namaste, added a few ingredient and turned it into a cracker! The mix is soo versatile.

These crackers have a GREAT crunch! They are not very flaky like other crackers, but have a wholesome satisfying texture and ever so slight cheesy crunch.

I have made two batches of these already- they keep disappearing! This will definitely be my go-to cracker recipe from now on. The recipe is so forgiving, so feel free to experiment with your own favorite ingredients.

Namaste Crackers

1/2 cup Namaste pizza crust mix
2 T cornmeal - I used Bob's Red Mill
2 T millet flour - fresh ground by me!
2 tsp olive oil
2 T melted KERRYGOLD unsalted butter
1 T grated fresh raw milk parmesan cheese
warm water as needed

To make your crunchy delicious crackers:
1. Add ingredients to a small bowl and whisk together.
2. Add warm water as needed and fold together with a small spatula.
3. Turn onto a lightly Misto-ed cookie sheet (can use a silicone baking sheet here if you have one- I don't, YET!)
4. Roll thin with a pizza roller to about 1/4 - 1/8" thick, making sure that there are no thin spots and you cannot see the cookie sheet through. Because there are large particles in the flours in cannot be super thin.
5. Slice into desired square shape with a pizza cutter.
6. Bake on the middle or bottom rack of the oven at 425 degrees for 10-15 minutes or until the middle is firm and edges slightly brown, rotating once.

*If you add too much water add 1 T millet flour.
**It is better for the dough to be on the wet side, than the dry side

Summer is the greatest time for crackers. Fire up a few batches and then you have an easy snacking and a low key dinner item for the next month! My mom and I like to have "girl dinners" where we have a smorgashboard of different things like crackers or rice cakes and peanut butter, carrots, peppers, celery, cucumbers and dip, a small salad or sweet potato, and whatever fresh fruit we feel like, especially cut up apples.

Tuesday, January 20, 2009

Gluten-free Pumpkin Bread.


I was away at school on Thanksgiving and I didn't get to bake my own gluten free baked goods, like pumpkin bread, stuffing or apple pie. The only baked good I had was a pumpkin bread my Mom sent me. The recipe I chose for her to make was less than stellar (I think I made over a wheat version into a GF version from online) and when I came home I vowed that I would make an amazing gluten free pumpkin bread.

I am blessed because it worked on the first try! I took my mom's REALLY good recipe and went to work. I am pleased with it. The texture is amazing and even my Dad (who is quite the texture Nazi) said so. This bread is not very sweet, so if you like your pumpkin bread very sweet, just add some more sweetner.

Gluten-free Pumpkin Bread.
    adapted from my Mom's recipe

    4 cups  gluten-free flour blend (I used a mixture of brown rice, white rice, arrowroot, potato starch and a little cornstarch)
    1/4 cup  maple syrup
    1/4 cup  runny honey
    4  happy eggs
    2/3 cup  cold water
    3/4 cup  unsweetened organic apple sauce
    1/4 cup  organic coconut oil
    1 - 16 oz  can pumpkin puree
    2 tsp  stevia powder
    2 tsp  xantham gum (acts as a binder)
    2 tsp  baking soda
    1 tsp  each of: baking powder, cinnamon, nutmeg, allspice
    1/2 tsp  cloves

To make your gluten-free pumpkin bread:
  1.  Combine both wet and dry ingredients in separate bowls.
  2.  Incorporate the wet ingredients into the dry. Mix well.
  3.  Pour equally into greased loaf pans. Bake at 350 degrees for 1 hour or until tooth pick comes out clean.

-Update: 1/1/09- This is a dairy free and sugar free pumpkin bread recipe. I am planning on making another version that has REAL butter and sugar sometime this month.

-Update: 5/11/13- See my most recent paleo/primal version here. I also notice that I did not include yeild amount for this recipe. I believe it makes 2 regular sized loafs.

Sunday, January 11, 2009

Buffalo Bean Soup and Classic Cornbread


This past week and a half has been filled with lots of baking (several snow days have kept me inside) and now I am finally getting around to posting it all.

Since being home we have eaten dishes with lamb, turkey, beef, pot roast, and most recently, I have been experimenting with buffalo. I especially thankful for all this lovely variety at protein, since when I am at school my protein choices are limited.

Sometime back in my childhood I remember going to some restaurant somewhere up in Northern New Hampshire, maybe North Conway? where I had my first taste of buffalo. Buffalo is different than beef in texture, taste, fragrance. The way it browns in a hot pan as you break it up with a knife is different than beef. The ground variety is less stringy. Brown both side by side in a pan and you will see what I mean. When they both cook up, the mountainous curves and bumps of the buffalo meat looks uniquely different than the beef. The taste of buffalo is so mild, and not at strong as beef.

That was, however, my first and last taste of buffalo for a while, until now. As I have become increasingly willing to experiment and I have demonstrated that I am capable of cooking (3 years working in foodservice really helped) my mom has let me go wild in the kitchen.

Well, maybe not wild.

But this soup is wild- wild on taste. It took my Dad one bite to declare, "This recipe is a keeper. I hope she wrote it down so we can make it again!"
Music to my ears!

Buffalo Bean Soup
serves 4 to 6 people, or less with leftovers

1 1/2 tsp coconut oil
1 pound grassfed organic ground buffalo meat
1/2 pound grassfed organic ground beef
1 half vadalia onion - diced
2 1/2 cups beef broth (I used Imagine)
2 1/2 cups water
1 can lightly drained corn
1 can lightly drained adzuki beans
1 can baked beans (be sure this is GF)
1 half vadalia onion - diced
1 orange bell pepper - diced
1/2 cup baby carrots - diced (use more or less depending on how much you have or how much you like carrots)
1 1/2 tsp chili powder
1/2 tsp: black pepper, cayenne pepper, cumin, salt
dash oregano, thyme
2 mildly heaping tsp arrowroot + water

To make your soup:
1. Place soup pot on the stove top. On medium heat, brown onion with coconut oil then add the buffalo and beef cook through. Do not drain off the fat- this is very nourishing!
2. Add the beef broth and water, diced pepper, carrots, onion, can of corn and both cans of beans. Add spices.
3. Let cook on medium heat, stirring often for about an hour. Cook for 30 minutes longer or until peppers, carrots and onions are soft.
4. Serve with cornbread.

It is very moist as cornbread should be, but it is not a super cakey gooey cream cornbread. Those types of cornbreads made with lots of dairy and creamed corn are not typically what cornbread is really about. This cornbread has a nice crumb, a balance of corn and textures of the other flours with a hint of sweetness. Next time I may try adding a whole can of corn so there are actual corn kernels.

Classic Cornbread
adapted from this website

1 cup stoneground cornmeal
1/4 cup uncooked polenta
3 Tbsp almond flour
1 Tbsp brown rice flour
1/4 cup brown rice flour
1/4 cup white sorghum flour
1 tsp baking soda
2 tsp baking powder
1/2 tsp: xantham gum, salt
2 REAL eggs (from grassfed chickens)
1 cup unsweetened almond milk (Pacific) or raw whole milk
1/4 cup coconut oil - melted (Spectrum Organics) or grassfed butter
1/4 cup organic maple syrup

To make the cornbread:
1. Combine the wet and combine the dry in 2 separate bowls.
2. Add the wet to the dry and mix well.
3. Pour into a 9 X 9 X 2 baking dish.
4. Bake at 400 degrees for about 25 minutes, give or take depending on your oven.
5. Cut into squares. Serve with Buffalo bean soup.
6. Optional: make a mixture of 3 parts agave, one part honey. Microwave/zap for 30 seconds or until warm and fluid. Serve in a little pitcher for drizzling over cornbread.

My family and I ate this for dinner. It was a lovely feast for three. And we have leftovers!