Showing posts with label cocoa powder. Show all posts

Friday, June 24, 2016

Black Bean Brownies.

This version included walnuts!

If you've never had black bean brownies, now is the time to try them.  Like many people, I was skeptical at first, but since trying them, I can't make any other kind of brownie.  I've been making these non-stop for six months now.  These are deliciously fudgy, chocolatey, and satisfying.  I've brought them to many events and they always ellicit rave reviews!  These are great if you're new to gluten-free baking and just need a brownie recipe that works, without having to buy a bunch of gluten-free flours.

Black Bean Brownies.
    makes one 8x8 pan

    2 cans (15 oz x 2)  black beans  (make sure you get the unseasoned versions)
    1/4-1/2 cup  sugar  (or 1/3 cup is a good middle)
    1/4 cup  coconut oil, melted
    2  eggs,  large or medium sized
    1 cup  unsweetened cocoa - mine favorite is mixture of dutched and non-dutched
    1 cup  unsweetened almond milk OR milk of choice
    1/2 tsp  baking soda
    ~9 oz  dark chocolate chips, this is 3/4 of one choc chip bag
    2 tsp-1 Tbsp  vanilla extract
    1/2 tsp  real salt

Directions:
  1)  Un-can the black beans into a fine mesh strainer. Strain and run under cold water x1 minute or until water over the beans runs clear.
  2)  Place all ingredients, except chocolate chips, into Vitamix blender (or equivalent) and blend for about 30 seconds to 1 minute OR until all ingredients are incorporated, and the mixture is smooth and homogenous. Stir in chocolate chips with a soft spatula.
  3)  Pour into one greased or parchment paper lined 8x8 pan. Bake at 350 degrees non-convection for 40-45 minutes. Brownies are done when slightly pulling away from the sides of the pan, and the middle is slightly set. Bake longer to be slighly less fudgy. Let cool on counter. Store in fridge for best results.

I personally love how easy they are to make! You can have awesome brownies ready in under an hour. These are best the next day, however, after they've had some time to set. I love them straight from the fridge. GREAT with any kind of vanilla ice cream or whipped cream.

Note on substitutions: I've made these with melted butter and water before, with coconut milk, with almond milk, and ALL versions have come out extremely yummy.


Nothing like a new brownie recipe to rock all summer long!


P.S. I'm all graduated from medical school now (Dr. Meg has finally arrived!). Maybe you'll be seeing more recipes on this space again! And my apologies for the poor photo - this was quickly snapped in clinic when I brought brownies for the whole shift.


Monday, July 16, 2012

Grain-free Kefir Brownies.


Sometimes my best recipes come from nowhere.  These brownies are definitely a testament to that.  One day I was in my apartment and I had some soured kefir that I had made.  It was past the palatable drinking stage, and not wanting to waste it, I threw together these brownies.  I didn't expect the results to come out very well, but I was completely surprised.  These are so incredible, I may like them better than my favorite grain-free brownie recipe.  I gave the pan away to one of my advisors as a thank-you, and he ended up (due to the pestering of his students) sharing them the with his entire class!  I got an email the next day with rave reviews.  I think you'll rave about them too ;)

Mhmm. Fudgey cakey chocolatey goodness!

Grain-free Kefir Brownies.
    makes one 8x8 pan

    2 cups  soured homemade kefir
    1 cup  organic coconut flour - source
    4  happy eggs
    1 cup  raw cacoa powder - source
    16 oz  chocolate chunks, I used Enjoy Life
    1 Tbsp  vanilla extract
    1 tsp  baking soda
    1/4 tsp  sea salt
    2 full droppers plain stevia - source


To make your brownies:
  1.  Preheat your oven to 350 degrees (mine is convection).
  2.  In a large bowl, combine all ingredients except chocolate chips.  Mix well.
  3.  Add chocolate chunks and mix again.
  4.  Bake for about 30-40 minutes or until the top is cracked, the sides are slightly firm and there is a tiny bit of jiggle in the middle of the pan.
  5.  Remove from oven and let cool.  Try a slice warm.  Let it cool and try another slice.  Share.  Serve with a nice cold glass of raw milk. Yum!

I love these brownies, not only because they are delicious, but that they are low in sugar and carbohydrates!  The only added sugar comes from the sugar in the chocolate chunks.  If you use unsweetened chocolate the brownies will not taste very sweet.  For those of you who are not partial to stevia, feel free to omit it.  I haven't made the recipe without stevia so I don't know if it will grossly affect the flavor, but my guess is that it will make a small difference in sweetness.

Mhmm. Chocolate chunks.

These will freeze very well.  They will also make a great accompaniment to homemade french vanilla ice cream and homemade raw whipped cream.  I love anything chocolate and vanilla combined!

Here are some of my other delicious brownie recipes:

Grain-free Coconut Flour Brownies
Banownies
Gluten-free Brownies (for you whole-grain folk)


Friday, June 22, 2012

Grain-free Chocolate Cake.


My attempts at grain-free cakes have really come a long way.  Those of you who have ever made a grain-free cake know that it's not the easiest thing ;)  I started my journey with some of Elana's recipes at Elana's Pantry.  The results were better than I hoped, but I knew I could make it better.  Over the past three summers, I've made a couple versions of her chocolate cake.  I've scoured a countless number of other food blogs, drawing ideas from what other real food bloggers have done in grain-free cake land.  I've experimented with the amounts of liquids and ratios of flours and other ingredients, changing it as I went along, longing for a certain taste and mouth feel of cake.  Now I finally have a recipe entirely my own.  Each time I've learned something new, and now this is a cake I am really happy with.  I cannot say more about this cake's texture, flavor and ease of cooking.  I know that you'll love it too.


Grain-free Chocolate Cake.
    makes two nine inch round cakes

Cake:
  3/4 cup  organic coconut flour
  1/2 cup  blanched almond flour
  1/2 cup  cocoa powder - I used Ghirardelli
  12  real eggs
  1 cup  maple syrup - grade B
  1 cup  organic coconut oil, melted
  1 Tbsp  vanilla
  1/2 tsp  baking powder
  1 tsp  baking soda
  1 tsp  unrefined sea salt

Frosting:
  4 cups  organic powdered sugar
  1 stick  unsalted butter - I used KerryGold
  ~1/2 cup  raw whole milk
  1/2 tsp  unrefined sea salt
  optional: extract of choice for flavor, here I used mint extract


Chocolate Ganache, or use my Paleo Ganche recipe:
  1 - 12 oz  package chocolate chips - I used Trader Joes brand - feel free to use unsweetened also
  1/2  stick unsalted butter - I used KerryGold

Here's the final product! Cake assembled and frosting+ganache set.

To make your chocolate cake:
  1.  Preheat oven to 350 degrees convection.
  2.  In a small bowl, combine cocoa powder, coconut flour, almond flour, sea salt, baking powder, baking soda. Whisk until there are no lumps.
  3.  In another bowl, whisk together eggs (room temp), maple syrup, melted coconut oil (make sure it's not hot), and vanilla.
  4.  Combine wet into dry ingredients until just combined.
  5. ****Grease and flour the sides of the pan - use butter (best) or coconut oil (ok). 
  6.  Pour equal amounts of cake batter into 2 9" round cake pans.
  7.  Bake at 350 degrees for about 35 minutes or until top springs back lightly when touched and sides are pulling away from the pan.
  8.  Let cool only until you can handle the pans, then run a knife around the edges before gently inverting the cakes and removing them from the pan. If you floured and greased the sides well, getting the cakes out of the pan shouldn't be an issue, but if you didn't, you might get only the top of the cake out!

To make your frosting and ganache:
  1.  For the frosting, with room temperature butter, cream butter and powdered sugar until fluffy. Add milk slowly as needed into the sugar and butter.
  2.  Add vanilla, extract (optional).
  3.  For the ganache, in a double boiler melt chocolate chips and butter. Remove from heat when 80% of the chocolate is melted. Stir. The heat will melt the remaining chips.
  4.  Let ganache cool, but still be spreadable.

Cake assembly:
  1.  Remove cake from the pans. Place one on a large plate.
  2.  Frost with one layer of frosting on the top of the cake.
  3.  Place the remaining cake on top of the frosted layer.
  4.  Frost with remaining frosting on top and sides of both layers.
  5.  Place cake in the fridge for the frosting to set.
  6.  Spread ganache on top of the cake. Return to the fridge and allow ganache to set.

Notes:
1) You can easily cut this recipe in half, and you'll have one 9" cake.
2) Do not make this with runny honey instead of maple syrup. There is less flavor and a bit less sweetness. When I made this with honey it just seemed to be lacking something.
3) Make sure your eggs are on the medium/large side. I've made this cake with small sized eggs, and the end product was a bit more on the dry side than I would like.

Here are some pictures of the first grain-free chocolate cakes I made:


At my house, cake is always served with real ice cream!


There was A LOT of filling inside, and it still wasn't enough ;)


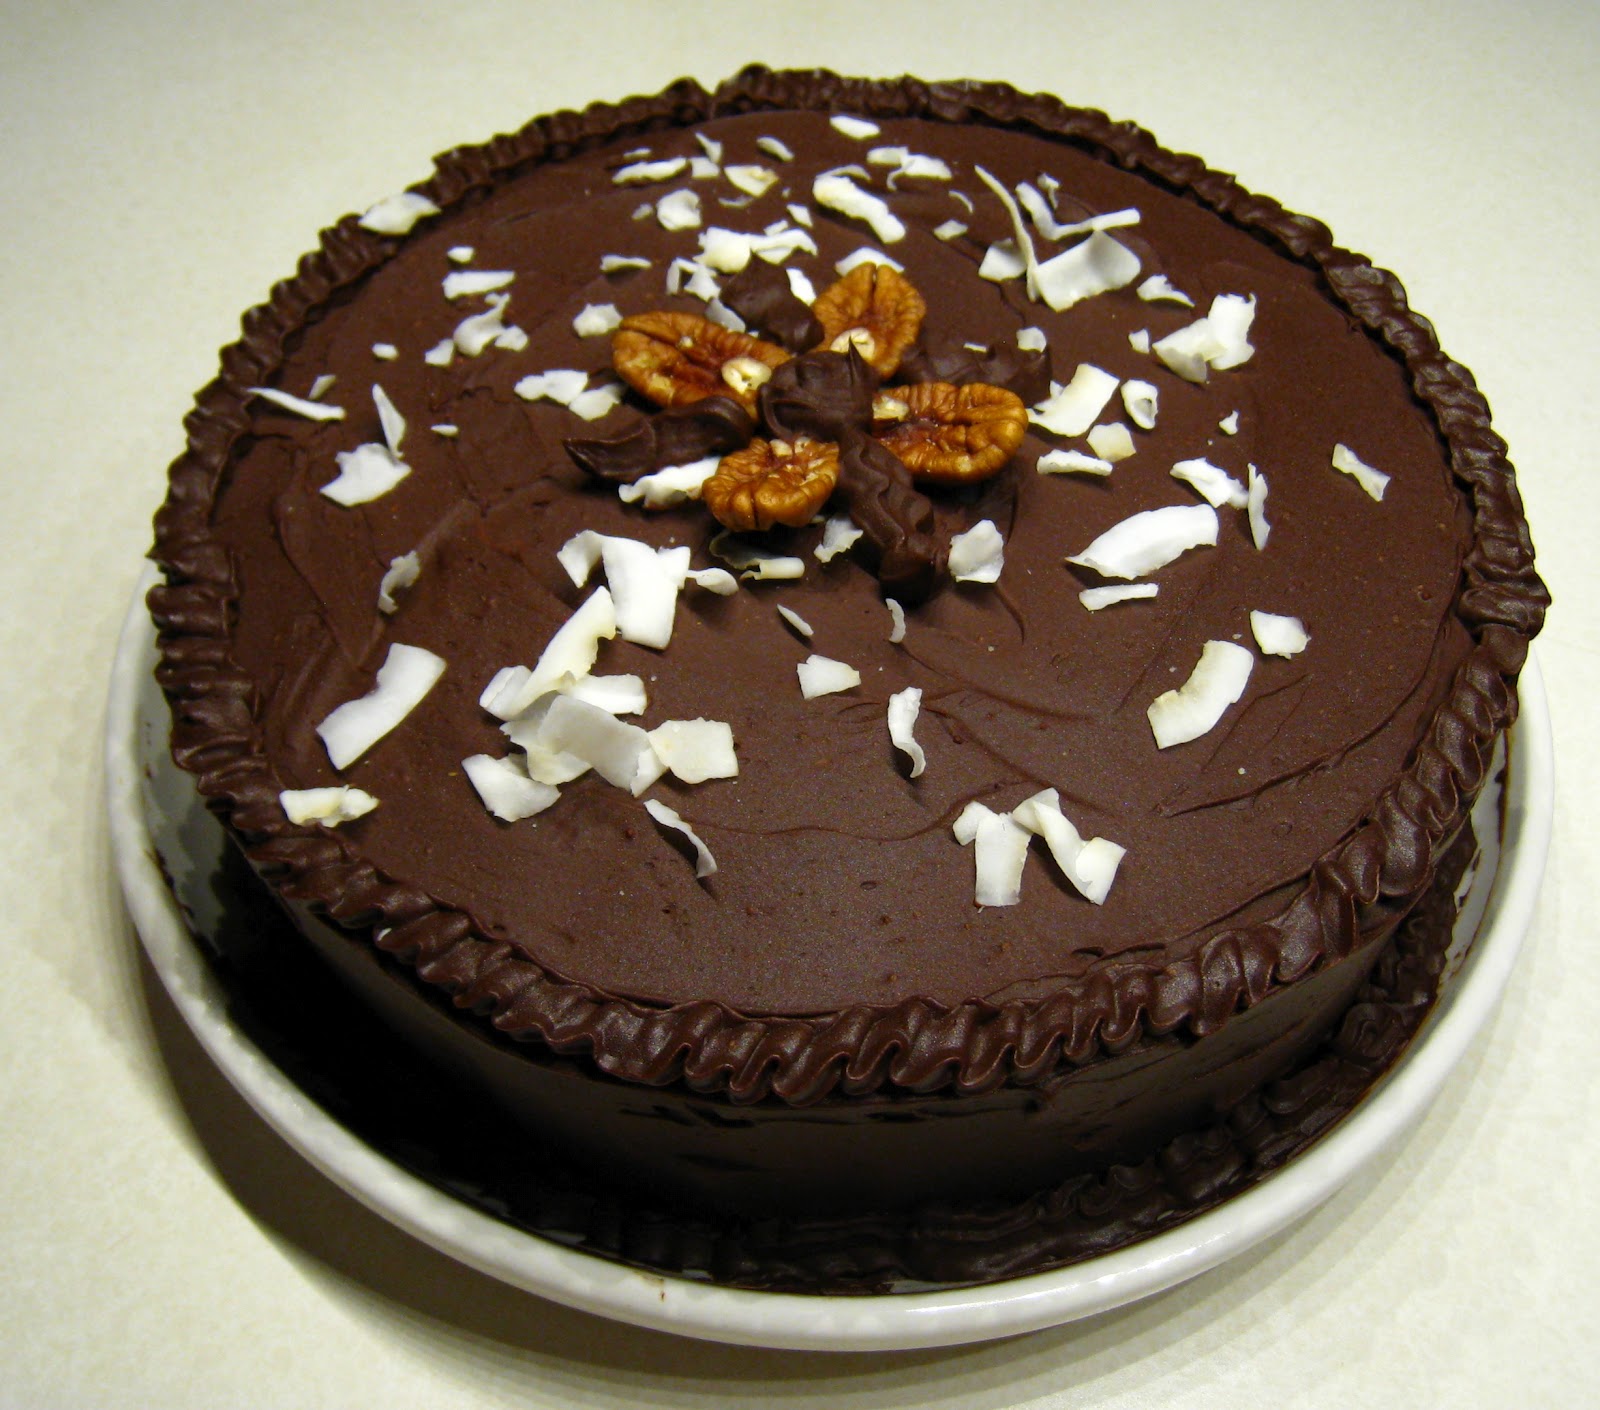
German chocolate cake, completely finished!


This was my first attempt at grain-free chocolate cake. I wish I had remembered to snap a picture before cutting it up!


My brother's birthday is always during the summer, so I always have an excuse to make a cake.  It's my once a year cake indulgence!  However that is beginning to change since I've learned how to make these cakes so nourishing and healthy!  This summer will probably be a little different since my brother and his wife are having twins.  It's very exciting, but I doubt a birthday celebration with cake and ice cream will be the last thing on their mind ;)  This past week I made this cake in a banana version with peanut butter frosting!  It's so nourishing, low in sugar and high in protein, and I've been eating it with my yogurt and berries for breakfast.

Happy summer! Cake away :)


Monday, January 2, 2012

Grain-free Buche de Noel aka Yule Log.

Grain-free Yule log unfrosted.

This year I promised I would make a grain-free yule log.  I knew that it could potentially be wrought with problems, but I was going to do it anyways.  I like to defy difficulty, shake my fist at hard culinary feats, and say happily "I conquered the ___" [insert hard culinary endeavor here].  Therefore, I was determined that the cake would roll well, it would be delicious, it would have a good chocolate taste that would allow the cake to be eaten on it's own, and it wouldn't turn into a grumpy crumbly mess of cake when sliced or eaten.  It would be a cake that tasted normal, not overly dense and full of almond flour, or that sometimes eggy coconut flour taste.  I mentioned this in my last post, when I showed you all just how exactly to make a yule log with step by step photos, sure to help even the most novice baker acheive yule log success.

During Christmas time I always make two logs.  One yule log to bring to the extended family, and one enjoy with my immediate family.  And thank goodness my family lives in the Northeast.  When I come home for the holidays and bake it's always super convenient to have an "extra fridge" and "freezer space," also known as outside in the cold garage, to keep all the Christmas goodies fresh when there's no room in the refrigerator.  This year I was determined to make a delicious grain-free yule log.  And I've done it.  Best of all, I like it better than my standard gluten-free version which has always worked so well.  I also inadvertently made this recipe without refined sugar.  Turns out we had none in the house!  How cool :)  Luckily I had some coconut/palm sugar on hand, and it worked very well instead of white sugar.

The uncut side before frosting.

 Grain-free Yule Log aka Buche de Noel.
    makes one log, serves 12-14 people with about 1" slices

Cake:
    5  happy eggs, from grass-fed chickens
    3/4  cup almond flour - source
    1/4  cup organic coconut flour - source
    1 1/4  tsp baking powder - source
    3/4  cup coconut/palm sugar - source
    1/2  tsp unrefined sea salt - source
    1/4  cup cocoa powder - source
    1  tsp vanilla - source
    2  cups raw milk cream (for inside)
    1  deep cookie sheet 10x15 (edges of the pan need to be at least an inch tall)
    real butter, from grass-fed cows (for greasing the pan) - source
    wax paper
    organic powdered sugar (for dusting)
    1  tea cloth (I used an old linen calendar)

Chocolate Outside layer: feel free to use your most favorite chocolate frostingrecipe, or either of the recipes listed here
    Chocolate frosting
    2   cups organic powdered sugar
    1/4   cup cocoa powder
    1 1/2   sticks grass-fed butter, softened
    6   Tbsp raw whole milk
OR
    Dark chocolate ganache/buttercream**
    1/4  cup hot water
    1/4  cup cocoa powder
    8  oz unsweetened chocolate - source
    1/2  cup chocolate chips - source
    1/2  tsp unrefined sea salt
    1  Tbsp vanilla
    2  sticks grass-fed butter, softened
    2  cups organic powdered sugar

Prepping for the Yule Log:
    1.  Preheat to 400 degrees.
    2.  Place the cookie sheet in front of you.  Take a hunky of soft room temperature butter in your fingers and rub it onto the bottom and sides of the cookie sheet, enough to grease it very well, but not in excess.  The most important thing to keep in mind here is that this step is designed to prevent sticking, so better to err on the more greased side than not enough.  Make sure to cover all the surfaces of the sheet, especially all the corners and sides.  The cookie sheet should look shiny and feel slimy.
    3.  Measure out a piece of wax paper to fit the pan, and place it on the buttered cookie sheet.  Press the wax paper down onto the sheet so it fits into corners and stays put to the edges.  The wax paper will stick to the cookie sheet since it is covered in butter.  It will also hang off the sides a little.  It does not have to be perfect, but you will need a few inches on both sides of the pan to remove the paper from the cake after baking, so don't cut off the ends too short.
    4.  Butter the top of the wax paper that you just pressed into the buttered sheet.  This makes a total of two layers of butter, one on the sheet and one on the wax paper, like this: sheet - butter - paper - butter.

Making the cake:
    5.  Using an upright stand mixer, add 5 eggs and sea salt, and beat until thick, glossy and lemon colored. Don't worry if it has bubbles, but don't try to make them.
    6.  In another small bowl, mix sugar and cocoa powder together.  Gradually add this mixture to the eggs, beating well after each addition.  Then add the vanilla.
    7.  In another small bowl (you can use the same one that you mixed the sugar and cocoa powder in), mix together both flours and the baking powder.  Add this gradually to the egg-cocoa mixture and beat until smooth.  Thoroughly scrape the sides to make sure all the ingredients become incorporated.  The batter may be a little thin or slightly thick depending your ingredients.  Either is fine and will not affect the final product.
    8.  Pour the batter evenly into the greased/waxed papered pan; smooth batter with a spatula, do not neglect the corners.
    9.  Bake for 10-12 minutes (usually it will be on the quicker side, but some ovens run hotter than others).  Cake will feel spongy to the touch, but is cooked through.

Assembly:
    10.  While the cake is baking, lay out a tea towel and sprinkle it generously with powdered sugar.
    11.  When the cake is done, remove it from the oven and loosen the edges of the cake.  Grasping the edges of the pan, flipping out the cake, wax paper and all, onto the sugar covered towel.  Do this fast- take it out, and tip it right over.
    12.  Gently peel off the wax paper from the cake and carefully roll up the cake in the towel.
    13.  Let the cake cool on the counter wrapped in the towel.  This is an important step to make the rolled shape. 
    14.  While the cake is cooling, whip up the cream.  I highly recommend putting the attachments and mixing bowl in the fridge or freezer while you prepare the cake, then all the utensils will be really cold for whipping the cream, and the cream will whip up more easily.  
    15.  When the cake has cooled, gently unroll it (do not force it flat) and frost the inside with the freshly whipped cream.  Then carefully roll it back up, but without the tea towel this time.
    16.  Gently lift the yule log and place it on the platter you plan to serve it.  Cut off one of the ends, or both if it gets a little burnt or if it is uneven.  If some cream squirts out of the log during cutting, just spoon it into the stump and frost over it.  Once you fill the log with whipped cream, return it to the cold so the cream doesn't go flat.
    17.  Make the chocolate frosting with your stand mixer:
           For normal chocolate frosting, proceed as you would for making any regular type of frosting.  Frost the log.
       **For making the dark chocolate buttercream:
       1) In a bowl, beat the butter,  2) then add the sugar and beat until fluffy.
       3) Melt the two types of chocolate in a double boiler.
       4) Boil water and in a small bowl combine hot water and cocoa powder.
       5) Let the hot water and cocoa cool until finger can be comfortably inserted into the chocolate without feeling too hot.
       6) Carefully add melted chocolate and hot cocoa to butter and sugar.
       7) Beat to combine until creamy and smooth.  Frost the log.  Log should not be very cold otherwise the dark chocolate butter cream may harden and not be spreadable.
    18.  Using one of the rolled up ends, place it on top of the log to mimic a stump.  Frost the stump.  
    19.  Decorate however you like.  The traditional way is to sprinkle coconut on top of the chocolate frosting to look like snow.  Fork marks in the frosting make the log textured and resemble bark.  You can also put some red and green MMs on top near the stump to look like berries and leaves.  If you do not have MMs or cannot eat them (I cannot) then just use whatever you can.  Have fun with it!  I have even used strawberries before!
    20.  Put the yule log in the fridge to set overnight.  Before serving, remove from the fridge for about 30 minutes.  Slice into half inch or one inch slices.  Serve with homemade vanilla ice cream.  Yule log freezes VERY well and stays good in the fridge for about 2 weeks.  Enjoy!

More posts on Yule Log:

Gluten-free Buche de Noel / Yule log - with step by step photos!
Gluten-free Yule log - my first one 3 years ago! 

View of the cut end - the cut off end makes the stump!

Enjoy your grain-free Yule Log.  My family sure did :)  We whittled it down slowly but surely and savored ever bite!  And don't forget to serve it with some homemade vanilla ice cream!

Sunday, June 26, 2011

Chocolate Date Bars


As promised in my last post, here is the triangle mystery bar. These are Chocolate Date Bars! I used a triangle scone pan to get their interesting shape, but I think they are actually better suited to be scooped with a cookie scoop and rolled into tiny bite-sized balls!


Chocolate Date Bars

    1 small (6-7") baked plantain
    2 T cocoa powder
    1 T maple butter
    3/4 cup walnuts
    4 medjool dates - pitted
    1/4 cup organic coconut flakes
    1/2 tsp sea salt
    cacoa nibs - as topping

To make your bars:
1.  Place dates, walnuts, coconut flakes in food processor and process until it is a course mixture.
2.  Add cocoa powder, maple butter, sea salt and the baked plantain and process until the mixture comes together and is cohesive.
3.  Pat down into desired type of pan (I used a scone pan!) or scoop out little balls of the "dough" of the processor onto a cookie sheet.
4. Press cacao nibs onto the top or roll balls in cocoa nibs.
5. Freeze until set. Eat and enjoy!

I would highly suggest keeping these in the freezer or the refrigerator before consuming, their texture is rather soft and tends to get even more soft if left out at room temperature.

Yumm, cacoa nibs :D

Since I know that I will probably get asked this, can you substitute a banana for the plantain? The answer is yes and no. Both types of "fruit" are related, but bananas are considerably LESS starchy and are more wet in consistency than a plantain. If you plan to use bananas either dehydrate the final product for a few hours, or you can add some coconut flour to the mix to help hold everything together.


P.S. - These taste like brownies! :D

Friday, June 24, 2011

Green Fig Bars


As you probably have already noticed, I love to make raw nut based "protein" bars. Whenever I go to an event, or want to bake something healthy for someone that is easy and does not take much time, I turn to my protein bar recipes. Remember my Sunbutter Chocolate Raisin Protein bars? And my Original Nourishing Protein bar recipe, look here and here? They are always a hit! I am always asked for the recipe. I am definitely a kitchen experimentor, I am definitely creative in the kitchen and so as I discover new ingredients (spirulina, coconut cream, zante currants) each different type of bar takes on a slightly different texture and flavor. The one thing I never change? Chocolate :)

This bar is all about figs! Have you ever tried a dried organic turkish fig? They are fantastic! After biting through the slightly tough outer layer, there are myriads of little tiny gooey fig seeds inside. I really enjoy biting off the tops and then stuffing them with other ingredients like homemade peanut butter and creamy coconut cream. They make the perfect snack! Figs are the star in this recipe, since I used some figs for the base and also some yummy fig jam. The bars look green because I used some spirulina. After seeing it on so many food blogs and then researching it myself, I decided to buy some at my local health food store and give it a try. I am surprised how it smells like algae - that was something I did not expect... but since it IS algae I do not really know what I was expecting it to smell like! The spirulina gives the bar a nutritional boost and a lovely green color. But don't worry, you can't taste any funny algae-like flavor in this bar.


Green Fig Bars

Base:
    4 large medjool dates - pitted
    1/3 cup organic raisins
    4 organic turkish figs
    1/2 cup roasted and salted macadamia nuts
    1 T fig jam - I used St. Dalfour, since it has no cane sugar
    1 T organic coconut oil
    1 T organic chia seeds
    1/2 tsp spirulina
    1 tsp vietnamese cinnamon (it's stronger than grocery store cinnamon and more flavorful)
    1/2 tsp sea salt

Chocolate topping (choose either):
    Handful or two of 100% baking chips or unsweetened chocolate - melted
    1/4-1/2 cup raw cacao powder + 1/4-1/2 cup coconut cream - melted and whisked together

To make your bars:
1.  In your food processor, blend dates, raisins, figs and nuts, until it reaches a coarsely ground texture. Pulse the mixture for a few times at the beginning to get it started.
2.  Add jam, oil, chia seeds, spirulina, cinnamon and salt to the food processor and process until combined. Mixture will be on the "wet" side.
3.  Using a square muffin pan (mine looks like this), place little bit of the bar mixture into each spot and push down with your fingers (helps to keep placing your fingers in a bowl of cold water).
4.  Pour type of melted chocolate of choice on top of each fig bar. Place in the freezer until set. Carefully remove from pan and store in the refrigerator. I wrap mine individually with plastic wrap.

These make a great snack! If you do not particularly like figs, try using raspberry or blueberry jam and use more dates instead of figs. Or you could just make some Sunbutter Chocolate Raisin Protein bars or Original Nourishing Proteins bars. They are all crowd pleasers, and no one will know that they are eating a healthy treat that is grain-free, full of both protein and fat which will give them lasting energy.

Enjoy your homemade protein / energy / chocolate green fig bars :)

Ps. Wondering what that triangle shaped treat is in the picture? You'll have to wait until next post :)

Sunday, August 15, 2010

Chocolate Peanut Butter Ice Cream.

(Holy Cow - I just found this post in my archives from JANUARY. I must have been waiting to post it because of a picture? Who knows!)

Sometimes making homemade ice cream can be a bit tricky. All of you who have tried it probably know what I mean. It takes a some time and some internet research to find out what works! The ice cream can come out too icy, freeze too hard, taste too sweet, taste too strong or be lacking in either flavor or texture. It's also disappointing when you spend so much time and dollars on ingredients, only to find that the batch did not turn out as you hoped.

Homemade Almond Joy Ice Cream on top with whipped cream and
Chocolate Peanut Butter Ice cream on the bottom! Delicious.
Unfortunately I don't have a better picture than this!
I've been making homemade ice cream this whole month with my lovely ice cream maker I received for my birthday this summer. Some batches have been good, but others have been rock hard, and not in a good way!

One of my family's favorite ice cream flavors is chocolate peanut butter cup. I have not had this flavor of ice cream in years ever since learning about my allergies. So after doing some research, I finally mustered up the courage to tackle this ice cream flavor!

I could not be happier with the results, and I think you will like it too. It's hard not to eat the whole tub at once!! Chocolate and peanut butter. I cannot tell you how highly I regard the culinary combination of chocolate and peanut butter. To say that I love it, crave it and think it is so incredibly tasty is an understatement. I love chocolate and peanut butter.

Chocolate Peanut Butter Ice Cream
    makes 2 quarts, with inspiration from here

    4 cups  raw cream (or 2 cups cream, 2 cups raw whole milk)
    1/2 cup  raw whole milk
    1 cup  organic cane sugar - I use Whole Foods brand
    1  scant cup unsweetened cocoa powder (about 3/4s cup)
    2 Tbsp  organic maple syrup
    2 Tbsp  organic vanilla
    1 1/2  Tbsp arrowroot powder
    4  egg yolks

Peanut chunks:
    1 cup  smooth organic peanut butter - my (current) favorite is Maranatha
    1 cup  organic cane sugar or confectioners sugar

To make your ice cream:
  1.  Put your raw cream and freezing bowl (the tub you scoop the ice cream into- NOT your ice cream maker's freezer insert) into the freezer to get really cold as you prep the other ingredients.
  2.  Get out a sheet pan and place some plastic wrap on it. In a small bowl, mix together peanut butter and sugar. Using two knives, dip one into the peanut butter mixture and use the other to scrap off a small quarter sized dollop of peanut butter onto the cookie sheet. Repeat until you use up the whole bowl. Place the sheet pan in the freezer. The peanut butter "coins" will freeze and will make it easy to incorporate it into the ice cream later.
  3.  In a large bowl, crack out your egg yolks, add arrowroot powder and cocoa powder - sifting both through a metal strainer. Sprinkle sugar into the bowl. Drizzle in 1/2 cup milk, vanilla and maple syrup, and whisk all ingredients until well combined. It will look like flourless dark chocolate cake batter. Make sure these ingredients are well mixed, that there are no lumps, that it is slightly thickened and that the mixture is smooth.
  4.  Take the raw cream out of the freezer and slowly pour it into the bowl while whisking.
  5.  Rush to the freezer, grab the ice cream maker bowl, tear off the plastic wrap (protects the bowl from freezer burn), put it into your ice cream machine, turn it on and pour in your chocolate ice cream mixture.
  6.  Churn for 30 minutes until the machine sounds slightly labored and the ice cream is thick and creamy, or "freeze according to your manufacturers instructions."
  7.  Take out your peanut butter chips and ice cream freezing tub/bowl from the freezer. Scoop out the ice cream in layers, placing several peanut butter chips on top of the ice cream for each layer. It should look like this - bottom of the bowl, ice cream, peanut butter chips, ice cream, peanut butter chips, ice cream... continue this until ice cream and chips are gone. Freeze immediately and lick up the dribbles on the counter. The ice cream will be ready to eat after it has been in the freezer overnight.
  8.  Take out ice cream from freezer. Try. Spoon. Mouth. Swoon. Scoop into bowls. Spoon. Mouth. Eat. Gone. Enjoy!

This ice cream, if made with 4 cups cream, is rich. If your taste buds are accustomed to eating sugar, the amount of sugar listed will taste perfect to you, or if you are like me and do not eat much sugar at all, this will taste very sweet and you may want to decrease the sugar content a little.

Friday, July 16, 2010

Banownies, revisited!


Remember Banownies 1.0. ??


Last summer I created several fantastic brownie recipes.  Brownies seem to be one thing that I keep coming back to.  I love making brownies, they are the perfect combination of chocolate and "bready" type dessert (or snack!)  While I love cookies, I find that brownies are more satisfying. And nothing beats a warm brownie and real vanilla ice cream.

There is going to be a party at my house tonight.  My mom wanted me to put my culinary skills and time (she works ALL day, I'm off on Fridays) to good use.  So Wednesday when I was baking for Yum Yums, I also found the time to whip up some of these banownies.  With all this humid, sunny and hott NH heat, the bananas at camp have been ripening way faster than usual, and that means a lot of brown bananas waiting to be made into something delicious.


I made the recipe the exact same way, so technically this cannot be a "revisited" post since I am not editing the recipe at all.  It was a good affirmation for me, though, that the recipe is not a one hit wonder, since the banownies came out fine this second time.


Banownies. (when bananas and brownies get married)
    makes one 9x13 pan 

    1 1/2 cups  good quality cocoa powder
    2 tsp  baking powder
    1/2 tsp  baking soda
    2T  vanilla extract
    6  small ripe bananas- mashed
    6 eggs  - use less if they are jumbo, mine were fairly small
    8 oz (1 cup)  unsalted butter, 70% melted
    2 cups  UNPACKED brown sugar
    2 cups  white sugar
    2 cups  chocolate chips
    2 cups  chopped raw or roasted walnuts
    coconut flakes for topping

To make your "banownies":
  1.   Combine in one giant bowl.
  2.   Mix-e-vous.
  3.   Pour into a olive oil sprayed/butter greased 9x13 pan.
  4.   Place in a preheated 350 degree oven. Bake until the coconut has browned, the sides have set, and the middle has a little bit of jiggle.
  5.   Serve to some VERY lucky people. Whipped cream anyone?

Before!
After!

Once you take these out of the oven, DO NOT cut into them immediately (seriously), the brownies need time to set.  These are also very ooey and gooey so keep them in the fridge if its humid, or they can last on the counter for probably a max of three days, since it's summer.  But before you cut them, place them in the fridge or the freezer for a few hours, if you want real squares and not blobs!


Maybe these should be called molten brownies instead! :)


Monday, July 20, 2009

Grain-free Coconut Flour Brownies.


I think I am the brownie queen. Try all of my brownie recipes and you'll see why. Or, just try this one. I can live with that.

The cookies that I looove so much I have turned into a brownie recipe. It was so easy. It was also effortlessly good. Seems to me there can be endless experiments with this recipe. The cookies are by far the best, and so are these brownies. They both take the cake in my book. Pun intended.


Grain-free Coconut Flour Brownies.
    makes one 8x8 or 9x9 pan

    1/2 cup  organic coconut oil or softened grass-fed butter - source
    3/4 cup  cane sugar or maple syrup (use grade B for best flavor)
    2  real pastured eggs
    1/2 tsp  vanilla extract
    1/3 heaping cup  cocoa powder of choice - source
    1/4 cup  organic coconut flour - source
    1/2 tsp  baking powder
    1/2 tsp  baking soda
    3/4-1 cup  chocolate chips or chopped chocolate bar of choice - source
    chopped walnuts for topping

To make your brownies:
  1.  Preheat oven to 350 degrees.
  2.  In a medium bowl, use a mixer to cream butter with sugar, or use a spatula to mix maple syrup and coconut oil, until light and fluffy.
  3.  Add eggs one at a time, beating well after each one.
  4.  Add vanilla extract.
  5.  In another bowl, sift cocoa powder and coconut flour to remove lumps. Add baking soda and baking powder.
  6.  Stir flour mixture into wet mixture and mix until combined. Stir in chocolate chips.
  7.  Pour into a greased/oiled 8x8 or 9x9 pan, depending on how thick you want your brownies. Sprinkle with chopped nuts if desired.
  8.  Bake for about 20-30 minutes or until center is slightly set and springy, and the sides are pulling away from the pan.
  9.  Cool completely on a wire rack (allows air to cool the bottom of the pan, and your brownie bottoms come out easier) and serve.

Look at the wonderful texture!

Please resist digging in right away, and give these brownies some time to cool. They are even better after a night in the refridgerator and warmed in the toaster oven. I like to top mine with homemade RAW milk vanilla ice cream, a recipe from Sally Fallon in her book, Nourishing Traditions. NT is such a great resource with tons of nourishing traditional recipes!

I won't neglect to mention that these brownies are low carb, delicious and healthy treat, especially when made with maple syrup, and grass-fed butter or coconut oil.

Enjoy!


Wednesday, July 8, 2009

Grain-free "Favorite" Chocolate Coconut Flour cookies


All it took was one time, and it was history. I have found the cookie. It is also blissfully gluten free, easy, extremely forgiving and easy to substitute ingredients, chocolately, and so so good.

I found the recipe for these cookies online at wholefoods.com- baked them once and my family was hooked. Now they are known as "those really good chocolate coconut cookies" and I am whipping up a batch of these at LEAST once a month, if not more.

The original recipe that I posting here only makes about 18 cookies, which may not be enough. They are that good ;)  I have also given the recipe tripled, so it's easy to make more to satisfy your chocolate addition. Don't be afraid to freeze these either! These cookies freeze really well (just make sure you keep it under six months). They are also easy to vary in flavor. You may make this recipe a bizillion times and never get bored. The possibilities are endless...


Grain-free "Favorite" Chocolate Coconut flour Cookies
  adapted from Whole Foods
  makes about 18 cookies, depending on size

    1/4 cup (1/2 stick) butter, softened (I usually use organic softened coconut oil)
    3/4 cup sugar 
 (I usually use maple syrup, grade B)
    2 real eggs 

    1/2 tsp vanilla extract 

    1/3 cup cocoa powder 
 (I usually use either Ghiradelli or raw cacao powder)
    1/4 cup coconut flour  (Tropical Traditions) 
    1/2 cup chocolate chips  (I like Ghiradelli 100% or Enjoy Life
)
    1/2 cup chopped walnuts (optional)

-To make a triple batch-
    3/4 cup softened butter
    2 1/4 cups sugar
    6 eggs
    1 1/2 tsp vanilla extract
    1 cup cocoa powder
    3/4 cup coconut flour
    1 1/2 cups chocolate chips
    1 1/2 cups chopped walnuts (optional)

To make your cookies:
  1.  Preheat oven to 350°F and line a baking sheet with parchment paper; set aside. 


  2.  In a medium bowl, use an electric mixer to cream butter with sugar until light and fluffy. Add eggs one at a time, beating well after each addition. Beat in vanilla. 


  3.  Sift together cocoa and flour into a second bowl, then add to butter-sugar mixture and beat just until combined.
  4.  Stir in chocolate chips and walnuts, then set aside to let batter rest for 5 minutes. (Coconut flour will absorb the liquid and thicken as it sits.) 


  5.  Drop the cookie dough by rounded teaspoonfuls onto prepared baking sheet, leaving 2 inches between cookies.
  6.  Bake 13 to 15 minutes, or until cookies are slightly set in the center. Allow cookies to cool on baking sheet for a few minutes before transferring to a wire rack to finish cooling.


I cannot say enough of these cookies. The cookies in the picture do not have chopped walnuts in the batter; I just pressed a few walnuts into the tops when they came out. After baking would work too. You can use any nut you like, or press in another candy like Reeses or M+Ms. I other batches have tried adding leavening agents to make them more fluffy (which I did not prefer) and lime zest so they would have a hint of lime (that part was tasty). These cookies have endless variations!

It's cookie time!