Monday, December 31, 2012

Grain-free Gingerbread.

 
Holiday baking is always a lot of fun for me.  Since I just completed my undergraduate degree, and have now begun medical school, I don't exactly have a lot of time to bake!  I've been home for Christmas for the past few weeks, and it's been really nice to be "on vacation," and have time to read books, bake, workout, and sleep at my leisure!

When discussing what we wanted to make during the time I am home, as well as for our family Christmas celebrations, my mom suggested we make a gingerbread cake, since my gingerbread men cookies are just too delicious!  (And hooow long has it been since there's been gingerbread in the house??  Apparently years!!)  You see, gingerbread used to be a favorite of mine, but today I realized I haven't had gingerbread cake in probably about 10 years!  What a shock!

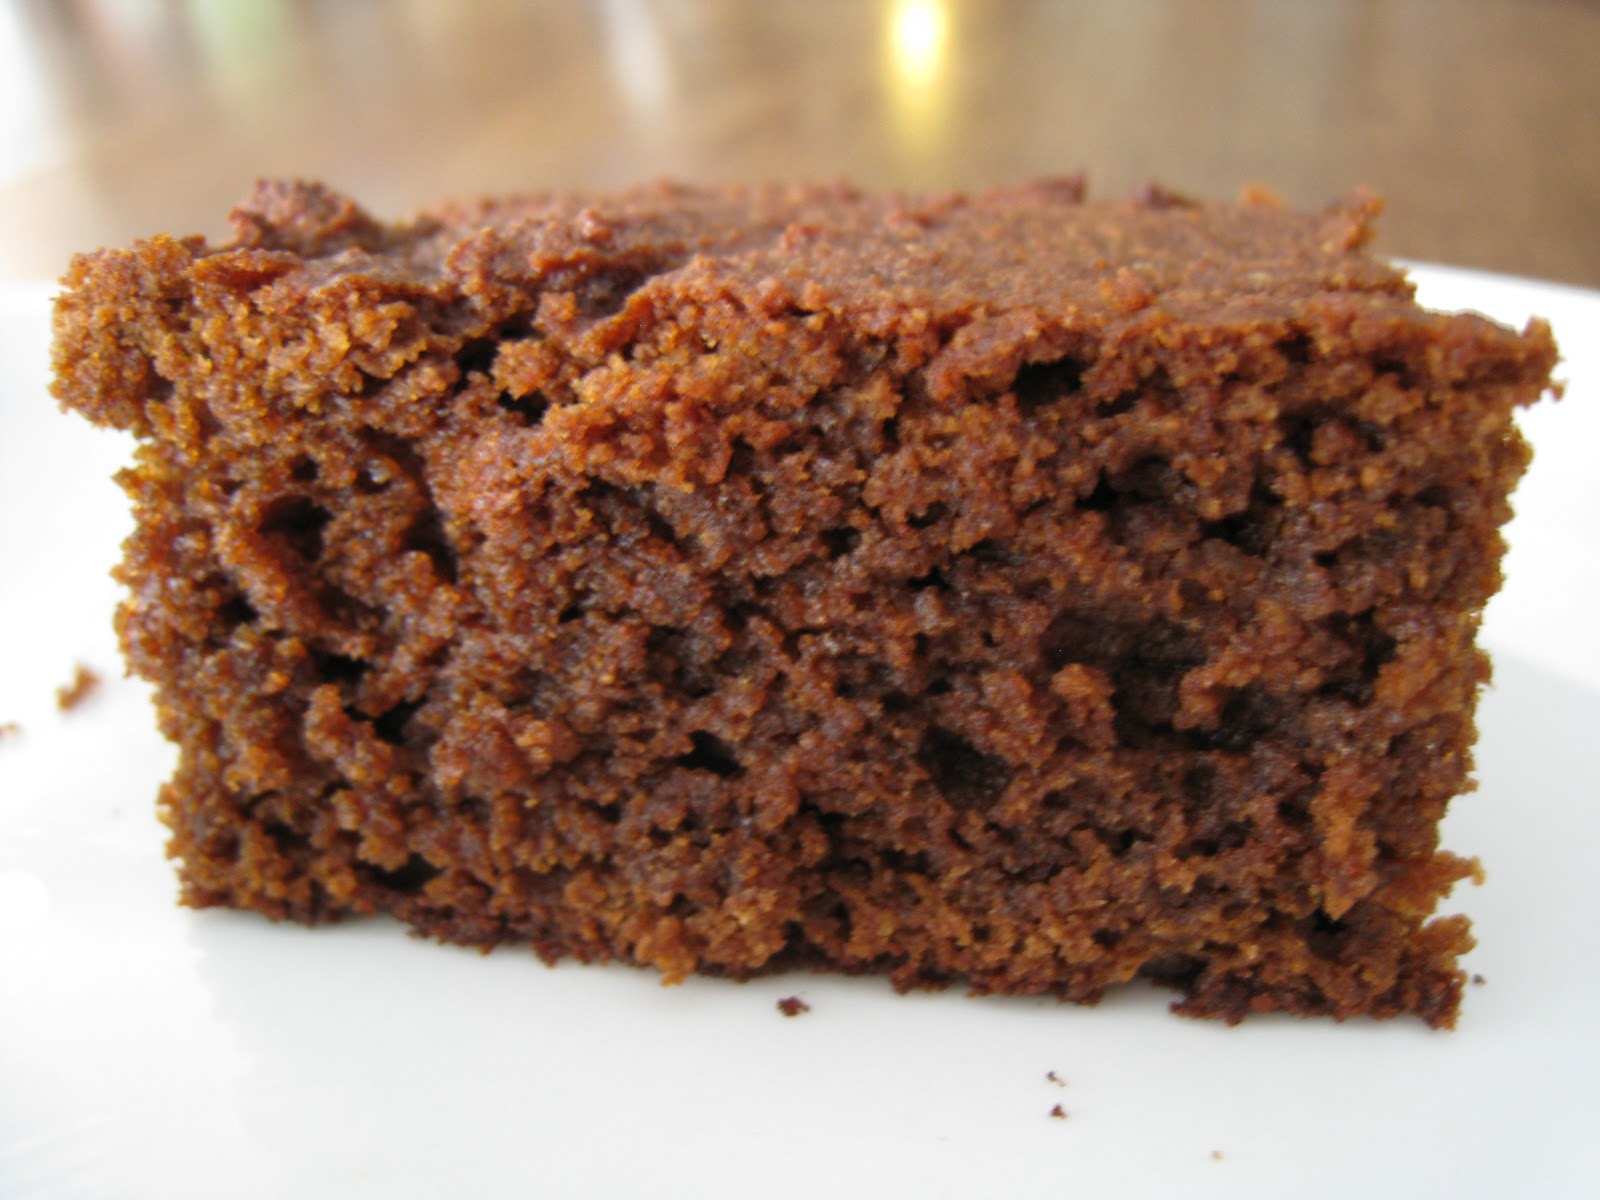
So today, I got out my bowl, my favorite spatula, a bunch of yummy molasses and baked this goodness.  My family and I love the cakey texture of this gingerbread, the rich flavor of the molasses, and the punch of the ginger.  And it's not overly sweet, which is what I prefer!


Grain-free Gingerbread Cake.
    makes one 9x13 pan

    1/2 cup  organic palm oil shortening - source
    1/4 cup  homemade vanilla sugar - or any sugar of choice
    4  REAL eggs
    1 cup  molasses
    1 cup  organic coconut flour - source
    1/2 cup  blanched almond flour - source
    1/2 cup  arrowroot flour/starch - source
    1/2 cup  organic applesauce
    1 tsp  baking soda
    1/2 tsp  unrefined sea salt
    lots of ginger + cinnamon (probably 2 T ginger, and 1 T cinnamon)

To make your gingerbread cake:
  1.  Preheat oven to 375 degrees (convection). Grease a 9x13 pan liberally with butter.
  2.  In a large bowl, cream together shortening and sugar until fluffy. Add one egg at a time until just incorporated.
  3.  To the same bowl add spices, coconut flour, almond flour, arrowroot, sea salt, baking soda, molasses. Mix. Add applesauce. Mix until combined.
  4.  Pour batter into the prepared pan and smooth top with spatula. Bake for about 20-25 minutes, depending on the heat of your oven.
  5.  Remove for oven when sides are slightly browned, and center of cake is springy. Let pan cool on a baking rack for about 20 minutes, then slice and transfer to desired container.  Feel free to freeze for later! Top with whipped cream, ice cream or eat it warm and slather it with cinnamon butter.


Try it cold (you can REALLY taste the ginger punch this way) and topped with some fresh whipped cream! Yum! And don't forget to share it with all your primal, paleo, or grain-free friends! :)


Tuesday, December 25, 2012

Merry Christmas.

Hello everyone,

Merry Christmas to all of you celebrating the holiday.  I am having a wonderful time relaxing at home with my mom and dad.  Christmas is one of my favorite days of the year simply because it is a time when we slow down, take a moment to rest, enjoy some Christmas music, cookies, and twinkly Christmas tree lights.  A Christmas run or walk is always in order too, and I find myself braving the cold each year to do so.  Christmas Eve is always a very special day for me because it is a time where I get to see my extended family.  I decided to be a little different this year and made a slightly different version of my lemon cookies; I made them instead like little sandwich cookies with lemon yogurt frosting inside.  My mother always likes to make my pumpkin muffins for Thanksgiving and for Christmas, and they always taste so good!  And we have leftover muffins at home! They certainly make for an excellent breakfast!

This year we were blessed with a white Christmas.  We woke up in the morning to light snow and a dusting all over the ground.  The snow kept up all day until it warmed up slightly later in the afternoon, and we ventured outside for some exercise and fresh air.  Tonight I think I am going to make some gluten-free pizza for the family and have "movie" night.  One morning this week I plan to make some waffles and eggnog too.  Eggnog is always synonymous with Christmas in my house ;)  While I am home I also plan on making some spiced nuts, grain-free granola, gluten-free crackers for my mom, protein bars for my sister-in-law, and of course Yule Log for my family when we get together to celebrate a little later in the week.  I also hope to make a gingerbread cake or gingerbread cookies, since I have definitely had a hankering for some spice-y molasses-y goodness lately.  While I have a whole pile (in a three-ring binder, actually) of new recipes I want to try, I think I will mostly be staying with some of my tried and true favorites this year.

I hope you are all healthy, happy, warm and enjoying time with family during this Christmas season.

Jesus is the Reason for this SEASON.

Wednesday, December 5, 2012

The Future of Natural Medicine.

All family, friends, fans, followers and lukers, please take TWO minutes of your time and visit this link:
https://petitions.whitehouse.gov/petition/include-licensed-naturopathic-physicians-primary-care-providers-federal-healthcare-law-obamacare/rW0MNqMt
Sign the petition to get Naturopathic doctors (doctors who specialize in natural medicine) covered under federal health care. This would further my future profession (I am a first-year medical student), and also open up a whole new scope of practice for NDs so they can be better Primary Care Practitioners for America, as we are LACKING primary care physicians! We need over 2k signatures by this FRIDAY (and have 22k so far, need a total of 25k) - so sign, share, circulate, and get all your friends to sign! Please, think of your health, the health of your children, and the health of America 
For more info on Naturopathic Medicine and what is a Naturopathic Physician, see here: http://www.naturopathic.org/
I plan on doing a more informative post on NM at a later time, (after finals).
Thanks everyone! December is here, and I'll get you some more recipes soon (again, after finals ;).


Thursday, November 1, 2012

Spinach Artichoke Dip with Cheddar.


Spinach artichoke dip has been on my list to make since who knows when!  I bought a few cans of whole artichokes from Whole Foods a while back in anticipation of one day making it.  And now I have :)


Right now, I am wondering why did I wait so long??  Spinach artichoke dip is delicious!!  (I admit I was skeptical.)  Before making this recipe I consulted a few other food blogs and food websites to see what they were doing in their artichoke dips.  After some internet searching, I decided to go for it and do what seemed intuitive to me.  My first attempt could not have been more delicious.  One thing that is unique about my dip is that it has some protein because I decided to incorporate some chicken and tuna.  Not only would it help with the texture, but it would also make this dip a little bit more wholesome.  And ooh my goodness, this dip is good.  The smoked paprika and cheddar cheese along with a splash of hot sauce really help the depth of flavor in this dish.


Spinach Artichoke Dip with Cheddar.
    makes one large dish, must be at least 9x13

    1 large bag spinach
    2 cans whole artichokes, chopped
    1 cup  dill havarti cheese, grated
    1/2 cup  smoked cheddar cheese, grated
    2-3 cups  extra sharp cheddar cheese (I used Cabot)
    8 oz  sour cream
    ~1/4 tsp  smoked mild paprika
    1/2 tsp  pepper
    1/2 tsp  unrefined sea salt
    3 dashes Franks Red Hot sauce
    1 small can  tongol tuna (I used Trader Joes)
    1 large can  white meat chicken (I used Trader Joes)

To make your dip:
  1.  In a 3qt sautee pan, cover the bottom of the pan with 1/2 inch of water.  Stuff as much spinach as you can in the pan.  Close the lid.  Cook over high heat until wilted.  Drain, and gently squeeze out excess water.
  2.  Combine all ingredients in a large bowl.  Mix with your hands - it's easier!
  3.  Pour dip into a large casserole dish or any sort of oven safe baker.  Sprinkle top with more cheese.
  4.  Bake at 400 degrees until bubbly.  Then broil for a minute or two until the top is golden brown and the cheese is melted.
  5.  Let cool.  Spoon out a section and dip baby carrots, red pepper slices and cucumber slices.  Enjoy!


I think this is quickly becoming one of my favorite recipes!  Try this delicious dip in your home for a satiating lunch!  It's great for a summer lunch, and also in the winter time when you want something warm and toasty.  Feel free to refrigerate for about a week as you eat it, but I would not freeze this or keep it over 10 days.

This yummy dip makes getting your veggies easy.  Kids might even love the warm cheesy goodness.  It would also be perfect for taking to parties.  People won't know it's so good for them, and you'll actually enjoy taking leftovers home!

Monday, October 15, 2012

Grain-free Cinnamon Raisin Granola 1.0.


Granola is one of the things that I have missed a lot since giving up grains.  I've tried a few recipes here and there that don't use oats, but the ease of making them and the combination of ingredients just didn't agree with me.  Recipes were either too complicated, or just plain odd.  I wanted a recipe that had the same satisfying crunch that I remember from normal oat-based granola.  Finally I came up with this!  It's so delicious my mom and I ate it up in no time.  Primal, WAPFers, Paleo and ALL people will love this recipe.  It makes either a delicious breakfast, or a great snack on the go.  I also shared this with my sister-in-law who just had twin boys :)  She's a grain-free granola lover and this totally made her day!  I know that you'll love it too!

Grain-free Cinnamon Raisin Granola.
    makes a bunch! :)

    6  egg whites
    1/4 cup  coconut sugar
    3 tsp  cinnamon
    1 tsp  unrefined sea salt
    1/2 cup  sesame seeds
    1/2 cup  chia seeds
    1 cup (each): whole cashews, pistachios, sunflower seeds, pumpkin seeds, coconut chips, walnuts, chopped pecans, sliced almonds, raisins

To make your delicious granola:
  1.  Preheat oven to 400 degrees convection.
  2.  Combine egg whites, sugar, cinnamon and salt.  Whisk until frothy.
  3.  Add all nuts and seeds, mix well with a wooden spoon.
  4.  On two silicone lined baking sheets, spread out the mixture evenly between two pans.
  5.  Bake at 400 for 10 minutes. Stir.  Another 10 minutes. Stir.  Depending on your oven, you may need another 5 minutes.  The first time I made this I didn't, the second time, I did.


This granola keeps very well.  I store mine in an airtight container in the cupboard.  Eat within 2 weeks or store in the fridge.

My favorite way to eat this is in a bowl with freshly sliced banana and some cold raw whole milk.  What a nourishing breakfast!! Enjoy!

Monday, October 1, 2012

Real Chocolate Ice Cream.


I got an ice cream maker for my birthday a few years ago, and I've put it to good use!  It's been so fun to experiment with different ice cream recipes.  Some have been really good, and some have been, not so good.  Several batches have come out too sweet, not sweet enough, or too icy or crumbly and hard as rock.  But this summer I think I've got the whole process down!  I am so happy with this recipe.  It's incredibly scoopable and you don't need to remove it from the freezer for any amount of time before serving.  It's texture is fantastic and the sweetness is just right.  


Real Chocolate Ice Cream.
   makes 2 quarts

    1 pt  raw cream
    2 cups  raw whole milk
    4  egg yolks
    1 T  arrowroot starch
    1/2 cup  cocoa powder
    1/2 cup  raw honey
    1 T  vanilla
    5 dashes  unrefined sea salt

To make your ice cream:
  1.  Combine all ingredients in a blender.
  2.  Pour into ice cream maker and freeze per manufacturers instructions.
  3.  Freeze overnight until hard.
  4.  Serve  and  enjoy! Try it with fresh whipped cream and chocolate sauce.  Or top it with peanut butter!!

Mhmm. The goodness is beginning to melt! YUM.

I like to freeze my ice cream in leftover yogurt containers! They are the perfect size, and I can put equal amounts in two 32 ounce containers.  Eat one, save one (shove it in the back).  In a few months you'll have several types of ice cream to choose from waiting for you in the freezer!

Chocolate not your style? Check out my other flavors:

Homemade French Vanilla Ice Cream
Homemade Vanilla Ice Cream
Peanut Butter Frozen Yogurt


Monday, September 24, 2012

Cauliflower Garlic Mashed Faux-tatoes.


Like most people, I love mashed potatoes.  I think they are the best when the skins are left on, they are creamy but hold their shape, and they have a nice garlic flavor.  Every since going gluten-free, becoming healthy, and really changing my diet, mashed potatoes have gone out the window.  While they were a treat before, they are now a complete rarity.  Until now.

Since I found out about the Weston A. Price foundation and Primal eating, I have rediscovered mashed potatoes. Only now they aren't actually made of potatoes, they're made out of cauliflower!  I used to think cauliflower was ghastly, and I would say that it was just a bad tasting version of broccoli (I love broccoli).  Well I am a firm believer that vegetables must be tried in several preparations, and more than one time, before anyone can say they don't like them.  Because now, I love cauliflower.  And after trying several fruits and vegetables several times, I now like them.  Once I didn't like cucumbers!

Now that cauliflower has made it's way into my diet, I've decided to make them in mashed potatoes.  This idea has been floating around in the Primal community for a while, and while I have made "cauliflower mash" before.  This time was different.  I went all out.  Roasted garlic.  Butter.  Whole milk.  Food processor.  Super smooth texture.  Oh yeah! 


Cauliflower Garlic Mashed "Faux-tatoes."
   makes about 8 servings

    1 head of cauliflower, steamed or boiled
    1/4-1/2 cup  raw whole milk
    4T - 6T  real grass-fed butter
    8 cloves of home-roasted garlic
    1/2 tsp  unrefined sea salt
    1/2 tsp  black pepper

To make your mashed potatoes:
  1.  Place hot boiled or steamed cauliflower, in a food processor.  Add butter and roasted garlic cloves.  Blend until smooth. Add spices. Blend.  Lastly, add milk until desired consistency is reached.
  2.  Taste.  Modify if needed. (Becareful, these are really good, it was hard to stop eating them! ;)
  3.  Serve warm with some more butter (if desired) along with a nicely cooked protein, like grass-fed beef, chicken or turkey!


Leftovers (if there are any) keep really well in the fridge.  Eat within a week.  They are even great cold!  This recipe is a great side dish option for those of us who do best on low carb, low starch, Primal, paleo diets.

Monday, September 17, 2012

Cranberry Sauce with Oranges.


My mom loves cranberries!  This past Christmas I decided to make some real cranberry sauce to accompany some turkey we were having.   The recipe was an experiment but a complete success.   I knew I wanted to blog about it, but had to wait until the summer to make it again, tweek the ratios/flavors, and give it a photo shoot.  I am happy to say that the recipe was again successful!  So here it is... cranberry sauce in September.  The meal photos are from one July evening this summer, when I decided to make a miniature "Thanksgiving" meal in July.  It was delicious!  With some cornbread taken from the freezer, some roasted turkey breasts and frozen cranberries we froze during cranberry season, a miniature Thanksgiving in July was served. 

I plan to make this cranberry sauce again, and again for all the remaining Thanksgivings and Christmases to come.  It's a fantastic alternative to the canned refined-sugar gelatinous mass that usually is called cranberry sauce.  This recipe is gluten-free, primal, paleo, yada-yada, and very easy!  The honey balances out the tartness of the cranberries, and gives a hint of sweetness.  Cloves and chinese five spice make it just a little bit spicy ;)


Cranberry Sauce with Oranges. 
    makes 10-12 servings

    8 oz  bag fresh organic cranberries
    3  oranges, peeled, ends cut off and sectioned
    1 T  organic coconut oil
    1/4-1/2 cup  raw honey
    zest of 1-2 oranges
    1/4 tsp  chinese five spice
    1/2 tsp  (or more) ground cloves
    pinch  unrefined sea salt
    water as needed

To make your cranberry sauce:
  1.   In a 10" inch skillet or sautee pan, simmer cranberries with coconut oil.
  2.  While cranberries are simmering, zest oranges.  Juice oranges into the skillet.  Simmer until cranberries soften and break apart ~10 minutes on medium and high heat.  Stir every few minutes.  Add some water if needed.  Do not let it burn.  Add zest to skillet.
  3.  Add honey, spices, and salt.  Stir well.  Simmer for another 10 minutes.  If sauce is too thick, add some water to thin it out.
  4.  Serve with turkey and some delicious cornbread.  May be served cold or hot.  Keep leftovers in the fridge.  It can also be frozen.


When cranberries come back into season this winter, give this recipe a try!  Your family will love it's sweet and spicy flavors as an alternative to the "classic" canned cranberry sauce.

Monday, September 10, 2012

Cashew Cookie Butter.


Rarely do I ever see a recipe online and go out and buy all the ingredients and then make it.  But I did exactly that with this recipe (and in less than 24 hours!)... it just looked too good.  This recipe comes from Studio Cuisine blog.  I love to try different combinations of nut butters, like my cinnamon honey almond butter, and this one was fantastic!  It tastes amazing -- just like sugar cookies! But it has none of the undigestible grains or refined sugars, and the cashews make it full of protein.  Therefore it makes a great snack, or a great spread for breakfast!  If you love cashew butter, you'll love this cookie butter.


Cashew Cookie Butter.
    adapted from Studio Cuisine
    makes one cup

    1.5 cups  organic whole raw cashews
    1/3 cup  unsweetened organic banana chips
    1 T  organic coconut sugar/palm sugar - source
    4 tsp  organic coconut oil
    1/3 tsp  vanilla
    1/4 tsp  cream of tartar (optional - for flavor)
    1/4 tsp  baking soda (optional - for flavor)


To make your cookie butter:
  1.  In a food processor, blend coconut sugar, banana chips and cashews together until it become homogenous and balls up.
  2.  Add honey, vanilla, cream of tartar, baking soda, and blend again.  Lastly, add coconut oil and blend until smooth.  If you'd like your butter a little more runny, add more coconut oil.  Mine was a perfect consistency at just 4 tsp.
  3.  Store in an airtight container.  It keeps outside for a little over a week.  For longer storage, refrigerate.


I can't wait to try some of this in my Vitamix! Make sure you share it with your friends :)

Saturday, September 1, 2012

Grain-free Unsweetened Banana Cake.


Today is my birthday, so I thought sharing a cake today would be only appropriate.  I didn't make this cake today, however, but made it sometime early summer.

Banana bread has always been one of my favorites.  Since going gluten-free, I've made lots of different versions.  Up until now, my best recipe has been my original banana cake recipe.  Then there was a banana cake made with oatmeal.  There was also my gluten-free whole-grain banana bread, which I adapted from my favorite wheat-based recipe when I first went gluten-free.  And now there is this banana cake.  Made with grain-free flours, left-over soured milk, and bananas, this banana bread is easy to digest, primal and absolutely delicious!  I also love it because it give me a use for raw milk that has gone a little bit too sour to be palatable.  Raw dairy is so valuable nutritionally, it's such a waste to not use it!


I've made this recipe twice now, and it's been fantastic.  The first time I made a frosting over the whole cake made with peanut butter, butter, yogurt and coconut oils.  It was fantastic and I ended up eating it for breakfast because it had enough protein and fat to make my metabolism happy :)  The pictures you see here have one layer of a peanut butter-butter frosting in the middle, but not over the entire cake.  I hope to tweak my peanut butter recipe, get it just right, and then share it with you.  For now, feel free to mix equal parts, butter, fresh ground peanut butter, a few drops of Stevia clear, and vanilla extract together to make a wonderfully nourishing peanut butter filling for the middle of these cakes.  And be sure to share with family!  It's so good (and makes a lot) so sharing should be mandatory!  This cake is also completely unsweetened (bananas only) and it's Primal!


Grain-free Unsweetened Banana Cake.
    makes two 9" rounds

    1 cup  blanched almond flour - source
    1 cup  organic coconut flour - source
    3 cups  ripe bananas, mashed
    6 small  real eggs
    2 cups  soured raw milk
    1 Tbsp  warm spice blend (mine was a mix of cinnamon, cloves, ginger, cardamom, nutmeg, allspice)
    1 Tbsp  vanilla
    1 tsp  baking soda
    1/2 tsp  unrefined sea salt
    2 Tbsp  grassfed butter (to grease the pan) - source


To make your banana cake:
  1.  Preheat the oven to 375 degrees (convection or non-convection, same results for this cake). Use your fingers to butter the cake pans liberally.
  2.  In a large bowl, mash bananas, whisk in eggs, sour milk, and vanilla.
  3.  In another medium sized bowl, combine flours, baking soda, and sea salt.
  4.  Mix wet ingredients into dry, using a spatula to incorporate.
  5.  Distribute batter evenly between both pans. Bake for about 35-40 minutes or until sides have pulled away from the pan and top is golden brown. When the cakes have cooled, remove from pans by gently inverting them onto your hand or a plate.  Wait until cakes are completely cooled to frost, if desired.

Texture up close.

This cake has quickly become one of my favorites, I hope you enjoy it too!

Wednesday, August 15, 2012

Chocolate Yerba Mate Iced Tea.


It's August, and in most areas of the USA, the weather is hot.  This weekend in Seattle is going to be extremely warm.  On Friday, 90 degree temps are expected.  This is definitely NOT your typical Seattle weather.  I love to drink water, but sometimes when it's so hot outside, liquid with a little bit more interest is way more appealing than plain H2O.  This iced tea fits the bill precisely.  It is sweet, with a hint of chocolate, so it tastes a lot like chocolate milk, but without the calories.  So it's light - it's refreshing!  And the raw milk adds some healthy fats along with probiotics and enzymes!  This would be a great iced tea to serve at a party.  Your guests, real foodies, primalists, paleo, or not, will drink it up!


Chocolate Yerba Mate Iced Tea.
    makes one large pitcher

    4  chocolate yerba mate tea bags - source
    1 cup  raw milk
    2 tsp  vanilla extract
    3 full droppers stevia - source
    dash unrefined sea salt - source
    ice cubes
    water

To make your tea:
  1.  We have an iced tea maker at home, but if you don't, simply boil a pot or tea kettle full of water, pour it into a glass bowl, and place tea bags in the water to steep.  After about 5 to 10 minutes, remove the tea bags, push the rest of the tea from the tea bags.
  2.  Pour about 1 quart of ice into the bowl, add the stevia, pinch of sea salt and vanilla.  Mix well.  When the tea is cool, add cup of milk and stir.  Return to pitcher and place in the fridge!
  3.  Serve in a cool glass with more ice.  Straws are optional!


Wherever you are, stay cool!  Happy summer :)

Wednesday, August 8, 2012

Peanut Butter Frozen Yogurt.


Happy August everyone!  As I type this post, it's July, and I anticipate some hot weather ahead for New Englanders in August.  But as you read this post, it's August, and I am busy busy studying Organic Chemistry.  I am completing my last pre-requisite before starting the ND program (naturopathic medicine program) in the fall at Bastyr University in Seattle, Washington.   This East Coast girl, turned California girl, is now a Seattlite(?)  I never imagined this!  Now can say I've lived in all four corners of the USA.  I was born and raised in Florida, lived in New Hampshire until college, lived in Southern California for my undergrad, and now I am pursuing my doctoral degree in Washington state!  How cool.  Even though I haven't moved around "a lot" in comparison to some people, I still feel as if I have.  Am I an East Coaster now?  Or a West Coaster?  For the past four plus years the West Coast has been my home, and now for the next four plus years (at least) the West Coast will continue to be my home, only instead of the Southwest I'll be in the Pacific Northwest.  Once I was just starting to feel like a true CA girl,  I'm off to Seattle.  Sunshine to rain.  Dirty LA traffic, to clear Seattle roads.  It's a new adventure.


But enough about traveling.  Let's take a look at this yogurt.  YUMMY.  This recipe was inspired by a guest post over at Kimi Harris' blog The Nourishing Gourmet.  I didn't have exactly the right ingredients the original recipe called for, so I made some changes, and now instead of honey and tahini ice cream, it's more like peanut butter frozen yogurt.  The 1/2 cup of raw honey was a little sweet for my taste, so next time I will probably reduce to either 1/3 or 1/4 cup.  If you aren't partial to peanut butter, feel free to use tahini, cashini, cashew butter, almond butter, coconut butter, sunflower seed butter, etc.  But if you're a peanut butter fan (in moderation of course) like me, you'll love this recipe!  Chocolate chips would go great with this too!


Peanut Butter Frozen Yogurt.
    Makes almost 2 quarts

    3 cups  raw milk yogurt
    1 cup  raw whole milk or full-fat coconut milk (mine was mixture of both)
    ½ cup  organic peanut butter
    ½ cup  organic raw honey
    2  real eggs
    1T  vanilla extract
    1T  arrowroot powder
    ¼ tsp  unrefined sea salt

To make your delicious peanut butter fro-yo:
  1.  Mix all ingredients in a blender.
  2.  Pour into ice cream maker and churn per manufacturers instructions.
  3.  When ready, scoop into reused plastic yogurt containers (or another vessel) and freeze for at least 12 hours.  Serve when frozen yogurt has hardened.  You may also want to remove from freezer a few minutes before serving.  Enjoy!


Make this frozen yogurt as a healthy "cool-off" treat to beat the August heat.  East Coast humidity is something that I definitely don't miss on the West Coast!  You can also put this fro-yo into popsicle molds for yourself or the little kiddos in your life.  I can't wait to do this when my little nephews get older!

Question for you: how much does your location relate to your identity?

Thursday, July 19, 2012

Cinnamon Honey Almond Butter.


Almond butter is one of my mom's favorite foods.  We enjoy using to make protein bars, waffles, and as a topping of one of our morning breakfast bowls.  It's a great primal peanut butter alternative, and it is much more digestible than peanut butter.  We've both tried lots of almond butter over the years, raw, roasted, organic, natural, salted, unsalted, fresh ground, homemade, either fresh or in jars of all forms.

After trying all the different varieties, I can definitely say that fresh ground, either raw or roasted, is the best.  Fresh ground almond butter comes just like fresh ground peanut butter from those nut grinders you can find at Whole Foods or your local health food store, except these grinders have dry roasted almonds in them instead of peanuts!


I have also found that fresh roasted peanut and almond butters from these machines (that you grind right in front of you! :) are much more digestible than the jars you can buy at the store.  I think that's because fresh ground is, well, fresh, and the stuff in the jar has been there for who knows how long.  The oils there have likely become old and rancid.  That said, I always stick to fresh ground nut butters.

One day I had some of fresh ground almond butter on hand and I decided to make it a little bit more exciting.  First I added coconut oil for some nourishing MCFA's, then some raw honey for some raw enzymes and probiotics, then molasses for flavor and iron, and then some cinnamon and sea salt to really make the sweetness of the honey and almond butter come out.  What I got was a lovely new take on almond butter.  Why try to buy this in the store when you can make it yourself?  This stuff is very flavorful, spreadable and delicious!  It's also Primal and paleo!


Cinnamon Honey Almond Butter.
    makes about 24 ounces

    16 oz  fresh ground dry roasted almond butter
    4 oz  organic coconut oil
    2 oz  organic raw honey
    1T  blackstrap molasses
    1 tsp  cinnamon
    1/2 tsp  unrefined sea salt

To make your almond butter:
  1.  In a large bowl, combine all ingredients together.  You can use less honey and it will be less sweet.  Personally, 2 ounces tastes very sweet to me.
  2.  Transfer to a jar of choice.  Eat within 2 weeks or store in the fridge for longer periods.

Try spreading cinnamon honey AB on homemade banana or zucchini bread for a delicious snack!  This would also go great with cacao nibs and celery to make celery logs snacks.  Or even on top of grain-free pancakes or yogurt and berry breakfast bowls!

Enjoy :D

Monday, July 16, 2012

Grain-free Kefir Brownies.


Sometimes my best recipes come from nowhere.  These brownies are definitely a testament to that.  One day I was in my apartment and I had some soured kefir that I had made.  It was past the palatable drinking stage, and not wanting to waste it, I threw together these brownies.  I didn't expect the results to come out very well, but I was completely surprised.  These are so incredible, I may like them better than my favorite grain-free brownie recipe.  I gave the pan away to one of my advisors as a thank-you, and he ended up (due to the pestering of his students) sharing them the with his entire class!  I got an email the next day with rave reviews.  I think you'll rave about them too ;)

Mhmm. Fudgey cakey chocolatey goodness!

Grain-free Kefir Brownies.
    makes one 8x8 pan

    2 cups  soured homemade kefir
    1 cup  organic coconut flour - source
    4  happy eggs
    1 cup  raw cacoa powder - source
    16 oz  chocolate chunks, I used Enjoy Life
    1 Tbsp  vanilla extract
    1 tsp  baking soda
    1/4 tsp  sea salt
    2 full droppers plain stevia - source


To make your brownies:
  1.  Preheat your oven to 350 degrees (mine is convection).
  2.  In a large bowl, combine all ingredients except chocolate chips.  Mix well.
  3.  Add chocolate chunks and mix again.
  4.  Bake for about 30-40 minutes or until the top is cracked, the sides are slightly firm and there is a tiny bit of jiggle in the middle of the pan.
  5.  Remove from oven and let cool.  Try a slice warm.  Let it cool and try another slice.  Share.  Serve with a nice cold glass of raw milk. Yum!

I love these brownies, not only because they are delicious, but that they are low in sugar and carbohydrates!  The only added sugar comes from the sugar in the chocolate chunks.  If you use unsweetened chocolate the brownies will not taste very sweet.  For those of you who are not partial to stevia, feel free to omit it.  I haven't made the recipe without stevia so I don't know if it will grossly affect the flavor, but my guess is that it will make a small difference in sweetness.

Mhmm. Chocolate chunks.

These will freeze very well.  They will also make a great accompaniment to homemade french vanilla ice cream and homemade raw whipped cream.  I love anything chocolate and vanilla combined!

Here are some of my other delicious brownie recipes:

Grain-free Coconut Flour Brownies
Banownies
Gluten-free Brownies (for you whole-grain folk)