Tuesday, December 29, 2009

Gluten-free Lemon Bread.


My grandmother has been responsible over the years, as are most grandma's, for always bringing certain baked goods to family functions.  I can remember Mimi bringing her lemon bread to every Thanksgiving, Christmas, and Easter celebration ever since I can remember family gatherings!  It is especially popular with my immediate family and my brother G usually steals/eats most of the loaf.  Ever since my Mom + Dad and I have needed to be gluten-free, we've missed lemon bread.  My brother begs for me to make it and I had never attempted a gluten-free version until now.

Normally I would try to make a recipe more healthy, but some recipes are just favorites and just cannot changed too drastically.  This is not an everyday quick bread, so making it an extremely quick bread was not high on my priority list.  Also because I use real grass-fed butter, there is certainly some vital nutrition to this yummy quick bread!

Gluten-free Lemon Bread
     adapted from the kitchen of my Grandmother
     yields one loaf

    6 Tbsp grass-fed butter (I always use Kerrygold)
    1 cup sugar (I used organic cane sugar)
    2 REAL eggs
    1 1/2 cups gluten free flour (1/2 cup brown rice flour, 1/2 cup tapioca flour, 1/4 cup arrowroot, 1/4 cup sorghum)*
    1 tsp baking powder
    pinch salt
    1/2 cup raw whole milk
    1 whole lemon, zested

topping:
    1/2 cup walnuts, ground or chopped
    1 lemon, juice of - optional
     1/3 cup sugar - optional

To make your lemon bread:
  1.  In a medium bowl, cream butter and sugar.
  2.  Add eggs one at a time, beating well after each addition.
  3.  In a separate bowl, mix together gluten free flours, baking powder, and salt.
  4.  Slowly incorporate the dry into the wet, beating on low speed. Add milk and lemon zest.
  5.  Sprinkle top with walnuts.
  6.  Pour into greased or MISTOed normal sized loaf pan.
  7.  Bake at 325 for over an hour, or until the bread has browned and a toothpick comes out clean.
  8.  Optional step: In a small bowl, whisk together lemon juice and sugar. When the bread comes out of the oven and is still hot, pour the mixture over the top and allow it to soak through. This is so delicious, but I sometimes I leave it off because the bread has adequate amounts of sugar already.

*Feel free to use whatever combination of gluten free flours are your favorite.  Depending on what I am baking I mix together flours that I think will achieve the texture and flavor I want.  This combination was perfect!  In general, my family and I really tend to like sorghum, arrowroot, brown rice, teff, almond, and coconut flours the best.  These flours also offer some great nutrition, which is often missing in gluten free baking.  I will never go back to the white rice flour, potato starch and tapioca mixture that lots of gluten free bakers use because it is so nutritionally devoid (not to mention high in starch, sugar and calories, and low in protein and fiber).  We also do not like bean flours, and I generally never cook with them.

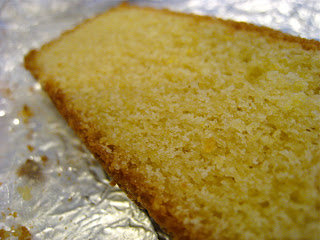
In general, this lemon bread has always been a little bit crumbly, even in the original wheat version, so don't worry if there are crumblies here and there.  It is quite tasty though and my whole family agrees.  This recipe has been passed down for generations!

I'm sorry about the pictures - but this was the last piece left!  I should have taken a picture right away before everyone ate it!

Update -- I will be making a grain-free version of lemon bread in the future!

Monday, December 28, 2009

Homemade Mayonnaise.


Mayonnaise is something that I have really been missing since learning about my soy allergy. I grew up on Hellmans mayonnaise, which contains soybean oil, so that has meant no Hellman's for me, and basically no mayonnaise period! That is, until I learned to make mayonnaise myself! You can purchase soy-free mayonnaise in the store, but they are made with rancid vegetable oils like canola, sunflower or safflower oil, which make me sick and I diligently avoid since they are not healthy.

Until I adapted this recipe last summer, I had been scouring the internet for a suitable mayonnaise recipe for months. After whipping up about three different batches mayonnaise, I finally found a healthy, tasty mayonnaise that is very easy to make.

I am also happy to report that this recipe tastes just like regular mayonnaise, but better! The texture of this mayonnaise is spot on, and it is a bit more creamy and less jello-like than Hellmans. It is really important not to use not refined vegetable oils that have been made by machines, are hexane treated and also made colorless by bleaching processes. That's not natural! Natural oils are actually nourishing to your body. That's why my choice is olive, coconut, sesame, or macadamia nut oil for this recipe.

Homemade Mayonnaise.
    adapted from Epicurious

    2 large egg yolks from pastured chickens
    1 1/2 teaspoons  white wine vinegar, or other vinegar of choice
    1 teaspoon  freshly squeezed lemon juice 
    1/4 teaspoon  Dijon mustard (Gulden's Spicy Brown) or ground mustard 
    1/2 teaspoon  unrefined sea salt, plus more to taste 
    3/4 cup  organic oil of choice, mixture of oils like olive, coconut and sesame work well

To make your mayo:
  1.  Combine the egg yolks, lemon juice, vinegar, mustard, and 1/2 teaspoon salt in your trusty food processor. Whisk until blended and bright yellow, about 30 seconds.
  2.  Using 1/4 teaspoon measure (yes it is small, but that's important) and with the food processor running, add 1/4 teaspoons oil to yolk mixture, one full 1/4 teaspoon at a time for about 8 minutes until the mayonnaise is thick and all 3/4 cup of oil is used. 
  3.  Place into a clean glass jar and store in the fridge. I found mine lasted for over 2 weeks! Toss if mayo ever smells odd, or separates.
  4.  Optional: fold in some whey at the end, then let sit out on the counter for 6 hours, to make a lacto-fermented mayonnaise.


I hope you enjoy this recipe. I know this recipe is a keeper! Use your soy free, gluten free mayonnaise in all your favorite recipes as you would a store-bought brand. My family is CRAZY for this parmesan chicken recipe. Since it calls for mayonnaise, I've never actually eaten the dish. Now I can! I also apologize for the pictures. I was shooting at night and it was really low lighting!


Friday, December 25, 2009

Merry Christmas

Merry Christmas!
In the coming weeks I will be sharing lots of new recipes, old recipes, and new versions of old non-gluten free favorites. In the meantime, please enjoy all the time with family and friends, being together, eating good nourishing food, and remembering that Jesus Christ is the REAL reason that we celebrate this Christmas day. Happy Birthday Jesus!

Saturday, December 19, 2009

Gluten-free Whole-Grain Banana Bread.

 
Update - 12/21/2009
This bread IS so moist!  We just finished off the first loaf this morning and are into the second one. The one great thing about this bread is that even after sitting outside of the fridge for a couple of days it has not even slightly dried out!

It was my first full day home yesterday and I definitely took advantage of all the rest.  Being the foodie that I am, I later found myself running to the grocery store with my Mom to get some chocolate chips for making fresh from scratch almond joy ice cream.  I also made homemade pizza and banana bread (there was conveniently very overripe bananas waiting for me when I arrived home from the airport).  I might have waited a few days on the banana bread, but I ended up adding 4 full eggs into my beginning ice cream mixture, instead of just egg yolks, and so I had to use the "oops" for something.


I have been very unhappy with all the gluten free banana bread recipes that I have tried.  They are either too dry, too grainy, have too little banana content, or just taste blah and are nothing like the banana bread that I remember.  In the past, I've tried making over my mother's traditional recipe, as well as other gluten free versions online.  While some were tolerable, they weren't great.  Banana bread is easily one one my favorite quick breads, and I really want to find a good gluten free version, one that I can serve to others and be proud of.  This time I finally might be on to something!  This bread passed the "wheat-eater" test with flying colors, my brother G really liked it!  My family and I almost ate the whole half loaf for breakfast!


The bread did really well except for the fact that it is a little moist on the bottom.  This can be alleviated by probably just changing the amount of liquid and also adding bit more baking soda.  I will probably do a combination of both and next time I make another batch of this yummy bread I will update the recipe here.


Gluten-free Whole-Grain Banana Bread.
    yields two loaves

    1 1/2 cup  sorghum flour
    1 cup  unblanched almond flour
    1/2 cup  teff flour
    1/2 cup + 2 T  arrowroot starch
    1/2 cup  tapioca flour
    1/2 tsp unrefined sea salt
    1 1/2 tsp  baking soda
    2 tsp  cinnamon
    2 dashes  nutmeg
    1/2 tsp  xantham gum
    1 cup  organic full-fat coconut milk
    1/4 cup  honey
    3/4 cup  organic maple syrup
    6 drops  clear stevia
    4 cups  mashed bananas
    4  REAL grassfed eggs

To make your banana bread:
  1.  In a large bowl, whisk together: flour, baking soda, salt and spices.
  2.  In separate smaller bowl, add bananas and mash.
  3.  In third small bowl, add eggs, maple syrup, agave and stevia.
  4.  Combine liquid ingredients and slowly add to the dry ingredients, folding together with a spatula.
  5.  Lightly MISTO spray two loaf pans, and divide batter evenly between them.
  6.  Place into a preheated 350 degree oven, and bake for about an hour or until the bread begins to brown, pulls apart from the sides and a stick inserted through the middle comes out clean.
  7.  Let cool in the pans on top of a wire rack. Then gently go around the edges with a dull knife and shake the bread out. Place them on wire racks to fully cool before eating or giving away or freezing.

This bread was so moist and delicious.  I hope you enjoy this banana bread with your family.  The bananas and sweet maple syrup make it especially scrumptious.  If you are averse to the taste of coconut, do not worry, the taste does not shine through in this bread.  The maple syrup taste is not assertive either.  It has just the right amount of sweetness.  Next time I make this bread, I might actually add more cinnamon!

For those of you that are wondering what banana bread recipe I used before I was gluten-free, click here.   I still use this recipe occasionally when I cook for others who do not have any special dietary needs.

Thursday, November 26, 2009

Thanksgiving 2009


My third California Thanksgiving. It seems so unreal!

This year, I was graciously hosted by my good friend N and her family. They have been such a blessing to me, always taking me to the airport, and letting me stay at their house. To my surprise and delight, now they are being accommodating with my food allergies for Thanksgiving! This is way more than a blessing to me. I always worry about going over to other's houses and being able to eat something. Most people don't understand, some people don't even care. But every once and a while us gluten-free people find friends that really go the extra mile. To N and C I will be forever grateful for such a wonderful Thanksgiving.

On Thanksgiving eve, it was N's younger sisters birthday. We had steak (which they did on a separate part of the grill), baked potatoes with sour cream, chives, cheese and butter, and cooked broccoli. There was also fudge. They were going to make two batches anyway, so for one batch they actually did a "Meagan friendly fudge" using Bakers Chocolate instead of chocolate chips and using butter instead of margarine! It was so delicious, and so nice to have such a delicious home cooked meal where everyone was eating the same things I was! That doesn't happen very often. I can't even describe to you how wonderful it was.


In N's family, the Thanksgiving meal happens at dinner, about 6-7 o'clock. This is very different from my family, where the meal usually is around 1 o'clock in the afternoon.

The day of-
Everyone slept in. Except me, I seem to have a knack for not being to sleep in past 8 or 9. While I had breakfast and they slept, I started blogging.

Around 11:00, the preparations started. The turkey did not need to cook in the oven for hours because it was a fresh never frozen turkey from Trader Joes. 3 -4 hours for I think a 20 lb turkey was all it took. Tommy the Turkey was prepped and went into the oven around 3 o'clock.

N's mom C and I started to get together all the other food. In the dinning room, there were several different plates on the table: "dark chocolate fudge" (the stuff that was safe for me) and "normal" fudge, fresh cut pineapple, 3 kinds of grapes, clementines, raw broccoli, orange, yellow and red bell peppers, cucumbers, cherry tomatoes, carrots, celery, hummus and ranch dip, deviled eggs, Trader Joes cinnamon sugar almonds and plain walnuts and pecans, and Tostitos corn chips to dip into homemade guacamole and tomato-onion salsa. C was kind enough to let me make the guacamole. You can find the recipe for the guacamole here. Everyone loved it. The tomato-onion dip was more of an experiment.

We grazed on the table of goodies all day. I was so overjoyed to have safe dip, guac and raw veggies. Can you tell what was one of my favorite platters? I didn't have to worry about lunch at all - I had adequate protein and veggies, my favorite combination!

As the day wore on, more of the family started to arrive and I was introduced to everyone. It was great to be "with family," even though it was not my own.

Next on the agenda were the side dishes. As planned, there was stuffing, gravy, green bean casserole, mashed potatoes, sweet potatoes, rolls, cornbread and cranberries. C's boyfriend D made the green bean casserole (not safe for me). The stuffing, of course, was wheat based. The rolls came from Albertson's (also not safe). But the gravy, cornbread, mashed potatoes, sweet potatoes and cranberries were all safe! I offered to make the cornbread (you know how I feel about the cornbread recipe I made this summer) and all the other dishes just needed minor adjustments.

The cornbread recipe was my own, which you can find here. The mashed potatoes were just butter, s+p, and half n' half. The cranberries were prepared from scratch with spices and fresh cranberries. The sweet potatoes were just butter, cinnamon and nutmeg (others put brown sugar and marshmallows on top, which I have never been fond of). The gravy, oh, that gravy -- simply chicken stock (Pacific brand organic free range chicken broth), s + p, turkey juices and cornstarch. This was probably the best gravy I have ever tasted, EVER. Naturally gluten free. Gravy does not have to be complicated. It also took about 5 minutes to make.

When everything was prepared, instead of placing all of the food on the table, we set it up "buffet style" in the kitchen. I directly helped C arrange the food, because as we all know buffets can become a distaster for GFers. Cross-contamination. My worries were abated, however, as all the safe things I could eat were awayish from the wheat dishes, including the rolls. There was also a utensil dedicated to each dish, and because of the way the dishes were arranged on the counter I did not have to worry about the "reach over" factor. Straight forward. I did not directly tell C about the cross-contamination issues, because I did not want to seem so burdensome, as they were already doing so much for me, but I think she caught on. Thanks again, C.

Around 7 o'clock, everything was placed out and ready to be eaten. The line for the food started and I was definitely hungry. My plate consisted of: a drumstick (I love the dark meat), mashed potatoes, half a sweet potato, a small dollop of cranberries (they looked interesting, but I had to try it), GRAVY, cornbread, and onions and celery that came from inside the turkey.

We ate our food around the table where the hors d'oeuvres had been previously - we had to clear them away to make room for our places. Then, we ate. We enjoyed our food. We certainly went back for extra gravy.

Dessert did not go so fortunately for me, but I was satisfied with the Thanksgiving meal. There were various pies, an apple crisp, fugde and fresh whipped cream. Not wanting to feel dessert-less, I ended up finding some berries in the freezer and topping them with some cream and fudge.

Then we all talked and relaxed on the couch. It was a good day.

That night, after we had digested a little, we had gingerbread house decorating contest. I will spare you from all the crazy details, you can probably already gather much of them from the picture! Candy mania.


I hope you all had a wonderful Thanksgiving!

Saturday, October 24, 2009

Three Bean Chili


Fall is just around the corner. Well, actually I think it has officially begun. This comes as kind of a shock, since Southern California has virtually no fall, or at least a fall season that could appreciably be called "Fall." Coming from New England, I have come to enjoy and love my falls. Autumn is easily my most favorite time of year besides summer and Christmas. The colors on the leaves, the pumpkin, the apple cider, the warmth of spices and the cold rush of an October breeze, the crunch of the leaves under your feet and the fields upon fields of apples and pumpkins just waiting to be picked...

Ahh, I reminisce. I miss my New England falls. But I cannot complain, because now in this new "world" I get nearly 365 days worth of sunshine. And you know how I love my sunshine.

The presence of fall has brought to light another thing that is missing. Soup. Once the leaves turn color and start to tumble down, and the weather begins to turn colder and colder, my family has always turned to soup. When fall arrives, on goes the stove, and on goes the crockpot. The crockpot has always been one of my mom's most beloved kitchen tools. Can you believe that only three years ago we bought her a new crockpot after using hers faithfully for 26 years, since my parents have first been married?! It was a feat to keep a much loved crockpot for so long, but now with the old one laid to rest, we can make bigger soup batches because the new one is so much bigger! I wish they would make appliances today that would last just as long!

I have digressed, however, because the making of this soup has nothing to do with fall, or the colors on the trees or my mothers crockpot. I created this soup this summer, and it is so good I can't believe I haven't raved about it before. But I've been busy, way busy.. so finally, consider it done.

This soup is warm, spicy and has a good mixture of both vegetables and "substance" - ie, meat and potatoes. I made it as an experiment, paired it with cornbread (see my earlier posts) and my mom and I managed to ate the whole batch in a week. So good. Try this soup out on a cold fall or winter day and it's kick of spice will be sure to delight your senses and wake you up!

Meagan's Three Bean Chili

1 lb browned beef chuck
1 small vidalia onion, diced
1 orange bell pepper, seeded and diced
2 T buter
3 - 15 oz cans of 3 beans (aduki, chickpea and white), drained and rinsed
1 - 15 oz can Muir Glen Fire Roasted tomatoes
4 cups organic free-range chicken stock**
1 heaping 1/4 tsp of smoked paprika - You can sub normal paprika, but you will lose the main taste profile of the soup.
1/2 tsp sea salt
1/4 tsp cayenne pepper
dash of black and red pepper flakes
2 cups water
2 T olive oil
2 cups fresh corn off the cobb
2 small golden potatoes, cubed***
1 large pot

To make "THE soup" (as my mom fondly calls it):
1. On medium heat, brown the beef in the pot, and remove (do not drain the fat).
2. Add the vidalia, orange pepper and butter and saute lightly.
3. Add corn and potatoes.
4. Add beans, chicken stock, and tomatoes (do not drain these).
5. Add water.
6. Cover, bring to a boil and then simmer on low until potatoes are almost cooked...
7. Then add olive oil and spices, and return beef to the pot.
8. Simmer on low until potatoes are fully cooked, and their starch is slightly breaking down.
9. EAT and enjoy delicious soup, served with homemade cornbread and shredded raw milk cheddar cheese.

*In the picture, that delicious blob of white goodness you see on top of the hot soup is partially melted FRESH grated raw milk aged sharp cheddar cheese.

**The kind I used is Imagine or Pacific. I did not use low sodium, or reduced salt, so if you are using this kind you might want to add more salt to the soup. I find that sometimes the reduced sodium soups have other additives like MSG. Imagine and Pacific are a good brand, and use sea salt, so I know the salt I am eating my body can use, unlike the weak table salt. And of course - if you have HOMEMADE chicken stock, use it!!

***Add more if you wish, but I am a protein type, and do not do well on lots of carbohydrates, so I generally do not add as much potato as I would, say, meat.

If you bring this tangy chili to winter potluck parties everyone is sure to love you, but don't forget the cornbread!

Friday, October 2, 2009

Breakfast Carrotie


Busy. That's what I've been these past few weeks and it's only going to continue (or actually get worse). But I love my classes, and it is so worth it!

This recipe was born from the 3 eggs that I had in my refridgerator that needed to be used because they had been in there for over a month! That's pitiful, I know, but it has brought some tasty results. It is a similar idea to my Fruity Vegan Oatmeal Bake, but is more cakey and has carrots!

Meagan's Breakfast Carrotie

1/4 cup organic coconut flour + 3 Tbsp
1/2 cup organic coconut oil
3 real eggs
1 tsp vanilla
1/2 - 1 tsp sea salt
1 cup packed shredded carrots
1 cup soaked GF oats (1 cup oats, add a glug of apple cider vinegar, water to cover - let sit on counter overnight, then lightly drain off water and use)
3/4 cup organic raisins
1 handful almonds
1 Tbsp pecans
1 1/2 tsp cinnamon
1/2 tsp baking soda
1 1/2 tsp baking powder
3 tsp stevia powder

To make your carrot-ie:
1. In a small bowl, crack eggs, add vanilla, salt. Beat until glossy yellow.
2. Add to the bowl: oatmeal, coconut flour. Beat until incorporated. Add cinnamon, stevia.
3. Mix in raisins, carrots, nuts.
4. Stir in leaveners, and pour in melted coconut oil. Mix well!
5. Put into (this doesn't pour) an 8x8 pan and bake at 350 for about 30 minutes.


I originally thought that I added to much coconut flour because in the end the mixture was quite viscous, however, due to the amazing properties of coconut flour, it was fine! Feel free to reduce coconut flour by 1 T for runnier batter and moister product. Oh, and I almost forgot! Happy October! And happy Fall to those of you NOT in Southern California.


5/29/11
I just found this recipe as a "draft" saved on my dashboard! How odd that I didn't post it. For those of you who like oatmeal breakfast cakes - this is for you. 
-Meagan

Saturday, September 5, 2009

Fruity Vegan Oatmeal Bake


This is another recipe that I whipped up last summer. Last summer I was widely experimenting with vegan baking, because I had a friend who needed it, and because I also was experimenting with veganism. I was vegan for about 6 months, and I do not recommend it. It is soo unhealthy! Click the link here.

Nevertheless, my experiments yeilded some VERY tasty results! (And I did buy a very good vegan cookbook that has very useful tips and tricks for vegan baking, as well as for regular baking!) There is proof in this recipe. It is soo moist and has a lovely texture. It is similar to baked oatmeal, but is smoother, moister and has a different flavor (you can thank the spices for that).

I love to eat this for breakfast warmed in the microwave and then broken up and topped with bananas, blueberries, flaxseed, peanut butter and RAW milk, cream or butter. It's so delicious!

Meagan's Fruity Vegan Oatmeal Bake

1 large banana - mashed
3/4 cup unsweetened organic applesauce
1/4 tsp vanilla extract
1/2 cup maple syrup
2 cups GF steel cut oats*
1/4 tsp EACH: baking soda and powder, cinnamon, nutmeg
1/8 tsp ground cloves
pinch sea salt
1/4 cup medium shred coconut - organic always
1/2 cup chopped walnuts (or nut of choice)
1/2 cup organic raisins

To make your fruity bake:
1. Beat banana, applesauce, vanilla and maple syrup briefly.
2. Sift together spices, salt, baking soda, baking powder, and oats.
3. Add to beated mixture and beat together until just combined.
4. Fold in coconut, walnuts and raisins.
5. Pour into a greased 8x8 pan and bake at 350 degrees for 30-40 minutes or until done. The middle should spring back when lightly pressed.

*If you are using soaked oats, be sure to rinse and drain them in a metal strainer before using them in the recipe. If the batter is not coming together very well, add 2 Tbsp coconut flour. Keep adding an additional 1 tablespoon as needed.

While I did create this recipe in the summer, it would be a great winter recipe too! It is very satisfying when warm and hearty, so it would be sure to warm you up in those snowy (depending on where you live) winter months!


On another note...
Now I am starting school again, so I will be very busy, MUCH more so than last semester because I am taking a very difficult class (along with several GE's). I will try to show you some of my creations, but I plan to spend less time in the kitchen than I did last year. And while that makes me a bit sad, I know it is for the best... May all my creative juices store up and be ready at Christmas!! (I already can't wait to make another gluten free yule log!) I might have to make TWO this year ;) I also might post some of my older recipes that I haven't shared that are in my computer archives. As always, stayed tuned for recipes that might pop up!

Saturday, August 29, 2009

Morning Glory Muffins 1.0.


When I formerly ate wheat, I used to have carrot "Morning Glory" muffins at camp in the mornings when they were available. The muffins were quite good, but they were very oily and not very healthy. When I discovered I needed to be gluten free, I eventually got around to finding a new recipe for them.

I believe that I originally found this recipe online at Whole Foods. I have adapted it a little to my taste and to make it more healthy. I cannot say more of these muffins! They are moist, not overly fluffly or heavy, and have lots of yummy ingredients in them. The photo does not do them justice! It was taken maybe a year ago on my older camera, which never turned out good photos. Also, ignore the poor photo shown in the linked recipe, it's not a good representation of how they actually turn out! The photo makes them appear very dry, but they are not!

Morning Glory Muffins 1.0.
    adapted from Whole Foods Market recipes 
    makes about 18 muffins

    3  happy eggs
    1/2 cup  organic cane sugar  (or 1/2 cup maple syrup and reduce flour by 3 tablespoons)
    1/4 cup  brown sugar
    2/3 cup  organic coconut oil - source
    1 tsp  vanilla extract
    1 cup  brown rice flour
    1/2 cup  tapioca starch
    1/2 cup  potato starch
    2 tsp each:
        baking soda
        cinnamon
        xanthan gum
    1/2 tsp  unrefined sea salt

Mix ins:
    1 tart red apple, unpeeled cored and finely diced
    1 cup  grated carrot
    1 cup  grated zucchini
    1/2 cup  organic raisins
    1/2 cup  chopped walnuts
    1/4 cup  coconut flakes

To make your muffins:
  1. Preheat oven to 350 degrees.
  2. Combine the wet ingredients in a large bowl, whisking by hand to incorporate air into the mixture about 1 minute.
  3. Combine the dry ingredients in a separate bowl and add to the wet ingredients gradually.
  4. Add the mix-ins last, gently folding with a spatula till combined.
  5. Scoop into paper lined regular sized muffin tins.
  6. Bake for about 20-30 minutes, until slightly golden brown on top; Cool, eat, enjoy.

My mom is especially crazy about these muffins! I love these muffins too, but I do not really love that they use so much white flour. I will experiment and make them with better gluten free flours like teff, or sorghum, flours that aren't as starchy and "empty" calorically. (Now that my diet has improved over the years, I have learned that grains are not the best thing for our bodies. Coming soon I will redo the recipe with more healthful flours, like coconut and almond.)

These muffins freeze well for a few months, but past six months is pushing it for ANY gluten-free baked good and so I do not recommend it. Also, be sure to store your gluten-free frozen goods in a freezer that does not have defrost cycle. The defrost cycle will damage the product over time, and it will not keep as long. Of course, if you have family or lots of friends that love muffins, they will be gone in flash and you won't have to worry about freezing them!

Saturday, August 22, 2009

Goat Cheese and Zucchini Frittata


I found this recipe on Whole Food's website. It had been on my recipe to-do list and I finally had the chance to make it this summer! It was satisfying and tasty so I will definitely make it again. Double or triple the recipe depending on how many people you will serve. The amount in the recipe is perfect for one person's breakfast!

Goat Cheese, Red Pepper and Zucchini Frittata

2 eggs
salt and pepper to taste
1 T olive oil
thin slices of red onion
1/2 medium zucchini, thinly sliced
goat cheese
1 red pepper, diced into pieces
fresh herbs of choice (optional)

To make the frittata:
1. Beat eggs and season with salt and pepper.
2. Heat oil in small skillet (be sure it can go under the broiler) and cook onion and zucchini until soft.
3. Add eggs and cook until slightly set.
4. Sprinkle in red peppers, goat cheese and fresh herbs (if using).
5. Place pan under the broiler for as long as it takes to cook (mine took around 10 minutes).

Enjoy!

Friday, August 21, 2009

The Best Cornbread.


One of the first few posts on this blog involved cornbread. And now a few months later, I've created an even better version. The one previous was less moist, not as sweet, and dairy free. This cornbread is very moist, sweet (enough for cornbread) and has real butter and raw milk. It's almost decadent. The addition of fresh corn "off the cob" into the batter gives the bread a whole other dimension of both taste and flavor.

Actually, I really surprised myself with this recipe. I made this recipe from scratch with no basic guidelines except noticing that one recipe on the cornmeal bag used a lot of leavening agent. I wouldn't have originally thought to use that much, and I figured since it was on the back of the cornmeal bag, I should listen. Despite that one thing, this recipe is entirely my own.

While the bread was still hot, the whole pan disappeared. I brought some out to the camp office for the staff to grab on their way by in their usually hectic camp afternoon. As soon as I left and came back, they needed more! And so less than 20 minutes after I had pulled it from the oven, I was staring at an empty pan. Then, grabbing my other 9 x 13, I made another batch. Then I took my first bite and knew that this recipe had "arrived." No tweaking needed!

The Best Cornbread
    makes one 9x13 pan

    1 cup  uncooked polenta - Bob's Red Mill
    1 cup  Masa Corn Flour
    2 cups stone ground cornmeal - Bob's Red Mill
    2 cups  whole or 2% milk - preferably raw whole milk
    1 cup  organic cane sugar
    4 tsp  baking powder
    1 tsp  baking soda
    1 tsp  sea salt
    4  real eggs
    2  sticks butter, softened
    2  heaping cups fresh cut off corn off the cob

To make your cornbread:
  1.  Mix polenta, masa, cornmeal, baking powder + soda, and salt in large bowl.
  2.  In a small bowl, cream sugar and butter until fluffy. Add egg one at a time, beating well after each addition. Beat on high speed until fluffy.
  3.  Add 2 cups of milk to the bowl with the polenta mixture. Stir until well combined with a spatula.
  4.  Gently fold in the fluffy butter/sugar/egg mixture into the milk and cornmeal mixture. FOLD in - do not stir - until combined.
  5.  Fold in the cut corn.
  6.  Pour into a lightly greased 9x13 pan and bake at 400 degrees for about 30 minutes.
  7.  The cornbread is done when it springs back like a cake in the middle, a poker will come out clean, and the top is a lovely golden brown.

This is not your typical dry cornbread. This bread is moist, decadent and lovely, so much so it doesn't need to be slathered in butter.  It's great on it's own! Be sure to share some with your favorite people. It just might disappear as fast as mine!


Tuesday, August 18, 2009

Mint Cake


Mint cake.

This is what I make in the summer for some very special people. The recipe is secret, and you'd better be jealous. Just look at the pictures and imagine millions upon millions of young adults pining over this huge commercial sized sheet cake of goodness. Well, maybe not that many people. But it's that delicious.

Thursday, August 13, 2009

Upside Down Blueberry Cake


Summer here in New England means LOTS of blueberries. We have over 30 blueberry bushes on property, so in August there seems to be an endless supply of blueberries!
I decided to make this blueberry cake as a treat one morning for breakfast for my mom. My mom is an oatmeal and yogurt + cereal LOVER, and I always like to try to get her to eat something a little different. Some mornings there is no going between her and her bowl of mixins. Story short, she ended up eating it for lunch! She loved the blueberries and the texture of the cake. One of the best things about this cake is that it is so easy to whip up, it cooks in a short amount of time, and it's mini sized! I baked this in a mini bundt pan, which makes it a perfect sized breakfast for one, or shared between two and topped with creamy vanilla yogurt. I suppose it wouldn't be such a bad thing for dessert either!


Upside Down Blueberry Cake
    makes one mini bundt pan, double or triple the recipe and do it in a normal sized pan!

For the "bottom" blueberry layer:
  1.  Sprinkle enough blueberries to cover the bottom of the bundt pan, then sprinkle uncooked oats, add a drizzle maple syrup (not too much) on top of the oats and then sprinkle as much cinnamon as desired on top of the whole mixture.

For the "top" cake layer:
    2 Tbsp  melted KERRYGOLD unsalted butter
    2 Tbsp  maple syrup - always buy organic
    2 Tbsp  organic yogurt - mine was vanilla low fat Stonyfield
    2 Tbsp  almond flour - unblanched and ground at home
    1 Tbsp  coconut flour
    1 tsp  organic teff flour
    1/4 tsp EACH: xanthan gum, baking soda, baking powder
    dash EACH: sea salt, nutmeg, vanilla

To make your upside down blueberry cake:
  1.  Mix all ingredients above in a small bowl with a whisk.
  2.  Spoon on top of the blueberry "bottom" of the pan.
  3.  Bake at 375 degrees for about 10 minutes on the highest rack until puffy, then move it to the middle rack and bake for about 4 minutes more or until the cake springs back when gently touched.
  4.  Be sure to place a cookie sheet on the bottom of the pan so the "dribble overs" are caught and don't burn on the floor of the oven.
  5.  Let cool completely. To free from the pan, take a normal silverware knife (not a butter knife but one with little teeth) and gently insert the knife on the edge between the cake and the pan and work knife around the whole pan. Shake the pan gently over a plate and cake should come right out!

As I said, this cake is originally intended to be eaten for breakfast topped with some vanilla yogurt, but it will do double duty for dessert as well, but with ice cream instead!

Enjoy your August blueberry frenzy!

Tuesday, August 11, 2009

Namaste Parmesan Crackers


Mhmm, crackers! Ever since going gluten free my mom has been craving her crackers. One day I decided to put an end to it and experiment in the kitchen. Viola!

To make this recipe I took my favorite gluten free pizza crust mix, Namaste, added a few ingredient and turned it into a cracker! The mix is soo versatile.

These crackers have a GREAT crunch! They are not very flaky like other crackers, but have a wholesome satisfying texture and ever so slight cheesy crunch.

I have made two batches of these already- they keep disappearing! This will definitely be my go-to cracker recipe from now on. The recipe is so forgiving, so feel free to experiment with your own favorite ingredients.

Namaste Crackers

1/2 cup Namaste pizza crust mix
2 T cornmeal - I used Bob's Red Mill
2 T millet flour - fresh ground by me!
2 tsp olive oil
2 T melted KERRYGOLD unsalted butter
1 T grated fresh raw milk parmesan cheese
warm water as needed

To make your crunchy delicious crackers:
1. Add ingredients to a small bowl and whisk together.
2. Add warm water as needed and fold together with a small spatula.
3. Turn onto a lightly Misto-ed cookie sheet (can use a silicone baking sheet here if you have one- I don't, YET!)
4. Roll thin with a pizza roller to about 1/4 - 1/8" thick, making sure that there are no thin spots and you cannot see the cookie sheet through. Because there are large particles in the flours in cannot be super thin.
5. Slice into desired square shape with a pizza cutter.
6. Bake on the middle or bottom rack of the oven at 425 degrees for 10-15 minutes or until the middle is firm and edges slightly brown, rotating once.

*If you add too much water add 1 T millet flour.
**It is better for the dough to be on the wet side, than the dry side

Summer is the greatest time for crackers. Fire up a few batches and then you have an easy snacking and a low key dinner item for the next month! My mom and I like to have "girl dinners" where we have a smorgashboard of different things like crackers or rice cakes and peanut butter, carrots, peppers, celery, cucumbers and dip, a small salad or sweet potato, and whatever fresh fruit we feel like, especially cut up apples.

Thursday, July 30, 2009

Banownies 1.0.


Check out my new post: Banownies, revisited!  


Yes, I have been on a bit of a brownie crazy lately. You'll thank me later.. In the meantime why don't you try out my lovely new take on brownies.

Groan.

Sigh.

Eat the whole pan. Come back for more. The latter is NOT recommended.

Warning- these are flourless concoctions that are drowning in the ooey gooey fudgieness factor. Look at the texture of the above photo!


Banownies 1.0. (Bananas and brownies got married ;)      
    makes one 9x13 pan  

    1 1/2 cups  good quality cocoa powder  
    2 tsp  baking powder  
    1/2 tsp  baking soda  
    2T  vanilla extract  
    6 small ripe bananas - mashed  
    6 eggs - use less if they are jumbo, mine were fairly small  
    8 oz  (1 cup)  unsalted butter, 70% melted  
    2 cups  UNPACKED brown sugar  
    2 cups  white sugar  
    2 cups  chocolate chips of choice  
    2 cups  chopped or whole, raw or roasted walnuts
    Coconut flakes for topping

To make your "banownies":
  1.   Combine in one giant bowl.
  2.   Mix-e-vous.
  3.   Pour into a sprayed/greased 9x13 pan.
  4.   Place in a preheated 350 degree oven. Bake until the coconut has browned, the sides have set, and the middle has a little bit of jiggle.
   5.   Serve to some VERY lucky people. Whipped cream anyone?

Once you take these babies out of the oven, DO NOT cut into them immediately (this is in all seriousness folks), the brownies need time to set. I placed my batch straight onto a wire rack in the fridge. These are also very ooey and gooey so keep them in the fridge, especially now, since it's summer.


I am immensely happy with this recipe. It's so easy. Your grandmother or a 2 year old could do it. Well, maybe not. Grandma sure could though!

These brownies could probably be made with some substitutions, like switching butter for coconut oil, or subbing sugar for maple syrup or honey, but that would definitely change the consistency of the batter. I don't believe they would cook up as nicely as the real recipe. Don't let me neglect to mention that these brownies are quite healthy for you, but they DON'T taste like it. This is the ULTIMATE decadent brownie that you'd never know was good for you. It has good fats (think butter and coconut oil) and flavanoids and antioxidants (think chocolate) and fruit (bananas).

Oh wait, there's 4 cups of sugar. Never mind... but it's not like you eat the whole pan yourself right?

Tuesday, July 28, 2009

Spicy Corn Salad


I created this salad on a whim last summer and have never looked back. It is soo delicious! This satisfies my spice-tooth and is a very easy salad to make ahead for a summer picnic, barbeque, luau or whatever your summer party plans are. The vibrant colors in this salad make it appealing to kids, and adults love it too because of the rich flavor. And besides, who doesn't love corn?

I used frozen corn in this recipe originally, but using left over corn on the cob from last weeks barbeque would be fine too.


Spicy Corn Salad
2 cloves garlic, smashed, peeled and thinly diced
2 cups frozen corn
1 red pepper, finely diced
1/4 red onion, thinly sliced
1 1/2 cup carrot, peeled and thinly sliced
1 tsp each olive oil and coconut oil - or as needed
1 1/2 tsp chili powder
1 tsp each black pepper and crushed red pepper
1/2 tsp each salt and basil

To make your corn salad:
1. On medium heat, saute frozen corn with oils until cooked. Add spices. Remove from skillet and place in a bowl.
2. Next put onion, garlic and pepper in the skillet and cook. Remove, and place in the bowl with the corn.
3. Add carrots to skillet and cook until slightly crunchy.
4. Mix all components together.
5. Serve warm or refridgerate a few hours and serve cold. For some extra spice and green color add some finely chopped jalapenos.

This can sometimes turn out very spicy. If you don't like things very hott, add a little bit at a time until you reach your desired heat level. This salad is slightly labor intensive, but using a food processor would make it go quickly. This can also be made ahead or made the day of. It keeps well in the refridgerator for a week or so. I would suggest something to do with the extras, but I don't think there is going to be any ;)

Monday, July 27, 2009

Daring Baker Challenge: Bakewell Tart, June 2009


I know! I am posting a June challenge in July?! I have lots of excuses, but you probably aren't interested in hearing them.

The June Daring Bakers' challenge was hosted by Jasmine of Confessions of a Cardamom Addict and Annemarie of Ambrosia and Nectar. They chose a Traditional (UK) Bakewell Tart... er... pudding that was inspired by a rich baking history dating back to the 1800's in England.

I have never made a bakewell tart, or a frangipane and so this was a new endeavor for me. The whole process went smoothly and all of the people that tried my creation really enjoyed it! I stuck to the recipe 100% and did not make it gluten free. I didn't want to eat it, so I didn't bother. This wouldn't be a hard "pie" to do a gluten free version of either.


Bakewell Tart…er…pudding

Makes one 9” tart
- mine was 10 inches

Prep time: less than 10 minutes (plus time for the individual elements)

Resting time: 15 minutes

Baking time: 30 minutes

Equipment needed: 9” tart pan or pie tin, rolling pin
One quantity sweet shortcrust pastry (recipe follows)
Bench flour
250ml (1 cup - 8 oz) jam or curd, warmed for spreadability
One quantity frangipane (recipe follows)
One handful blanched, flaked almonds
Assembling the tart:
Place the chilled dough disc on a lightly floured surface. If it's overly cold, you will need to let it become acclimatised for about 15 minutes before you roll it out. Flour the rolling pin and roll the pastry to 5mm (1/4”) thickness, by rolling in one direction only (start from the centre and roll away from you), and turning the disc a quarter turn after each roll. When the pastry is to the desired size and thickness, transfer it to the tart pan, press in and trim the excess dough. Patch any holes, fissures or tears with trimmed bits. Chill in the freezer for 15 minutes.
Preheat oven to 400 degrees Farenheit.
Remove shell from freezer, spread as even a layer as you can of jam - I used raspberry with lotsa seeds - onto the pastry base. Top with frangipane, spreading to cover the entire surface of the tart. Smooth the top and pop into the oven for 30 minutes. Five minutes before the tart is done, the top will be poofy and brownish. Remove from oven and strew flaked almonds on top and return to the heat for the last five minutes of baking.
The finished tart will have a golden crust and the frangipane will be tanned, poofy and a bit spongy-looking. Remove from the oven and cool on the counter. Serve warm, with crème fraîche, whipped cream or custard sauce if you wish.
When you slice into the tart, the almond paste will be firm, but slightly squidgy and the crust should be crisp but not tough.
Note:

• You can use whichever jam you wish - doesn't matter what flavor. I used Smuckers Organic raspberry because it was my brothers and was a jam that was "wheated."
Sweet Shortcrust Pastry (pie crust)
Prep time: 15-20 minutes

Resting time: 30 minutes (minimum)

Equipment needed: bowls, box grater, cling film
8oz all purpose flour, 1oz sugar, ½ tsp salt, 4oz unsalted butter, cold (frozen is better),
2 egg yolks, ½ tsp almond extract (optional- I used vanilla instead), 1-2 Tbsp cold water
Sift together flour, sugar and salt. Grate butter into the flour mixture, using the large hole-side of a box grater. Using your finger tips only, and working very quickly, rub the fat into the flour until the mixture resembles bread crumbs. Set aside.
Lightly beat the egg yolks with the almond extract (if using) and quickly mix into the flour mixture. Keep mixing while dribbling in the water, only adding enough to form a cohesive and slightly sticky dough.
Form the dough into a disc, wrap in cling and refrigerate for at least 30 minutes
Frangipane
Prep time: 10-15 minutes

Equipment needed: bowls, hand mixer, rubber spatula
4.5 oz unsalted butter, softened,
4.5 oz icing sugar- I used regular refined sugar,
3 eggs, ½ tsp almond extract- again, I used vanilla,
4.5 oz ground almonds - mine where blanched, 1oz all purpose flour
Cream butter and sugar together for about a minute or until the mixture is very fluffy. Scrape down the side of the bowl and add the eggs, one at a time, beating well after each addition. The batter may appear to curdle. Don’t panic- it will be fine. After all three are in, pour in the almond extract and mix for about another 30 seconds and scrape down the sides again. With the beaters on, spoon in the ground nuts and the flour. Mix well. The mixture will be soft, and keep its slightly curdled look (mostly from the almonds).

I apologize for the crazy format of the font. Blogger is a little weird. I pasted in most of the post since it was already given to us Daring Bakers, as opposed to typing it out again - no way! - and this seems to mess up the normal font formatting.