Saturday, January 30, 2010

Monster "Smashies" (cookies)

Cookies are one culinary endeavor that are fun to experiment with, but also, easy to mess up. I love to experiment and make my own cookies but often times the result are not all that fruitful! I made these cookies two days before I journeyed back to school for my second semester of sophomore year. My inspiration was Kelly's monster cookie recipe. The soaked and cooked teff I had waiting on the counter was just calling to me to be turned into some ingenious cookie creation!

How could I resist? I didn't, and started throwing things together. And what's more fun than this - I made this recipe using one bowl and only one utensil to mix it with, a potato masher! Yes, go back and read that sentence. One bowl, one utensil. It's easy! The kids in your life will love helping you make these cookies.

They cooked beautifully in the oven and when they were all cooled and ready to be sampled I couldn't wait! My family and I all tried one and loved them! These are so tasty and they are packed with chocolate chips - the best part of any cookie! There are also mild hints of banana, walnut and raisin.

Monster Smashie cookies
makes about two dozen cookies

1/4 cup teff grain, soaked in whey and water for 24 hours, cooked and cooled - after this process the teff makes 1 full cup
1 medium banana
1 REAL egg
1/2 cup raw organic almond butter (roasted would probably be fine too)
1/3 cup organic maple syrup
5 drops stevia
1/4 stick REAL butter
2 Tbsp organic coconut flour
1/4 tsp sea salt
pinch xantham gum
~
1 cup organic raisins
1 cup chocolate chips (I use Enjoy Life - I will try cocoa nibs sometime!)
1 cup shredded coconut
1 cup walnut halves + pieces

To make your cookies:
1. Add teff and banana to a large mixing bowl. Mash together. Add egg and butter. Add maple syrup, stevia, coconut flour, salt, xantham gum. Mash, mash, mash.
2. Dump in the last 4 ingredients, your delicious mix-ins. Or mash-ins, as we should call them.
3. Use a cookie scoop to place them on 2 half baking sheets. Use your Silpats, they're lovely ;) or parchment paper of course.
4. Bake in a 350 degree oven for about 20 minutes or until golden brown on top. They do set more as they cool - don't over bake! These keep their shape, so either keep them in a ball from the cookie scoop, or flatten them out with a fork.
5. Cool, please-resist, before eating.
6. Eat and enjoy (hide them before the whole family eats them)... or wrap them in plastic wrap and put them in a large plastic baggy and take them to California with you. Oh, wait... that's what I am doing today!

Because as you read this I am probably flying on a jet plane back to California, don't despair! This does mean I will be extremely busy with all my new classes (when I get my final schedule I will update you) and that I probably will not be posting every week. Or every month. But I will try to post some things that I've had going in the mix - recipes that I've cooked and done photo shoots for but haven't quite made it to the site. I will miss you all. I do love blogging. Please pray for me and my semester.

Until the next update,
Meagan

Friday, January 29, 2010

Homemade Almond Joy Ice Cream


This recipe.

Heaven.

Unfortunately you will only get tempted by the picture, because if I gave the recipe away then I would have two boys in the house who would be very upset if they learned I have shared the recipe for our special Almond Joy ice cream. I wouldn't want to upset them, would I?

Imagine the best ice cream you've ever eaten... multiply times 10 or 100, and you've got it.

Ice cream has always been a favorite in our house, and now I feel better because when I make it I know how nourishing it is! It's so much better than store bought. I make the ice cream using ingredients like raw cream and organic coconut milk. Each scoop is full of nourishing and essential saturated fats!

Sorry about picture quality - it was at night so of course that means no natural lighting to take a photo! The ice cream on the bottom is my homemade chocolate peanut butter cup ice cream, which I will be sharing within the coming weeks!

Monday, January 18, 2010

Cinnamon Scones

My lovely brother has been begging for scones lately. And considering he gave me this pan for Christmas, the making of scones today (we are having another snow day) was unavoidable. He requested cinnamon scones especially so I sought out a recipe and went to work!

Cinnamon Scones
adapted from Chelsea Lincoln

1/2 cup organic coconut flour
1 cup sorghum flour
1/4 cup potato starch
1 cup organic cane sugar
1 Tbsp baking powder
1/2 tsp sea salt
2 tsp cinnamon
1 cup raw whole buttermilk
1/3 cup butter
turbinando sugar crystals, for sprinkling

To make your scones:
1. In a large bowl, combine all the dry ingredients.
2. Using a pastry cutter, work the butter into the flour mixture until it resembles small peas.
3. Pour in buttermilk and stir until moistened.
4. Spoon batter into a greased scone pan or cut into 8 separate scones and place on a baking sheet.
5. Bake at 450 degrees until the tops have browned and the scones do not feel overly puffed up in the middle.
6. LET COOL - if you try to eat one too soon it will crumble!

This recipe tasted amazing. My brother could not wait until breakfast in the morning, so I pulled out a still warm scone (that's why I know about the crumbling) and we all sampled a piece. G still eats wheat, so to see his face light up in reaction to the taste of this GF scone, it speaks volumes! We all agreed that this is definitely a great scone recipe. The recipe called for other various mix-ins. Try it with chocolate chips, lemon zest, raisins, coconut, nuts, dried fruit, or whatever you like best in your scones. Also, if you don't like your scones very sweet, decrease the sugar.

*Note- I was not happy with the way the scones cooked. I might decrease the oven temperature to 400 degrees and see what happens. Also, next time I will be adding some xantham gum to help hold the crumb together. When they are fully cool in the morning I will tell you if the crumbling is better. I will also upload a better photo!

1/20/10 - The scones are still crumbly. But as I anticipated, a completely cool scone comes out of the pan nicely (as long as they were greased). Next time, which will be soon since G only has 2 scones left, I will add some xantham gum and adjust oven times/temperatures. Unbelieveably (haha!), last night G ate the scone that I had prepped for this mornings photo shoot! So these photos are not as pretty as I wanted them, but as my mom always says "It doesn't matter what it looks like, it's all going to the same place anyway" - which is funny, but I must admit I do not entirely agree. Making a pretty presentation is fun! Look at the texture those scones!

1/28/10 - I made these scones again. I added a pinch of xantham gum, decreased the sugar by 1/2 cup and decreased the oven temperature to 400 degrees. They cooked for 20 minutes. End result: they did not crumble as much, they were less cinnamony, they were more dense and not as airy, and were less sugary. The no crumble factor is no doubt because of the xantham gum, yipee! That part is fixed. I think I decreased the sugar too much, I will probably do 3/4 cup sugar next time or add some stevia or honey; stevia for sweetness, honey for moisture. I do not know why they tasted less cinnamony - maybe I will up the cinnamon factor even more and do a whole tablespoon! I will also increase the oven temperature to 425 degrees, the puff factor of the scones was less than last time (the scones were more dense) so upping the oven temperature will help the scones rise more quickly. Stay tuned for this summer when I will have some time to finalize this scone recipe.

Friday, January 15, 2010

Bacon-Wrapped Chicken


What a long title! This yummy and nourishing meal is full of good fats and protein, it's sure to become a family favorite!

A few months ago I discovered an ingredient I believe everyone should have in their pantries - smoked paprika. Yes, smoked. I'll admit, it sounds scary at first, but in the hands of a good recipe, it is a bombshell of flavor. It will make you want to replace paprika with smoked paprika in all your recipes! Use restraint with this spice, however, because unlike some dried spices, a little goes a long way. The marinade/rub for this chicken is great and it makes enough for leftovers, which I now have in my fridge. It's perfect for when you need a quick homemade sauce quick, so don't be shy - make the whole batch. I actually halved the recipe from the original amount.

I made this recipe for dinner tonight. G was coming home from work and I wanted something extra special he would just love. We are all on different schedules, and he had not had a "real" homecooked dinner (besides homecooked leftovers from the fridge) for a while. He loves all protein and anything involving bacon in his world = good. I actually have to agree with him! Bacon is quite tasty. Up until a few months ago we never had bacon in the house. It was too "unhealthy" - full of saturated pork fat. But now that my mom and I have been learning about real food, we have bacon again. G and my Dad are very happy! Now we buy two types of bacon, a pork bacon for G, and a turkey bacon for me and mom because we would rather not eat pork. I used two bacons for this chicken - I wrapped mine in turkey bacon and G's in pork bacon, so feel free to use whatever bacon you fancy. They both work extremely well!

Smoked Paprika Roasted Chicken wrapped in Bacon (and stuffed with Cheese)
with spices from Elise

4 chicken thighs with bones and skin, or boneless chicken breasts with skin
1 package turkey bacon or pork bacon

1 Tbsp smoked paprika
1 Tbsp honey
1 1/2 tsp fresh squeezed lemon juice from organic meyer lemons
1 1/2 tsp Tbsp softed real grassfed butter
1/2 tsp sea salt - I used himalayan
1/2 tsp garlic powder
1/4 tsp pepper

cheese of choice, I used aged cheddar cheese - I was all out of raw cheddar!

To make your smoked paprika chicken:
1. Take your chicken and turn them over so the skin is down.
2. If you have chicken breasts, make a slit in one side and stuff in two thick pieces of cheese. If you have chicken thighs like I did, make two slits along the bone and stuff in two chunks of cheese as much as you can. Carefully bring both sides of the chicken together and turn the chicken over.
3. Wrap the chicken with 1 to 3 pieces of bacon, however much is desired, making sure the ends stay tucked under the chicken.
4. In a small bowl, combine spice ingredients. Fold together with a spatula and spread a small dollop on top of each bacon wrapped piece of chicken. Get messy - using your hands (you could use a pastry brush as well) rub the marinade all over the chicken making sure to cover all possible spots on the chicken, not only the top.
5. Place chicken in a large glass casserole dish and roast covered with tin foil at 350 degrees for about an hour. Take chicken out and baste with juices. Then for 15 minutes increase to 375. Finally, take off the foil and roast at 400 degrees for a final 15 minutes or until the chicken is cooked through and the bacon is lightly browned. Remove from the oven and baste with juices before serving. Serve warm with roasted brown sugar and buttered carrots and oven roasted yukon gold potato fries.
6. Enjoy!

G so enjoyed this recipe, as did I. I will definitely be making this again but will use chicken breasts so I can add bacon inside and more cheese. The cheese in my chicken melted and added to the chickens flavor and moisture, and also the outside juices - but it did not stay cheesy in the chicken. It was still good though!

In the photos - the double wrapped is pork bacon, the single wrapped is turkey bacon. Also, that is Annies organic ketchup (which beats Heinz in any taste test, I've done it with my friends and family, you'll be surprised with the results!) and Guldens dijon mustard with some goat and sheep feta from Whole Foods. Not in the picture, there was some local kimchi on the side! Such a tasty meal! It surely will become a staple in the family food rotation!

Wednesday, January 13, 2010

Boston Baked Beans

Before you scroll down and see the recipe let me just tell you from the get-go. This is not a traditional recipe for Boston Baked beans. I am from New England. And because I am I can take certain liberties with certain regional traditional dishes.

Also let me tell you that I've never made any sort of baked beans in my life. I knew I wanted some of these for dinner. See, I grew up having the canned baked beans. They were good. Everyone loved them. Even though Boston is nigh two hours away, no one really questioned why we did not have authentic Boston beans. We had canned beans that were good - so who cared?

My love of cooking and learning about my allergies has definitely changed what we eat. How could it not? We cannot go out and buy cream of chicken soup anymore to make that super-duper wicked easy to throw together casserole. Enjoying food at Christmas parties and church functions has gone out the window. But never have I been so happy. We eat real, fresh, whole unprocessed foods. What can get any better than that?

And seriously, if you haven't figured it out - processed food is soo overrated.

Boston Baked Beans
adapted from JustHungry

1 lb grassfed beef, browned
3 cans navy beans
1 Tbsp organic light brown sugar, packed
1 tsp: black pepper, ground ginger, ground mustard, cayenne pepper
2 tsp sea salt
2 medium sized red peppers, chopped very small
1 medium green pepper, chopped very small
1 medium vadalia onion, diced
4 slices raw/uncooked turkey bacon
2/3 cup molasses
4 cups water*

To make your baked beans:
1. In a crockpot, place all ingredients in and stir.
2. Turn on high for at least 4 hours.
3. Turn on low or warm and simmer until ready to serve.
4. Serve hot with brown or white basmati rice, veggies and real cornbread.

*This dish is not thick - it is more like a soup, so use less water if you want less sauce.

My family LOVED this recipe and said, "I hope you wrote down what you did so you can make it again." I must confess that sometimes I create a dish in the kitchen and do not write it down. Then sometimes they like it and request it again. I can usually remember nearly all the ingredients, but usually am missing some! That doesn't exactly work if we want to have the recipe again!

Thursday, January 7, 2010

Banana Cake


Banana cake. Everyone needs to have a recipe. Why? It's good, and if you've never had some you won't really understand. Like bananas? Try it! Don't like bananas? Try it! It's like an amazing win-win situation.

It tastes like: bananas and goodness. It is sweet with a gooey cake texture. You will not believe that this cake is not only nourishing, but good for you!

This stuff is so good I almost died. Enough said.

Banana Cake
    makes one 9x13 pan

Cake:
  2 1/2 cup  mashed bananas
  1/2 cup  organic coconut oil
  1/2 cup  organic maple syrup
  10-12 drops  liquid stevia
  3  REAL eggs
  1/2 cup  organic coconut flour
  1/4 cup  sorghum flour
  1 tsp  baking soda
  1 tsp  baking powder
  1 tsp  sea salt
  pinch  xantham gum
  1-2 tsp  cinnamon

Topping:
  2 Tbsp  grassfed butter
  1/2 cup  ground walnuts
  2 tsp  organic cane sugar
  2 Tbsp  packed organic light brown sugar

To make your banana cake:
     1.  Preheat the oven to 350 degrees and grease a glass 9x13 pan. I like to use left over butter wrappers or Misto olive oil spray.
    2.  In a large bowl sift together dry ingredients.
    3.  In a small bowl, mash bananas with a potato masher. Add maple syrup and stevia.
    4.  In another small bowl beat eggs.
    5.  To the large bowl with dry ingredients, add wet ingredients: mashed bananas, eggs and melted coconut oil. Fold together with a spatula until combined.
    6.  To make the topping - place all ingredients in a bowl and use your fingers to smoosh the butter into the sugar and walnuts to make a crumbly mixture.
    7.  Pour batter into prepared pan and sprinkle with walnut topping.
    8.  Bake at 350 for about 30 minutes or until the top has set and a stick inserted through the cake comes out clean. Let pan + cake cool on a wire rack overnight. Eat for breakfast the next day. Restrain eating it all yourself.

Look at the texture. I pulled apart a corner of it so you could really see the yummy banana insides. Well, actually the cake was like that when I got there. Someone was having fun with the cake or eating it or something. And as you can see, it's almost gone. We all definitely did that.

Like I said before, this cake is so good I almost died. I almost died yesterday at breakfast, and the day before, and today. Almost dying when it comes to baked goods is good. Very, very good. Unless it's your neighbor dropping a piano on your head from the 40th flour because the burned cookie smell is drifting into his window. That is not advised.

Cherry and White Chocolate Scones

Baking for others is one thing I truly enjoy. Each summer I am able to bake for many special people near and dear to my heart. One of those special people is my brother. His summer job always kept him on the run so I make him cookies and peanut butter and jelly sandwiches, leaving them in the fridge for him to grab whenever he has a spare moment to eat. One of his favorite breakfast bread options are scones. When I found this recipe over at David's, I couldn't help but pass it up.

These scones are very easy to make and bake up beautifully. I apologize that this is not a gluten free recipe, but by subbing your favorite GF flour blend I am sure it wouldn't be too far of a stretch for it to be a lovely gluten free recipe as well. G gave me a scone pan for Christmas, knowing all along that I would have to use it. Next time, however, he will have to eat some gluten free scones, since I will not mix a wheat and gluten free pan.

adapted from David Lebovitz
makes over a dozen good sized scones

1 REAL egg
1/2 cup cream (raw is best)
1 1/3 cup wheat pastry flour
1/3 cup buckwheat flour
1/3 cup stoneground cornmeal
1/3 cup organic cane sugar
2 1/2 tsp baking powder
1/2 tsp sea salt
6 Tbsp grassfed butter, cold and in cubes
1 cup white chocolate chips
1 cup chopped cherries

To make the scones:
1. Preheat you oven to 400 F degrees.
2. In a small bowl, whisk together egg and cream.
3. In a larger bowl, whisk together dry ingredients.
4. Using a pastry cutter, work the butter into the flour mixture until it resembles small peas.
5. Add the egg/cream mixture and stir until combined.
6. Fold in chips and cherries.
7. In large spoonfuls, spoon the scones out onto a lightly greased cookie sheet until desired size is reached, or press into a scone pan. Dough will be sticky.
8. Place into the oven and bake for about 25 minutes or until scones are golden brown.
9. Allow to cool or enjoy a few right from the oven!

I can't help but wonder what some chopped walnuts or macademia nuts would taste like in these. Scones have several elements of texture, however, and folding too many things into scones makes them loose their, err, sconeness. For those of you who are not inclined to white or dark chocolate, try stirring in some macademia nuts instead. These scones keep quite well in the fridge and they freeze well, too. Don't be shy about making a big batch!

Wednesday, January 6, 2010

Chocolate Chip cookies


Chocolate chip cookies have to be one of the greatest cookies of all time. Their wonderfully buttery-chewy-gooey insides are incased in a crispy layer of fantasticness (I'm a blogger, I reserve the right to make up my own words. Look for it in next years copy of Webster's.) on the outside, protecting the good stuff (chocolate, duh!) from the elements of the hostile outside world. This cookie's sole purpose is to take up residence in your mouth. Dancing on your taste buds. Moving down your esophagus by peristalsis (I'm a human biology major - I couldn't resist) into your stomach where they will make you warm and fuzzy inside. Chocolate chips for pleasure, and butter for lasting joy. Classic. Yummy. How could you ever describe such a cookie?

Until this past summer I had not attempted to make a gluten free chocolate chip cookie. I was scared of failure, scared to make something that would not live up to it's exceedingly high expectations. Chocolate chip cookies must always be perfect. The greatest American tradition should be respected, not baked to failure. After making these I realized - Oh goodness, why did I wait?

(Later I feel especially embarrassed because you can have failures and failures of batches of cookies in the safety of your own kitchen where you don't have to tell anyone that you ate all the screw ups. We don't want to be wasteful!)

I did not actually do what I just said above. Those of you who do, don't feel bad. Try exercising some self restraint next time. Breathe, sit down, and realize that instead of eating all those cookies you could have crushed them up and made this.

These gluten free chocolate cookies were excellent! I didn't even tell people that they were gluten free, and the plate was inhaled before you could count to ten. Victory.

I decided to use the recipe on the back of the Nestle chocolate chip package because I thought why mess with something that's been tested for years? The fact that Nestle has probably already developed recipe perfection since it's on the packaging means the recipe must be good. All I did differently was exchange the wheat flour for a combination of gluten free flours. For my first attempt gluten free chocolate chip cookie, I am immensly satisfied. Not quite perfection, but close to it. Just look at the texture! Imagine biting into it.

Now throw off the guilt of those holiday sweets, grab your nourishing grass fed butter and go make these cookies!

Original Nestle Chocolate Chip cookies
adapted from the back of a Nestle package
makes about four dozen?

1 cup oat flour (grind your own with GF oats!)
1 cup sorghum flour
1/4 cup buckwheat flour
Or, instead of above use 2 1/4 cup of your favorite GF mix
1 tsp baking soda
1 tsp sea salt
1 cup or 2 sticks grass fed butter
3/4 cup organic cane sugar
3/4 cup organic brown sugar, packed
1 tsp vanilla extract
2 REAL eggs
2 cups chocolate chips, I use Enjoy Life
1 cup chopped nuts, optional

To make the cookies:
1. Preheat the oven to 375 degrees non-convection, or 350 degrees convection.
2. Combine dry ingredients in a small bowl.
3. In another medium sized bowl, beat together butter, sugars and vanilla until creamy.
4. Add each egg separately, beating well after each addition.
5. Gradually beat the dry ingredients into the wet ingredients.
6. With your handy-dandy wonderfully useful cookie scoop, scoop out the batter in tablespoons and onto ungreased baking sheets.
7. Place into the oven and bake for 9-11 minutes or until golden brown - don't over do it, cookies are better under done then over done.
8. Cool and enjoy! Be sure to share with loved ones!

There are several variations to the taste, texture and process of making chocolate chip cookies. Everyone seems to have their favorite recipe! What is yours? Feel free to post a link in your comments and we will all share our favorites.

In the meantime, these are some recipes have caught my eye:


Tuesday, January 5, 2010

What to do with soured Raw Dairy products?

Have you ever bought some raw milk and cream from your lovely local farm and gotten so busy that you could not find the time to eat or use it up? It is too expensive, not to mention nourishing to waste... So what is one thing that you can do with soured raw milk cream? You turn it into a breakfast cake! The cake in the pictures are my attempt at making a date-nut-coffee-cake-like gluten free breakfast option, while not wasting cream! The top has a lovely dry flaky layer (like the top of box brownies) while the inside has a layer of cinnamon, nuts and dates. This coffee cake (sans the coffee) is certainly a work in progress. I don't believe the flavors are quite there yet, but my mom loves the dry texture!

How do you use up your soured raw dairy products?

Monday, January 4, 2010

Grain-free Pumpkin Pancakes.


I have always had a little bit of a problem making pancakes. I try and experiment with my own recipes, but they usually fail miserably, something I am definitely not used to! Needless to say that now whenever I make pancakes I find a recipe that I like and stick with it. Hopefully down the road I will be able to pioneer some of my own pancake recipes, but for now, I need help!

This mornings recipe comes from Kelly at The Spunky Coconut. She has some great ideas which you can try at her blog, and very nice cookbook(s) as well!


Grain-free Pumpkin Pancakes
    adapted from Kelly

    6  REAL eggs
    1 cup  organic canned pumpkin puree or homemade
    1/4 cup  grassfed whole raw milk or coconut milk
    1/4 cup  maple syrup or runny honey
    6 drops  Sweetleaf liquid stevia
    1 Tbsp  vanilla
    2 Tbsp  coconut oil or butter
    1/4 cup + 2 Tbsp  buckwheat flour (can use coconut flour)
    1 cup  unblanched almond flour
    2 tsp  pumpkin pie spice
    1 tsp  cinnamon
    1/2 tsp  baking soda
    1/2 tsp  baking powder
    pinch xantham gum - optional
    butter - for greasing the pan

To make the pancakes:
  1.  Puree first seven wet ingredients in your food processor.
  2.  Add remaining six dry ingredients and mix in food processor.  These first two steps may also be done with a whisk, as long as you whisk well.
  3.  Pour batter into a bowl with a spout for easy pouring.  Be careful, the batter is delicious! ;)
  4.  Heat up your griddle to around 325 degrees and grease with coconut oil, misto or butter.
  5.  Pour batter onto the griddle and smooth around with a spoon.
  6.  The pancakes are ready to flip when they are bubbly and the tops do not look shiny anymore.
  7.  Top with warm blueberries, maple syrup, ground pecans, walnuts, ground flaxseeds and sliced bananas!
  8.  Enjoy!


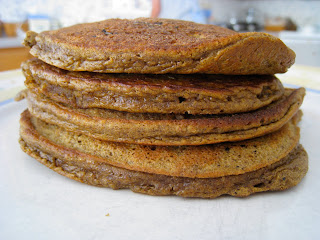
These pancakes were stellar! I couldn't believe the texture in Kelly's photo at first, but then when I made mine they really do look like the picture! They are very moist and fluffy, and the spices inside them make them aromatic and delicious. The almond flour in the batter also makes them a good source of protein! They kept me full and satisfied many hours later. I will definitely be making these again! 

-Update 1/10/10-
Kelly was kind enough to feature me on her blog! Check out what she said.

-Update 12/26/12-
I just made these with coconut flour instead of buckwheat flour (1/4 cup), didn't add any butter or coconut oil to the batter, used runny honey, and a pinch of xantham gum. They were delish! I was happy to not use the buckwheat, so now they are truly grain-free, paleo, primal.. etc. 


Happy pancake making!

Saturday, January 2, 2010

Peppermint Bark


For Christmas this year, I made my brother G some peppermint bark. I got the idea after I received a curious email in my inbox from him with a link to a peppermint bark recipe online. I had planned on making him some sort of Christmas treat and giving it to him under the tree, but I ran out of time before Christmas day, so I ended up making it a few days later. After seeing his idea, I could not help but make his exact request!

Peppermint bark
adapted from Rita Heikenfeld

12 oz semi-sweet chocolate chips (use good quality chocolate, Ghirardelli or better)
11 oz white chocolate chips (same as above)
1/2 tsp peppermint extract (not the fake colored kind)
6 or 7 white + red peppermint candy canes, crushed

To make the peppermint bark:
1. Line a 9x13 pan with tin foil, pressing it down and into the corners.
2. In a double boiler, melt chocolate chips.
3. When all but a few chips are melted, remove chocolate from heat and stir, melting the final chocolates.
4. Pour into the bottom of the pan and smooth with a spatula.
5. Place pan into the refridgerator to cool.
6. In a double boiler, melt white chocolate chips.
7. A good 5 minutes before the white chocolate is done, remove the first chocolate layer from the fridge and allow to sit on the counter.*
8. While waiting for the white chocolate to melt, unwrap candy canes and place into a plastic baggy. Beat with a heavy ladle or mallet until they are crushed to bits but not a powder.
8. When all but a few chips are melted, remove white chocolate from heat and stir, melting the final chocolates. Be gentle with the chocolate. Since white chocolate isn't real chocolate (many brands have no cocoa butter content) it is very finicky.
9. Stir in peppermint extract.
10. Pour white chocolate on top of the first chocolate layer and spread carefully with a spatula.
11. Immediately sprinkle peppermint bits on top of the white chocolate layer and press in with your fingers.
12. Return pan to the fridge to set. In about a hour take out chocolate and allow to sit out for about 20 minutes. Now the chocolate is ready to cut. Lift out the chocolate by grasping the foil. Place on a cutting board and cut evenly with a knife into desired size.
13. Place your pretty bark into baggies or Christmas tins and distribute to friend and family, or hoard it all to eat yourself.

*Failing to do this prevents the white chocolate layer from adhering to the first chocolate layer; when you cut into it the white chocolate layer will separate from the chocolate layer. Instead you want both layers to stick together so you have one batch of bark with both layers intact. Trust me, don't skip this step.

He deemed it so delicious that I chose to make it for gifts for friends and family. It is very important the exact process be followed for success. Enjoy your bark!

Friday, January 1, 2010

Homemade Vanilla Ice Cream.


Happy 2010 everyone!

The recipe for this lovely ice cream actually comes from a fellow food blogger who adapted Sally Fallon's famous raw milk ice cream recipe from her book Nourishing Traditions. It was originally suited for an ice cream maker that makes only 1 1/2 quarts of ice cream, but both Kelly and I have the same ice cream maker, which makes a full 2 quarts of ice cream.

I made this recipe several times this summer since I asked for the ice cream maker as an early birthday present. I wanted to be able to use the ice cream maker during the summer before I went off to school. Mom and Dad agreed, and later everyone reaped the benefits because I made several batches of all kinds of flavors of ice cream!

The very first one I attempted was vanilla. It is so delicious!

    recipe from Kelly

    4  egg yolks - grass-fed from our local farm
    2/3 cup  real maple syrup
    4 cups  raw heavy cream
    2/3 cup  raw whole milk
    3 Tbsp  vanilla extract
    1 1/2 Tbsp  arrowroot starch
    dash  unrefined sea salt

To make your vanilla ice cream:
  1.  In a large bowl, whisk together egg yolks, arrowroot, maple syrup and sea salt.
  2.  Then pour in your heavy cream and milk into the same bowl and whisk vigorously.
  3.  Pour into your ice cream maker per manufacturer's instructions.

Ice cream making tips:
  1.  Have all of your ingredients very cold. Usually taking the cream and milk from the refridgerator is fine, but for some extra quick freezing action put them into the freezer while you are assembling the other ingredients.
  2.  Don't take out the frozen ice cream bowl until you are ready to pour in your ingredients and start churning.
  3.  Insulate the top (there is a hole) by covering the ice cream maker with a "tin foil hat." This keeps the cold in and your ice cream will freeze up much quicker, around 20-25 minutes. I've found that not doing this increases churning time.

This ice cream is perfect with some homemade chocolate sauce and fresh whipped cream! It is also quite versatile, since its vanilla, so try folding in your favorite ingredients... blueberries, chocolate chips, peanuts - whatever you like.

I am sorry for the lack of pictures... I never got a chance to snap some before we ate it up! After playing with this recipe a little more, I've adapted my own French Vanilla Ice Cream recipe, which is now my go-to recipe as the base for all my ice cream endeavors. Go there for some pictures! Or do you want some chocolate? Try this out.

You won't be able to keep this ice cream in the freezer!