Monday, June 28, 2010

Basic Dressing


A good salad dressing can sometimes be the one thing between you and a good salad. While I don't mind eating my salads "dry" (most dressings have soy oil), I've found that I tend to enjoy and be more satisfied with my salad if I really enjoy the dressing.

[Photo credit: Amazon.com]

I recently pulled out one of my favorite books, the Versatile Vegetable, a Body Ecology book, which I received for Christmas two years ago. I love Donna Gates and the principles behind BED are very important for good digestion. If you haven't heard of her I urge you to pick of one of her books, lectures or browse the website. There is so much good information there!

Inside the book there are several GREAT vegetable recipes for every kind of vegetable you can think of! There are also several sauces and dressing recipes too. My search for a good basic salad dressing with no yucky ingredients has ended. I found it here!

Basic Dressing
adapted from the Versatile Vegetable

1/2 cup olive oil
1/2 cup apple cider vinegar
2 Tbsp flaxseed oil
1/2 tsp sea salt
1/4 tsp black pepper
other spices as desired - I like kelp flakes, garlic and onion powder, cayenne pepper

To make the dressing:
1. In a glass measure, add ingredients one by one.
2. Whisk well until ingredients are fully incorporated.
3. Pour into a salad dressing jar and refrigerate.
4. Pour liberally over every type of vegetable salad! Enjoy.

Unfortunately, the picture isn't the greatest. In my house we try to reuse things, especially glass bottles. Here is an old salad dressing bottle which we kept (but threw away the industrial oil laden dressing) and now it holds our real salad dressings. As you can see it still has the label gunk on it. Separation is natural. Be sure to shake well before serving!!

Sunday, June 27, 2010

French Vanilla Ice Cream.

Have you ever wondered why some recipes are so complicated? I like to read a lot of food blogs (or glance at a lot at least), and I find myself becoming very excited about the featured recipe as I see the first, second or third photo. Then I find myself scrolling down the page as fast as I can, my eyes are glued to the screen, in a state of all-out anticipation as I wait to find out the first few ingredients of the recipe. A long ingredient list, complicated measurements, or too many steps and long prep time often strike those feelings dead, however, and that will be the end of that recipe.


All that to say, I love uncomplicated recipes. In January, I shared with you my favorite vanilla ice cream. Now that it's summer, I'm back to cranking out ice cream recipes again. As I read other cookbooks and food blogs, however, I notice that most ice cream recipes are too complicated. It requires tempering eggs, boiling milk, chilling the mixture for hours, unnecessary amount of churning, etc. Because I don't believe it is healthy to eat heated milk (raw milk is best) and I am not afraid of raw eggs (eggs from a healthy source shouldn't be worrisome), I find a lot of these recipes annoying. The picture may look downright delicious, but I just can't get by the process. I'd rather have an ice cream that tastes amazing, made with real ingredients that does not a very long time to put together. 

That being said, here is my homemade vanilla ice cream recipe now updated. I've dubbed it french vanilla ice cream this time around because the color, taste and texture remindes me just of a french vanilla version of vanilla. What's the difference between french vanilla versus regular vanilla ice cream? French vanilla uses eggs and has a more custardy taste and texture, whereas vanilla and vanilla bean versions are usually less creamy, more icy, often do not use eggs, and have tiny black vanilla bean flecks throughout.

This has become my go-to ice cream recipe! By keeping the basic ratios the same, it's easy to make many many different flavors! Yumm!


French Vanilla Ice Cream.
    adapted from Nourishing Traditions, by Sally Fallon
    4 cups  raw grassfed organic jersey cream (or 2 cups cream, 2 cups raw whole milk)
    2/3 cup  raw grassfed organic jersey whole milk
    2/3 cup  organic maple syrup
    4  egg yolks from pastured chickens
    2 tsp  organic coconut flour
    8  drops vanilla creme liquid stevia
    3  good dashes unrefined sea salt

To make your ice cream:
  1 . In a large bowl, crack egg yolks, add coconut flour and whisk until combined. Add milk, maple syrup, salt and stevia and whisk well.
  2.  Lastly, pour in four cups of cream, whisking very well to make sure there are not lumps.
  3.  Pour into your ice cream maker and freeze per instructions. Mine churned for 25 minutes and was done!


After sampling some after taking the picture, this ice cream would probably make a good "eggnog" ice cream (after adding fresh ground nutmeg). Look at the yellow color!! That comes from real milk and real eggs ;)


Saturday, June 26, 2010

Nourishing Protein Bars 1.0


I've been looking for a nourishing protein bar recipe for a while now. Most versions out there seem to be loaded with sugar, grain-based, or have other questionable ingredients. My search ended when I found this recipe!

I cannot say enough about these bars, or eat enough of them! They are quite tasty. My mom and dad tried them also and deemed them delicious. I will definitely be making these again and again and again. My mom and I have actually caught each other going back for seconds on these bars when we've already had a big enough sample. They are that good! And I usually have great amounts of self control.

I have a friend who recently asked me about finding an easy breakfast option for her on early morning trips to the hospital for clinicals, since she is a nursing student. These are a perfect option for her and others like her who are constantly on the go! They are easy to make up and you can save the whole batch in the fridge, just cut and eat as needed! They can easily be frozen as well. For easy packaging, cut up into squares and place in snack baggies or plastic wrap.


Nourishing Protein Bars
    adapted from Passionate homemaking

    2 cups  raw almonds
    1/4 cup  ground golden flaxseed
    1/2 cup  pitted dates
    1/2 cup  organic unsweetened coconut flakes
    1/2 cup  organic raw almond butter
    1/2 tsp  unrefined sea salt
    1/2 cup  organic coconut oil, melted
    1-2 Tbsp  organic maple syrup
    2-3 tsp  vanilla
    1 handful 100% baking chips, or 3-4 unsweetened chocolate baking squares, melted
    6 drops  vanilla creme liquid stevia (optional)

To make your bars:
  1.  Place almonds, flaxseed, dates, coconut, almond butter and salt in a food processor. Pulse to combine.
  2.  In a small sauce pan, melt coconut oil using LOW heat. Remove from heat and add vanilla and maple syrup.
  3.  Add melted oil mixture to the food processor and pulse/grind ingredients until it forms a coarse paste.
  4.  Scoop out the mixture and press into an 8x8 pan. Chill in the fridge for an hour or until hard.
  5.  While the mixture is in the fridge, melt chocolate in a double boiler, add stevia when finally melted. Remove pan from the fridge and pour chocolate mixture on top. Smooth out and pop back into the fridge. Cut and serve when chocolate is hardened.

I suggest keeping this in the fridge or the chocolate might melt in the summer heat!

Enjoy!

Wednesday, June 23, 2010

Organic French Dressing


Recently I've been dying to try several french dressing recipes that I've been eyeing. Today I was finally in the mood to break out and make some, but I couldn't bring myself to use any of the recipes I found (making your own is much more fun), so I just used them for inspiration in the back of my mind instead. I am really happy with the end result so far. It is currently sitting out on the counter for a few hours to let the lacto-fermented juice from the pickle jar do it's work before I place it into the refrigerator.

This recipe is super creamy and has a nice spice to it. Give it a try and tell me what you think.

French Dressing

4 Tbsp organic tomato paste -  I used Muir Glen
3 Tbsp mayonnaise - Wilderness Family naturals, or make your own homemade
2 Tbsp organic maple syrup
3 Tbsp juice from the pickle jar - I used Bubbies brand
3 oz organic and raw apple cider vinegar - Bragg's
7 oz organic olive oil
1/4 tsp organic garlic powder
1/2 tsp organic onion powder
3/4 tsp sea salt - I use Celtic sea salt
1/8 tsp kelp flakes
1/8 tsp black pepper

To make your dressing:
1. Place all the ingredients in a small glass bowl.
2. Mix together with a whisk until spices are well distributed and the mixture is opaque.
3. Pour into your favorite salad dressing jar and let sit out on the counter for a few hours.
4. Refrigerate and use on luciously delicious green salads!

Here are some other good recipes which helped inspire mine:

Lexie's french dressing


Enjoy your delicious salad!

Saturday, June 19, 2010

Satisfying Real Food at Home


Since I've been back home I've had the pleasure of being able to cook again. It has been so nice just to putter around in the kitchen and create simple dishes from scratch. My mother loves it when I come home, too. We have a special arrangement. When I am home, I cook, and she does the dishes. For me, a girl who doesn't particularly care for doing dishes, this works out perfectly. And Mom agrees.

I've also been busy adjusting to my new schedule at the bakery. Re-teaching my body to an earlier than early wake up schedule has not been easy. 4:30 AM comes really quick, no matter if you take a hour and a half nap the day before and go to bed at 8:30 PM. It's getting easier though, and things are looking up.

I thought I would share with you two meals that I recently made which were quite delicious, full of nourishing real food, and satisfying. Meals are simply aren't worth it if they are not satisfying. This is something I've been discovering lately. And most importantly of all, real food is satisfying. Eat something nutritious, loaded with proteins, fat, vitamins and minerals. Listen to your body. Our bodies are very smart, and will tell you what they need.

Simple Baked Eggs
1 ramekin
olive oil
1 large handful spinach
1 real egg
s + p
manchego and parmesan cheese

To make your simple baked egg:
1. Brush the sides of the ramekin lightly with olive oil.
2. Take the spinach and squish into the ramekin, making a hole in the middle for the egg.
3. Crack the egg inside the space and sprinkle with salt and pepper.
4. Grate cheeses on top.
5. Bake at 400 for about 10 minutes, and then turn the broiler on and bake for about 5 minutes or until egg white is cooked and tops are bubbling and golden brown with cheese.

I ate my egg with some guacamole and ketchup on the side, along with roasted carrots and asparagus, while my mom ate hers with cauliflower mash (her favorite) and roasted carrots and asparagus. It was so satisfying!


When making gluten free pizza, I simply use Namaste pizza crust mix (it's so easy) and top with a variety of toppings. The pizza always has two halves (the girl side for me and Mom, and the boy side, for Dad and my brother G if he is home). This particular pizza showcased several lovely toppings. Our half had: baby spinach, vadalia onion, brussel sprouts, pineapple chunks, feta, parmesan, mozzarella and raw cheddar cheese, while Dad's half had: mozzarella, cheddar, parmesan and a little bit of feta cheese, bacon, grassfed ground beef, and pineapple chunks.

I hope you enjoy these real food ideas!

-Update 2/23/10-
I almost forgot to share the fish tacos I made! See the photo at the top. These are made with organic sprouted corn tortillas filled with baked wild Chilean seabass (soo buttery), peppers, onions and feta cheese, with guacamole and fresh cut pineapple on the side. It was a wonderful California mexican lunch!

Friday, June 18, 2010

Red Vegetable Soup


Waiting to share this recipe with you has been agonizing! The original post was actually created on April 8th! I did not have lots of time over the school year, and so I am finally posting up this wonderful dish. This recipe is probably one of the simplest dishes I have ever made, and yet it is extremely flavorful. It stands as one of my most favorite meals I have ever had. I love this soup! I know you will too.

I created the recipe when on vacation in La Jolla over spring break. It was an instant hit in our family. I vowed to make it went I returned home, I did, and it was just as tasty as before! I made up a ginormous batch last week and had it with extra pulled roast chicken for dinner each night before my early morning bakery shifts. It was nice and easy on the tummy, satisfying and so delicious. [Notice the yummy crispy roasted chicken skin in the picture.]


Roasted Chicken and Roasted Red Vegetable Soup

3 large sweet potatoes, washed and quartered
2 large red peppers, washed, seeded and halved
3/4 large vidalia onion, peeled and quartered
1 bag of organic carrots, cut off ends and washed

1 small fresh chicken
4 cups chicken stock
olive oil as needed
real butter as needed
salt
pepper

To make your soup:
1. Open chicken from bag, rinse well with warm water. Take out the giblets/organs and set aside.
2. In a large roasting pan (for oven), place chicken in the center and cut up veggies around the chicken on the sides.
3. Sprinkle the chicken liberally with salt and pepper. Pour olive oil over the top and rub into the chicken, top and bottom.
4. Arrange the red peppers so that they have the skins down and the insides facing up, making a cup shape. Place the rinsed giblets inside.
5. Drizzle veggies with olive oil, and sprinkle with salt and pepper.
6. Bake uncovered at 350 for 30 minutes, then add about a cup or more of chicken stock and cover, roasting until vegetable are tender and chicken juices run clear.
7. Remove pan from the oven, let the chicken rest in a separate dish lightly covered with foil for about 10 minutes as you prepare the soup.
8. On the stove top, bring remaining chicken stock up to a simmer on medium heat. Take the cooked vegetables and place into a food processor, blender or Vitamix and process in batches until totally pureed. [You can also place all the cooked vegetables right into the pot with the stock and use a hand blender, I think this method works best.] Add 2-4 Tbsp of butter, and salt and pepper to taste to the soup and simmer until ready to serve.
9. Uncover the chicken and break it down, separating the wings, thighs and cutting off the breast meat. Save the bones for making stock later and remove as much of the meat and fat from the bones as possible. Be frugal!
10. Serve the soup in bowls, with chicken on the side. Or if you prefer, you can shred the chicken further and stir it into the soup.


This picture is from our stay in La Jolla. I served the soup and chicken with roasted spaghetti squash and some local gluten free cornbread. I was more than satisfied, however, with just soup and chicken.

Be sure to serve this soup with lots of real butter, because the good fats in the butter help you absorb all of the nutrients from the vegetables, like fat soluble vitamin A.

One final note: This is a thick, pureed soup. For a thinner consistency, add more chicken stock, water or raw cream.

-Update 2/23/10-
Here are the most recent photos of the version I made when I was at home.

Monday, June 7, 2010

Where I've Been.

Greetings!

Oh, how I have missed blogging. It's crazy that I haven't posted anything since March? Where did all the time go?

As most of you know I have been studying alot, and therefore blogging (and several other things) go on the back burner. But it's summer and I can now officially say I am back! My week of final examinations started on May 24th. I had 3 finals on Monday, and 2 on Tuesday and then I was finished. It was a different finals week this time around, as it didn't really feel as if it really was finals week. Odd way of describing it, I know! It was over so quick and before I knew it I was trying to pack up my room, get it in storage and come on a plane home. PHEW. These past two weeks have been a BIG adjustment for me!

Because it's summer, that means I can blog THAT much more, but I have a real job too! I am working at local bakery in town. In my application I told them that I have lots of personal experience with gluten free baking. In fact, I just completed my first "day" (I had to wake up at 4:30 to be there at 5:30) and they want me to do some gluten free and diabetic (sugar free) baking! As soon as I got to the back, however, it was apparent that there is NO way anything coming out of the kitchen could be gluten free, so I am going to be working and baking from home on some days, using my own pans, ovens and utensils in a gluten free environment so I know the goodies will be gluten free. It is going to be a big process to teach the staff some basic gluten free "ins and outs" but I feel like it is really going to work! :) I am really excited because this really helps my summer with flexibility. The hours that I log in at home can simply be put on my time card, and some ingredients he is just going to order me from the wholesaler.

For now, I am going to upload what happened while I was gone in pictures, because it's much more fun that way... ;)


The last time you officially "saw me" I was busy busy studying. Below is a picture of some yumminess I sampled on while writing a beast of an Abnormal Psychology paper. [Bad quality iPhone photo- sorry!] The above photo is obvious! I like to study study study. Bananas help my brain! And no, I did not eat all these at once ;)


And then, sometime in there between all that studying.. SPRING BREAK happened! My parents came out to visit me for over a week. We went to several fun places...

Since I am in the LA/OC area, we went to LA...

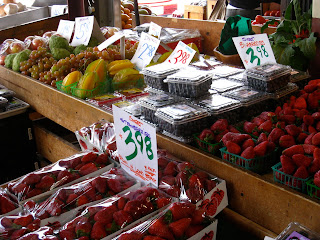
We visited the Grove and the LA Farmers Market. My mom and I had a delicious lunch of Brazillian food from Pampas Grill. It was our first time ever having Brazillian food, and it certainly will not be our last! We waited in line for what was probably a good half hour or longer. It was so worth it. Brazillian is my new favorite!! Notice the rotisserie beef, fresh greens, plantains, and hearts of palm and various spicy sauces. Above is my mom's plate, and below is mine. My dad (was typical) bought a gluten free pizza, scarfed it down and went and found the Apple store.


Yumm, sweet potatoes! Look at those berries and crispy, juicy apples!


And we went to Disneyland! No trip is complete without it :) We ate at the Storyteller's Cafe in California Adventure. After anguishing over all the options, I got a wonderful gluten free soy free chicken quesadilla prepared just for me by the chef. Disneyland is great for allergies, but you have to know where to go. My mom's chicken caesar salad came with gluten-free croutons, and my Dad got a gluten-free burger and fries. The salsa was SUCH a letdown though!


Then we travelled down to La Jolla, San Diego and stayed in a beach house for the week. It was really pretty. We took our beach cruisers [thank you to Rusty Spokes!!] for a ride in the morning for exercise and had fun shopping, relaxing, visiting the beach and trying some GF restaraunts that we didn't even know existed!!


One day Mom and I went shopping at the Las Americas Outlets in San Diego. For lunch we were adventurous and tried a small chain, family mexican restaurant called "Achiote" that looked promising (I had researched it before). The overall feel and decor reminded me of Outbacks! To be brief, the waiter was very helpful and the food was delicious too! She understood my gluten and soy allergies and helped us out in picking the right things off of the menu and made us feel very comfortable. Not the best mexican food in my life, but getting soy-free gluten-free mexican food is a rare find; soy is in everything. I was quite pleased! From the pictures you notice two types of homemade salsa, my carne asada meal with fresh tortillas and my mom's wonderful avocado, feta, chicken salad.


Another restaurant we visited (twice it was THAT good) was Sammy's Woodfired Pizza. I do a lot of restaurant research before I go anywhere; I love Yelp and Google and celiac.com. I had heard that Sammy's was a restaurant chain with a good reputation, reasonable prices, fresh food and great pizza. And they had a gluten free menu! My mom, dad and I just had to check it out. We did and it was so delicious. I was able to have a real gluten free and soy free pizza and even a CAESAR SALAD with dressing which usually never happens since usually all dressings have soy. The food was out of this world! My mom and I split a pizza (spinach, feta, onion, oh my!) and their smallest Caesar. Dad got his own whole pizza. These are pictures from our second visit.


We ate out at Sammy's, Achiote, a place called Lean and Green (no pictures!), and our probably one of our most favorite places to eat out, WHOLE FOODS MARKET! My mom and I always get boxes and load up on salad, veggies and fun dishes that you can not get anywhere else, eat half and save the rest for the next meal. My Dad really enjoys the "comfort food" bar. Each Whole Foods market is a little different, so it's fun to stop at each one! (We are addicted, and yes we do know :D) One reason we like Whole Foods is because it is safe. The chefs list all the ingredients for every dish or ingredient that is on the food bars. I can clearly see if it contains an allergen or not. The food is also mostly organic, sometimes local, but always fresh and delicious. No matter what food-mood you are in, Whole Foods has it.

The above shot is my food from Whole Foods San Diego.
The above photo is my food and below it is Mom's food, from Whole Foods Tustin, our first visit. Let me tell you now: GO there, but plan enough time to eat, because they have a CRAZY selection. Half the store is filled with their food bars!
Here are more Whole Foods Tustin shots...
They even have a WHOLE bar dedicated TO FETA CHEESE! I sampled every one (not made with cow's milk)!! It was really fun to have a little bite of each. I personally belief feta should be only goat or sheeps milk, mainly goat. I mean, why would you want a cow feta? Isn't the whole point of feta to be goat or sheeps milk cheese?

During vacation, while we did eat out some (which is fun because we as a family usually never eat out) but we ate a lot of our meals at the house. I got to cook a few simple, delicious meals. Some are totally great new creations that we will definitely be implementing into our normal family meal rotation!!

Roasted spaghetti squash!
Roast whole chicken with roasted red pepper vegetable soup (recipe coming soon) with roast spaghetti squash and lotsa yummy grass-fed butter. Below is spaghetti squash with gluten free pasta spirals, meat marinara sauce and sauteed brussels sprouts. Both the soup, marinara and chicken were probably some of the best I have ever tasted!

Before we knew it, the week was over and we had to leave La Jolla and go on with life! I went back to study study study and Mom and Dad flew home.

While we were apart for the final haul of the semester, interesting things were happening for both my family at home and for me at school...

My mom went to the farm and found the biggest egg I've ever seen (or eaten) in my life.


I went to Disneyland with friends, and ate at the Storyteller Cafe (again). Yay, chicken quesadilla! The best part was that I asked the chef if the guacamole could come without tomatoes, and he ended up specially making me no tomato guac! Delicious. I like tomatoes, but my body is sensitive to them so I try not to eat them as much as possible.


The cafe actually had some gluten free spaghetti!?! Wow.


One Wednesday night, me and some friends made the trek from campus to the Tustin Whole Foods, to get a foodie fix and of course, dinner at their fabulous food bars ;) my second visit! Yay for 5.99 per lb food instead of normally 7.99 per lb food! Notice the hUGe dollop (or two, or three... or four) of guac!


Then, on my way through the airport to board the flight home, the Sees Candy candy shop had THIS! I went in and talked to the girl working and apparently the owners have multiple allergies and so feature allergen free food. I picked up a box of Glutino crackers curious to see how much it would cost in an airport. The price was... 10 bucks, woah!

The access to gluten-free food is increasing. Things are looking up for us gluten freers :)

These past few weeks I've really enjoyed being home and have been adjusting to all the new things in life that I won't bother with here. I am happy and healthy and looking forward to keeping you healthy and happy this summer by sharing some yummy food ideas and recipes. I am also relishing the time to be able to continue to read all the real food information, health and nutrition books I can get my hands on. I have several books I was given for Christmas that I have yet to get to!

I hope you enjoyed this post. It's my longest to date!!