Friday, December 25, 2015

The Most Awesome Massaged Kale Salad.


A few months after getting on the "I love kale" band-wagon, I discovered just how great massaged kale salads taste. Also, they are incredibly easy to make. The massaging process only takes a few minutes, but is sufficient to break down the cellulose and other fibers in the kale, making the leaves more digestible and less chewy when eating. This version is super simple, and very customizable. I like to add parmesan cheese for a salty kick and an off-set to the slight bitterness of the kale leaf. But if dairy isn't your thing, feel free to leave it out.


The Most Awesome Massaged Kale Salad.
    serves 4-6 depending on your kale-love-level

    2 heads dino kale, stems removed, and cut into 1/4”-1/2” ribbons
    1/2 cup freshly grated parmesan cheese
    2 Tbsp tahini
    juice of one lemon
    1 Tbsp olive oil / drizzle of olive oil
    3 dashes nutmeg
    2 dashes cayenne pepper
    1 dash smoked hot paprika
    1/2 tsp red pepper flakes
    salt and pepper to taste

Directions:
  1)  Place kale in large bowl, add lemon juice, salt, pepper, and olive oil. Massage with bare hands for 3-5 minutes, until kale decreases in size by half and is soft and looks dark green.
  2)  Add parmesan, tahini, and spices. Mix thoroughly.
  3)  EAT and enjoy! This is even better the second or third day, but I doubt it will last you that long!

Feel free to add more heads of kale if you want to make a bigger portion, but you may have to adjust the amount of cheese and tahini; however, I've made this with 3 heads of kale and didn't add any more ingredients. It's that forgiving! The photos here are of the salad made with regular green kale, but I much prefer the dino kale, but both work and are equally delicious.

Possibly vegan, gluten-free, nutrient rich and delicious. Share it with all your family and friends. They’ll gobble it up! My family, friends and I surely did.

Xoxo,


Tuesday, May 19, 2015

Benefits of Coconut Flour.

Many of you readers (hello! long time no see!) know how much I loooove coconut flour.  Coconut flour has been such a great option for me, for many reasons, and I know many of you have learned the ins and outs of baking with coconut flour too and love it just as much as I do.

For those of you who are still on the fence, or just haven't hopped on the coconut train (it's a serious train that's been chugging very strong for several years now) then I'm here to convince you to give coconut flour a try.

My journey with coconut products began several years ago when I first learned about the paleo way of eating. Focusing on the paleo / primal template for my food choices was a great option for me, and during this time I discovered the awesomeness of coconut flour.

What makes coconut flour so awesome is mostly its nutrition stats, its affordability and its versatility. Today I'm here to tell you about why coconut flour is a healthy choice, so that will be my main focus, but I'll also touch on the other two points near the end.

Disclaimer - While I do have extensive training in nutrition, I am not a doctor, nutritionist or registered dietitian, so implement this information with your own discretion.


  Why I Love Coconut Flour 101

1) Contain healthy fats
- Healthy fats are so important for our bodies.  We need fat in order to make healthy skin, hair, and nails.  Fat is an essential part of our brains, as well as ALL our cell membranes which are basically a double stack of fat molecules, called a phospholipid bilayer.  Many sources of fat also contain cholesterol, which is an essential building block of almost all hormones.  Pregnant women need a higher intake of essential fatty acids (EFAs) in order to make the babies brain (most importantly).
- Coconut flour contains medium chain triglycerides (MCTs) aka medium chain fatty acids (MCFAs). You've probably heard about these before. What's great about MCTs is that they are metabolized very quickly by the body and so are used as an energy source right away, in contrast to LCFAs (long chain fatty acids) which need a more involved process in order to be broken down and utilized. MCTs are also very antimicrobial.
- Coconut flour is also rich in a type of fat called lauric acid, which along with MCTs, are very antimicrobial. Both together can help contribute to a healthy balance of body flora, on our skin and in our gut.
- In less than one ounce of coconut flour, it contains about 3 grams of saturated fat.
- It is also worth mentioning that coconut flour is low carb, which makes it a great alternative for those who medically need to choose a low carb diet, and for others who eat low carb diets by choice.
- Fats also contribute to feeling satisfied with the food you're eating, so you are more likely to stop eating and be satisfied with how much you've eaten, when you are feeling full.

2) Fiber content
- Many baking flours on the market are devoid of certain nutrients, and other properties like fiber, but coconut flour is NOT one of them! Coconut flour is rich in fiber, and if you've ever worked with coconut flour before you know that if not used properly, it will suck up all the liquid in your recipes and the end product will be very dry! That's because of all the fiber.
- In less than 1 ounce of coconut flour, there is 11 grams of fiber.
- Fiber is necessary in our diets because it is needed to detoxify hormones, to help move our bowels, and to feed the bacteria in our colons.

3) Protein
- Most flour products contain little or NO protein, but coconut flour actually does!
- In less than 1 ounce of coconut flour, there is 4.5 grams of protein.
- Both the fat, fiber, and protein contents of coconut flour make it very nourishing and satisfying at the same time. Making brownies or cookies or waffles with coconut flour will keep you full for hours, instead of lifting your blood sugar and crashing you down 2 hours later. Say good-bye to the blood sugar roller coaster. ;)
 

Many of my recipes use coconut flour - but these are some of my absolute favorites. They're also all grain-free! All the photos in this post feature recipes I've created using coconut flour.


I hope you all found this post to be useful, informative, and inspiring! Get baking ;)

Love to you all,
xoxo


I am wrote this post for Nuts.com because they are passionate about sharing information about healthy food!  It was good opportunity to join forces in order to spread information about making healthy choices.

Monday, January 5, 2015

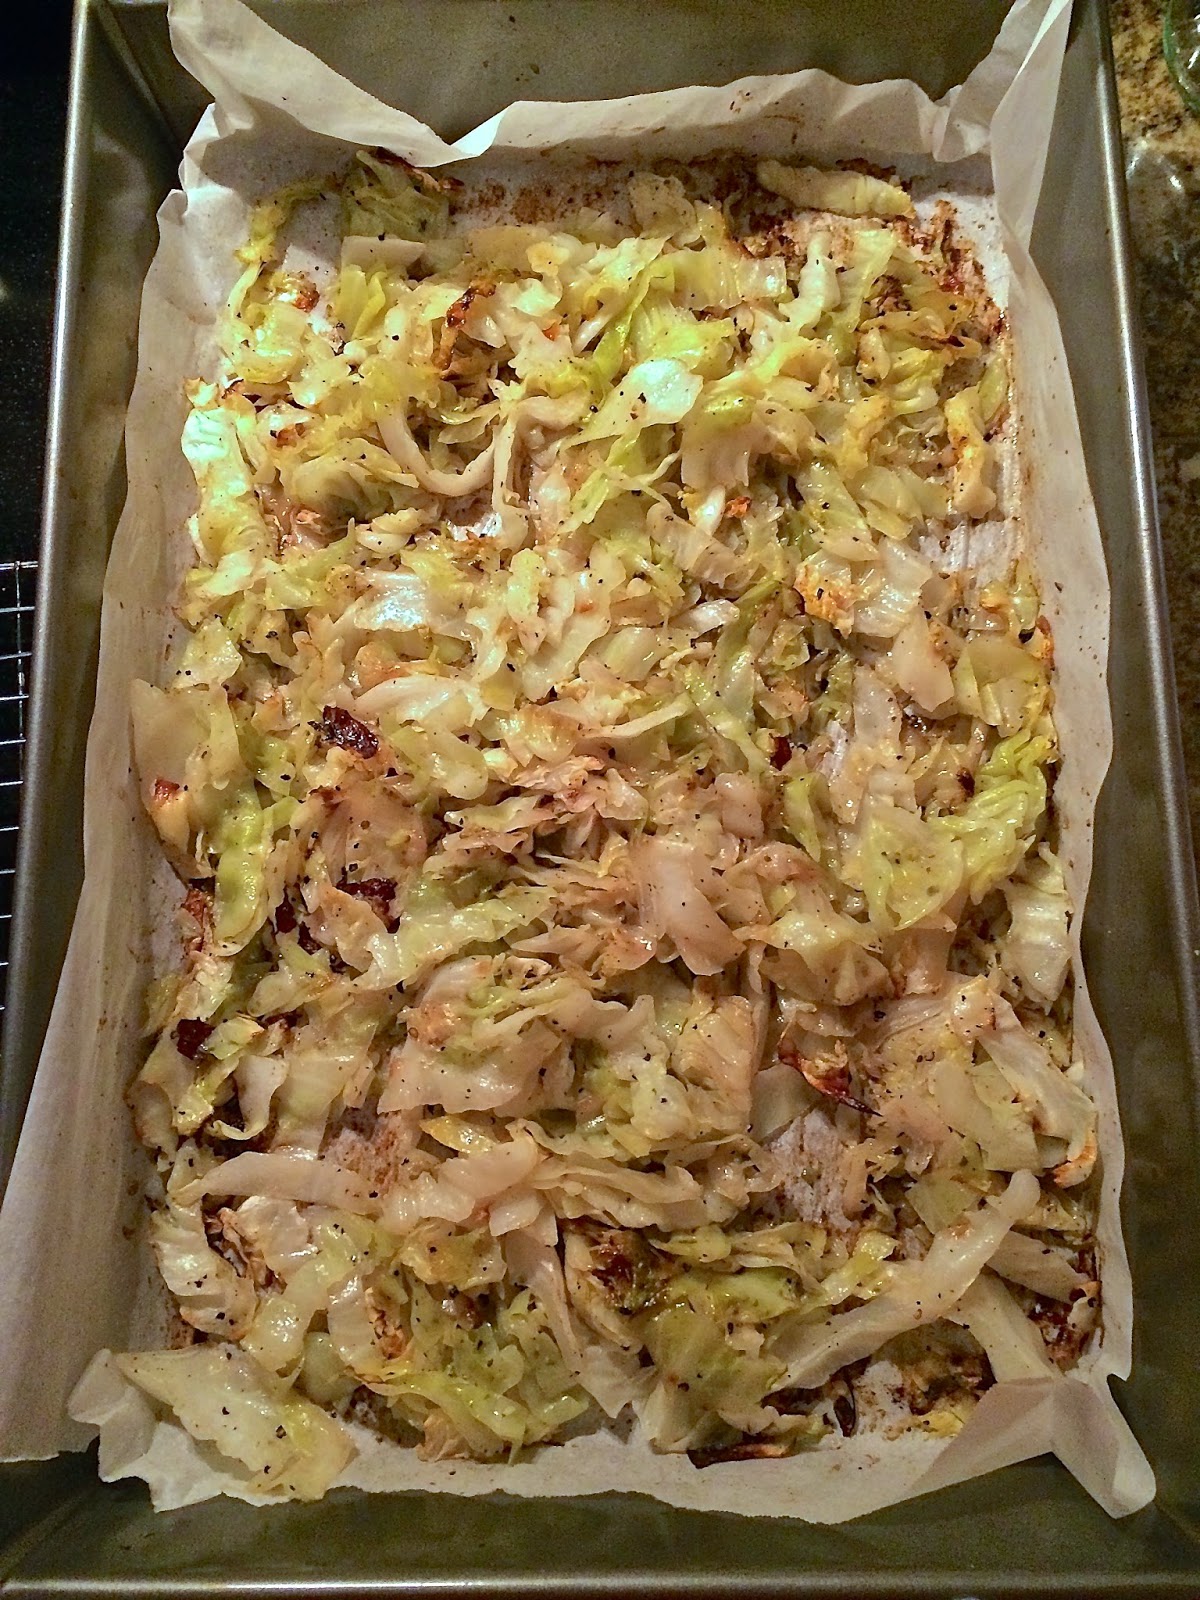
Olive Oil Roasted Cabbage.


I thought I was a foodie before I tried roasted cabbage. I was clearly wrong. Prepare to have your culinary minds blown. After all, it's only four, if you could even call it four, ingredients!!


I've been wanting to share this recipe with you guys for a while!! It's just too good to keep to myself. But I can also hear you saying: but Meg it's a simple recipe, so how can such flavor come from such simple ingredients? Cabbage? Come on!

You're right, this is a simple recipe. It's easy to prepare, easy to make, and easy to eat since it pairs well with many different foods. The taste of this dish, however, is anything BUT simple. The olive oil creates a rich flavor that compliments the sweet taste of the roasted green cabbage, and there are soft and sweet bits of cabbage intermingled with darkly browned crunchy delicious pieces.  Heaven!


Olive oil Roasted Green Cabbage. 
    makes enough cabbage for meals for one, for one week

    1 head of green cabbage - I don't buy organic here, since cabbage is part of the "clean fifteen"
    good quality olive oil for drizzling - source
    unrefined sea salt - source
    ground black pepper

To roast your cabbage:
  1)  Use a large roasting pan or baking sheet; line with either parchment paper or a Silpat silicone baking sheet.
  2)  Slice cabbage into 1/2" thick slices. The break apart leaves/pieces with your hands. (You can also cut along the inner part and keep the leaves attached in the middle - this makes "wedges" - and you can roast it that way too - I've done it both ways and like both equally)
  3)  Place in pan, drizzle liberally with olive oil (don't saturate, just get mild coverage over all cabbage), sprinkle with salt and pepper (don't be shy!) and TOSS well with your hands.
  4)  Spread cabbage evenly, and bake in a 400 degree (mine's non-convection) oven for anywhere from 20-40 minutes. Leaving in cabbage longer will give you some nicely browned pieces that get crispy and delicious. Baking for less time will give you a cabbage that isn't as fully cooked and is more on the crunchy side. I highly recommed baking it for longer :)
  5)  Remove from oven and enjoy! Keep in the fridge all week for snacks, salad toppings and as a main course side. I really enjoy pairing mine with homemade hummus, carrots and some chicken!


Yes, it's that simple, and yes, it's THAT good. Try it out!

(FYI - I haven't tried this process yet with red cabbage, but I'm sure you could do that too.)

Happy New Year my lovely readers! I go back to school today :)